Shopify Integration
Goal
To connect your Shopify store, your agent team will need:
- Store domain (
yourstore.myshopify.com) - Client ID and Secret
This guide walks you through creating an app, configuring its API scopes, and finding those details.
Time: ~15 minutes
What You'll Need
- A Shopify account.
Step 1. Create Shopify App
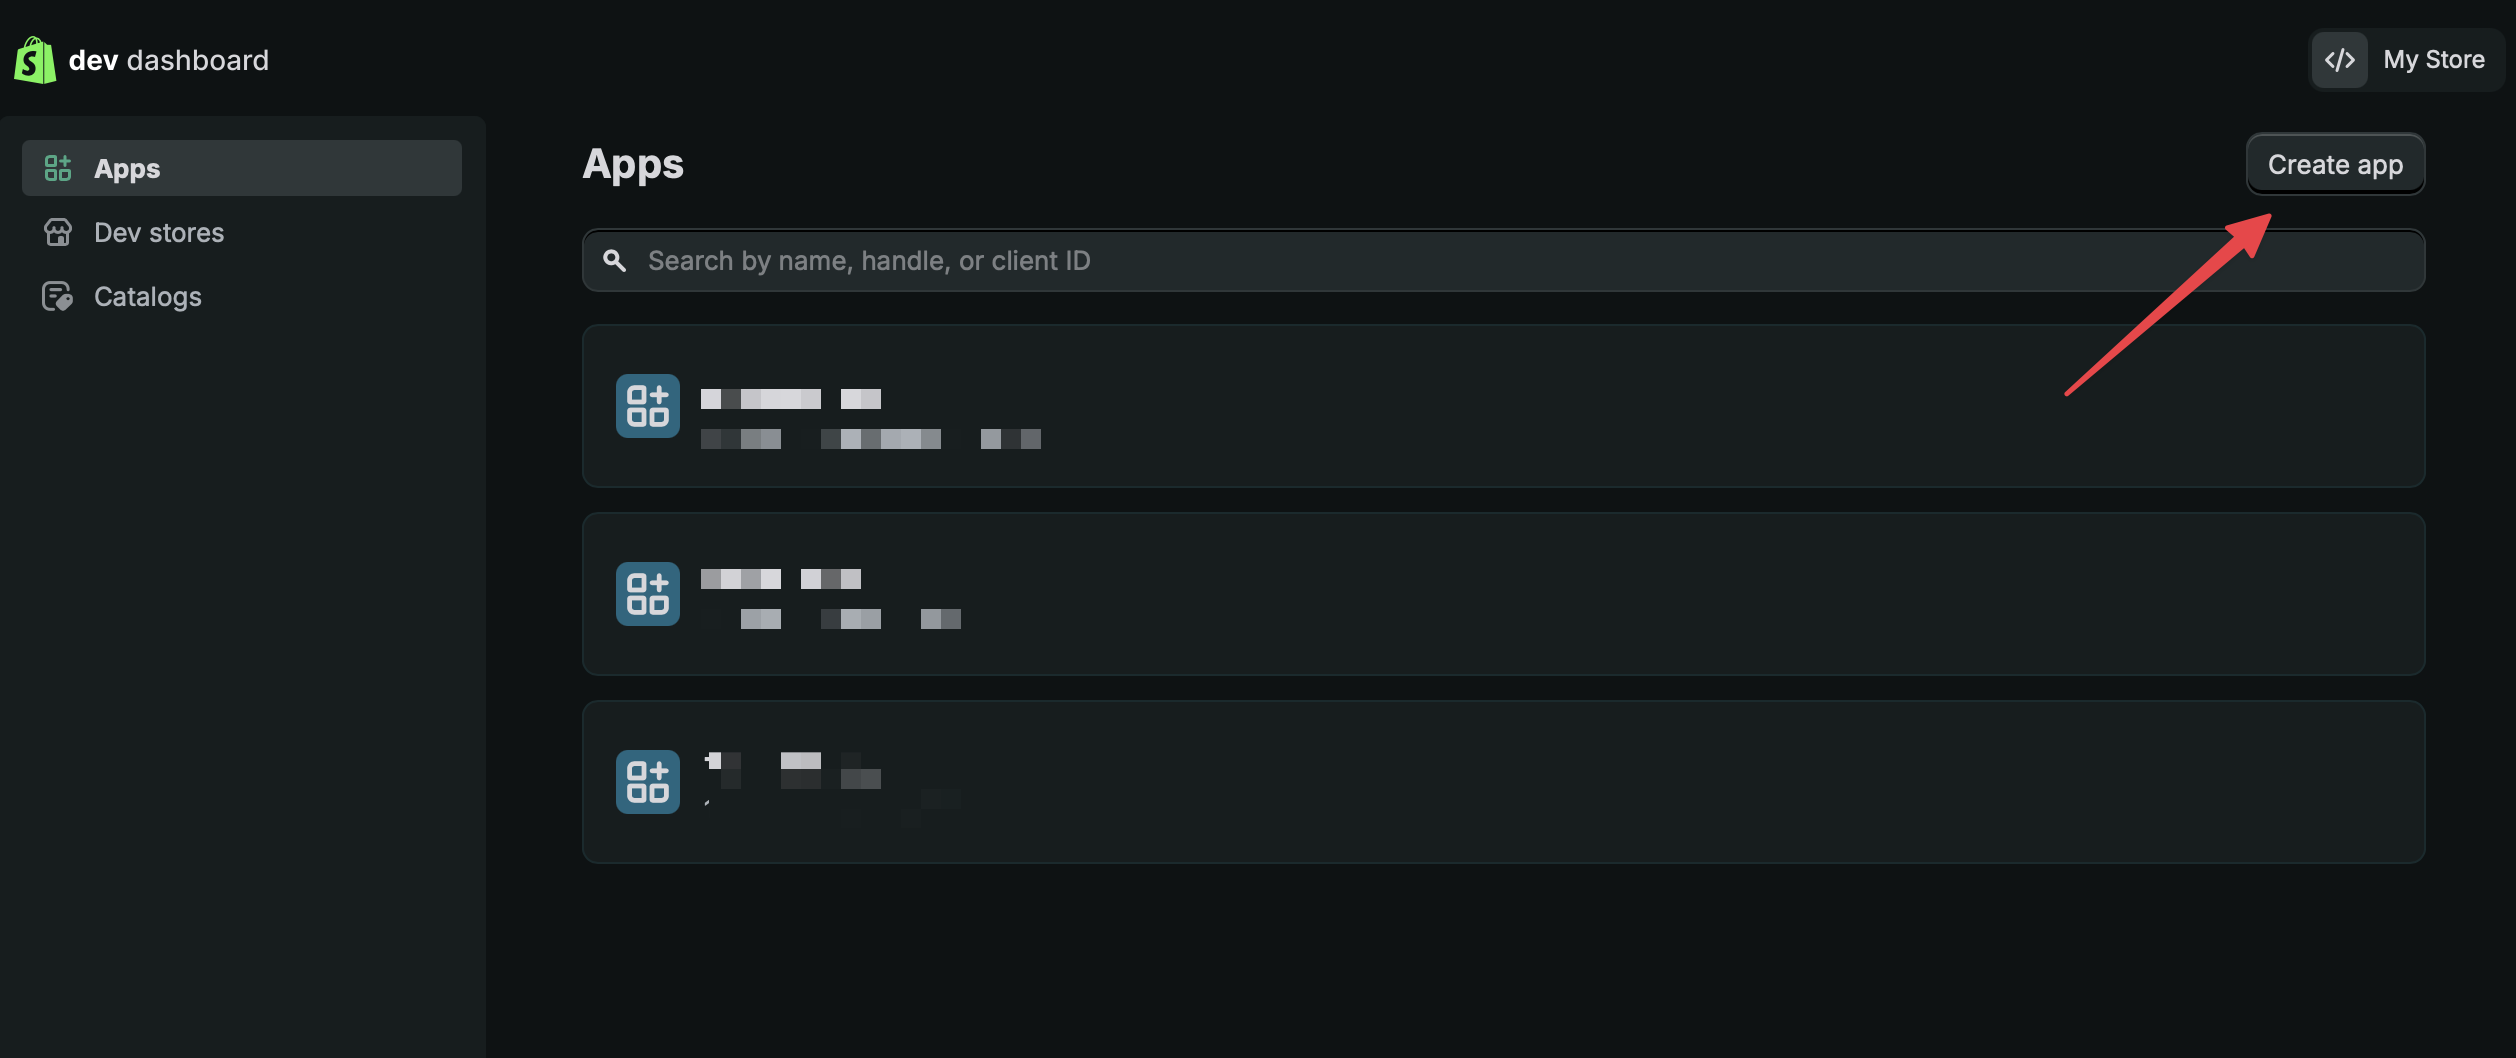
- Open the Shopify Dev Dashboard and sign in with your Shopify account.
- Click Create app in the top-right corner.
- Choose a name for your app. You can ignore the CLI option for this setup.
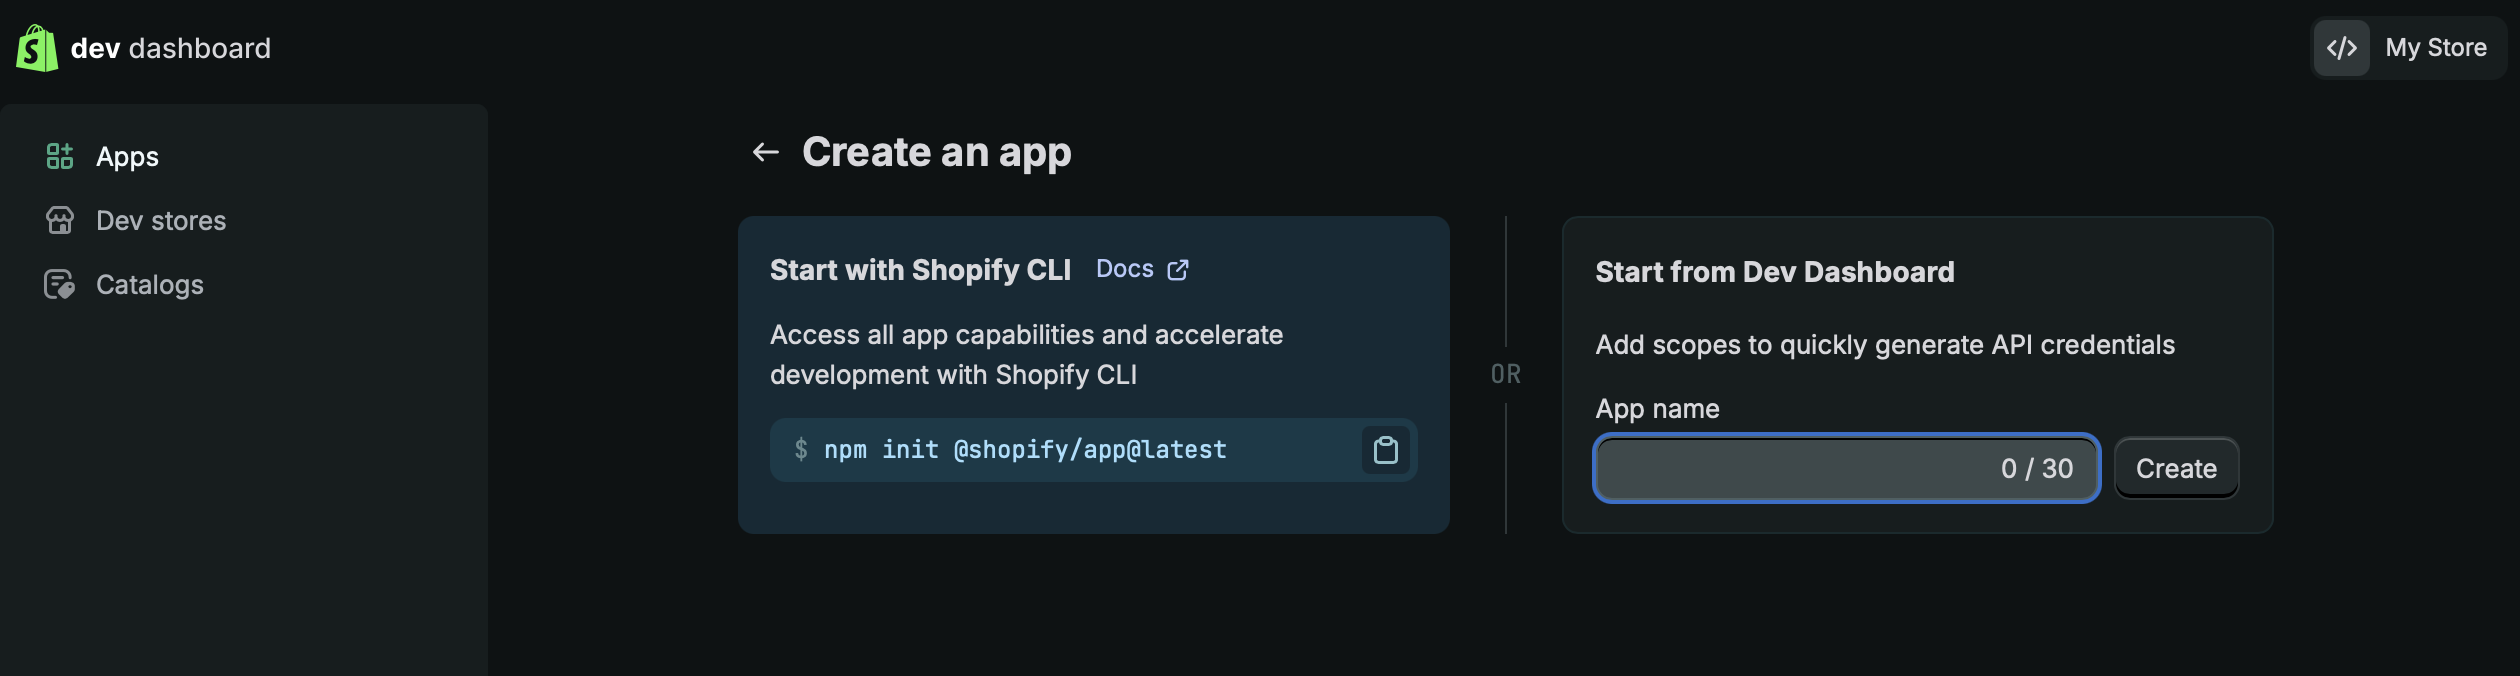
- Click Create. Keep the Create version page open for the next step.
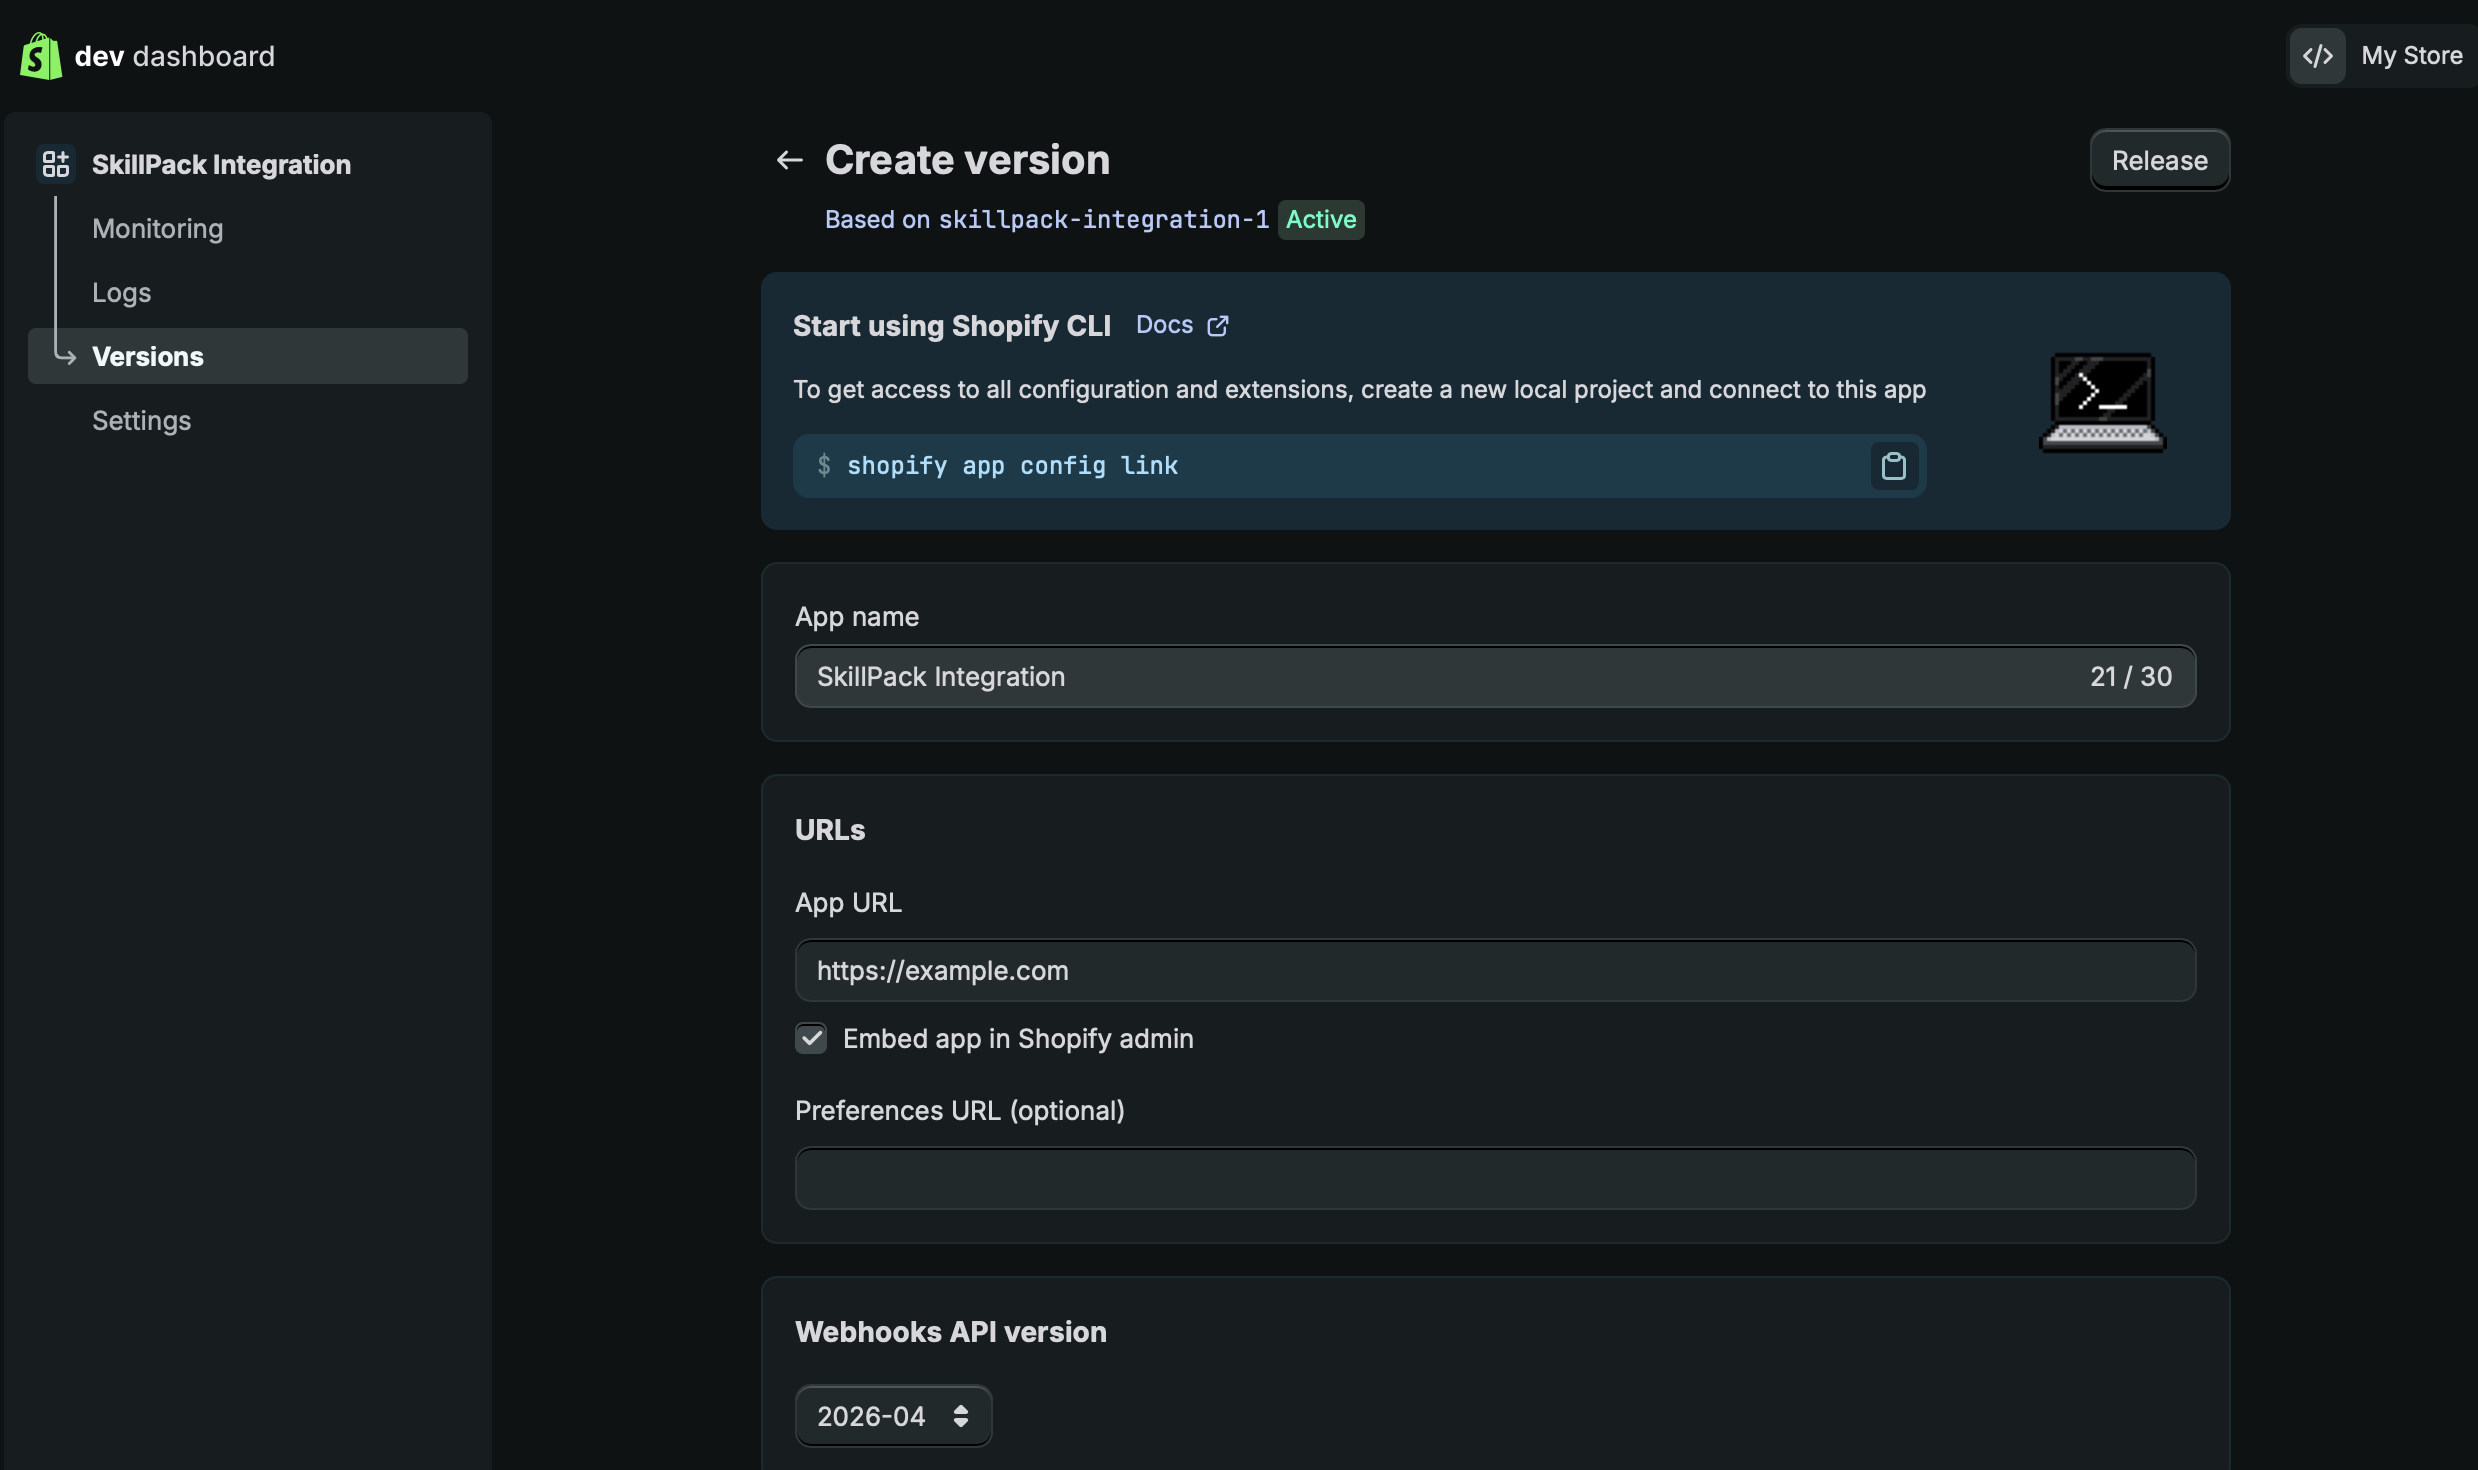
Step 2. Create a version
note
If you accidentally closed the page, find "Versions" on the side menu, then tap on "Create Version" on the right.
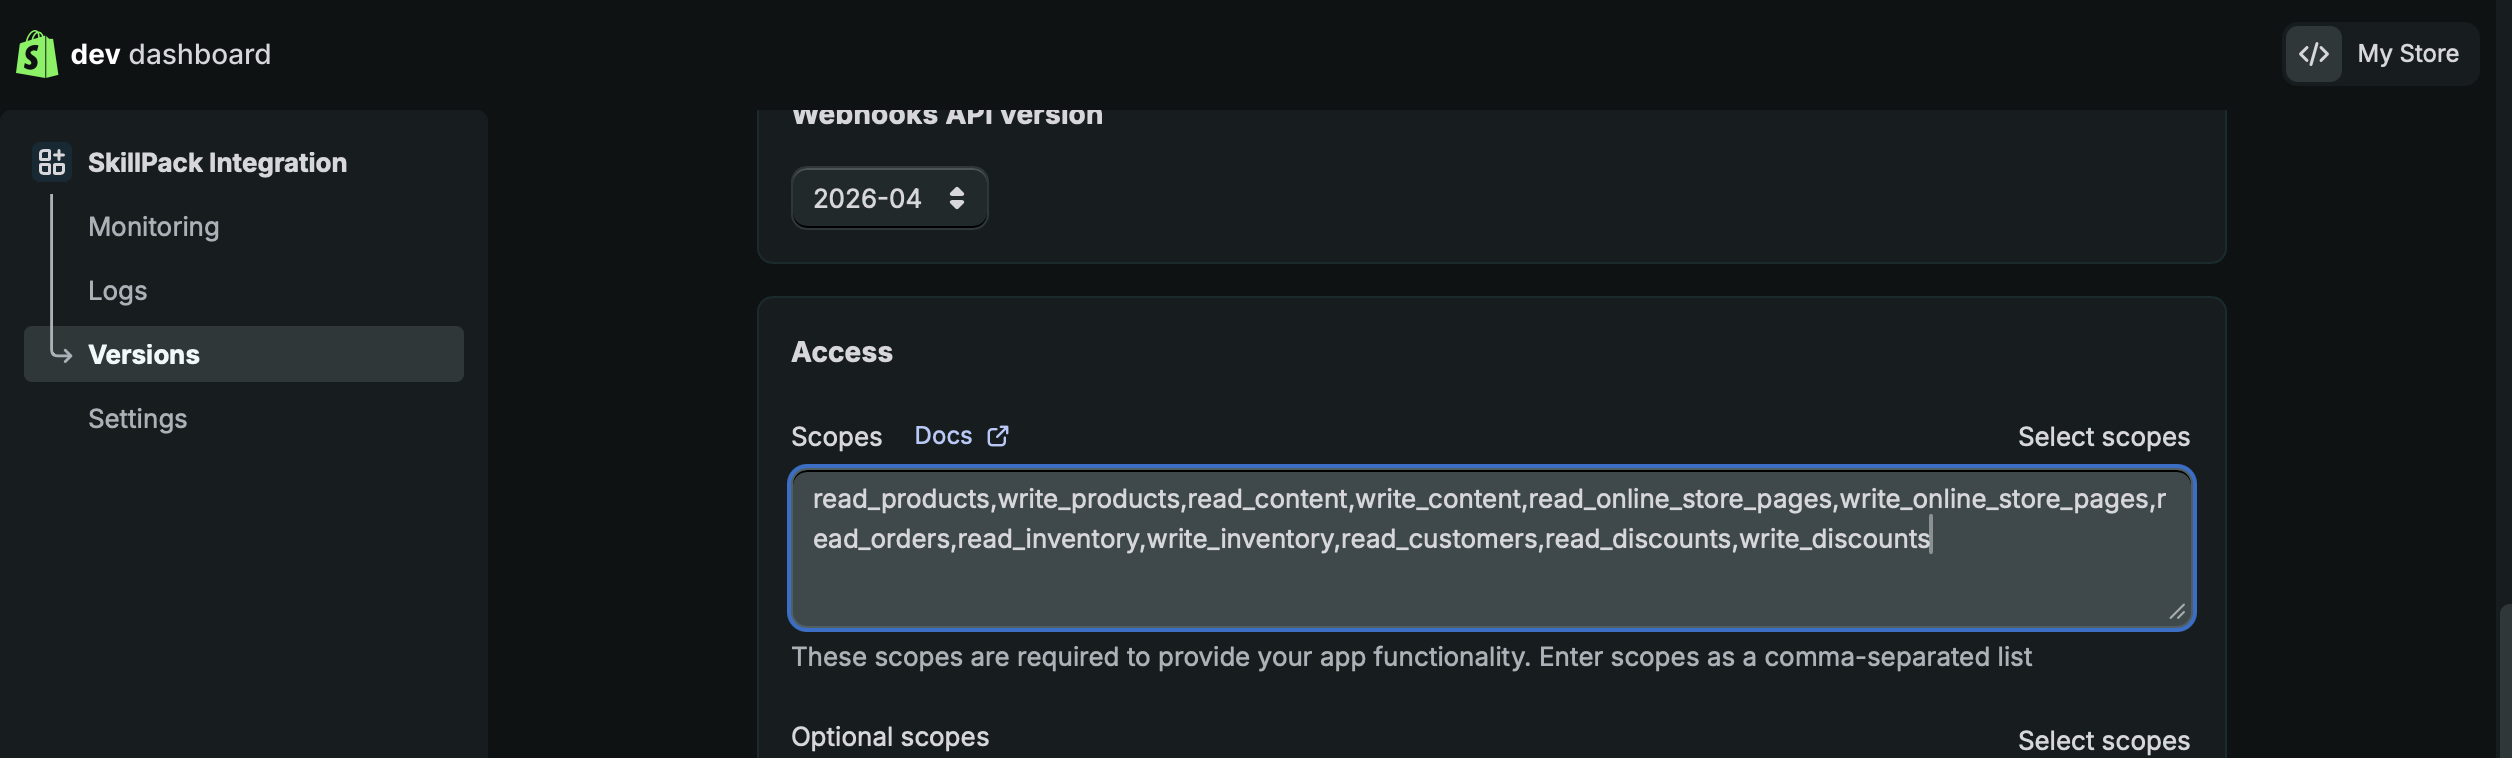
- Within the same page, scroll down, find Access - Scope
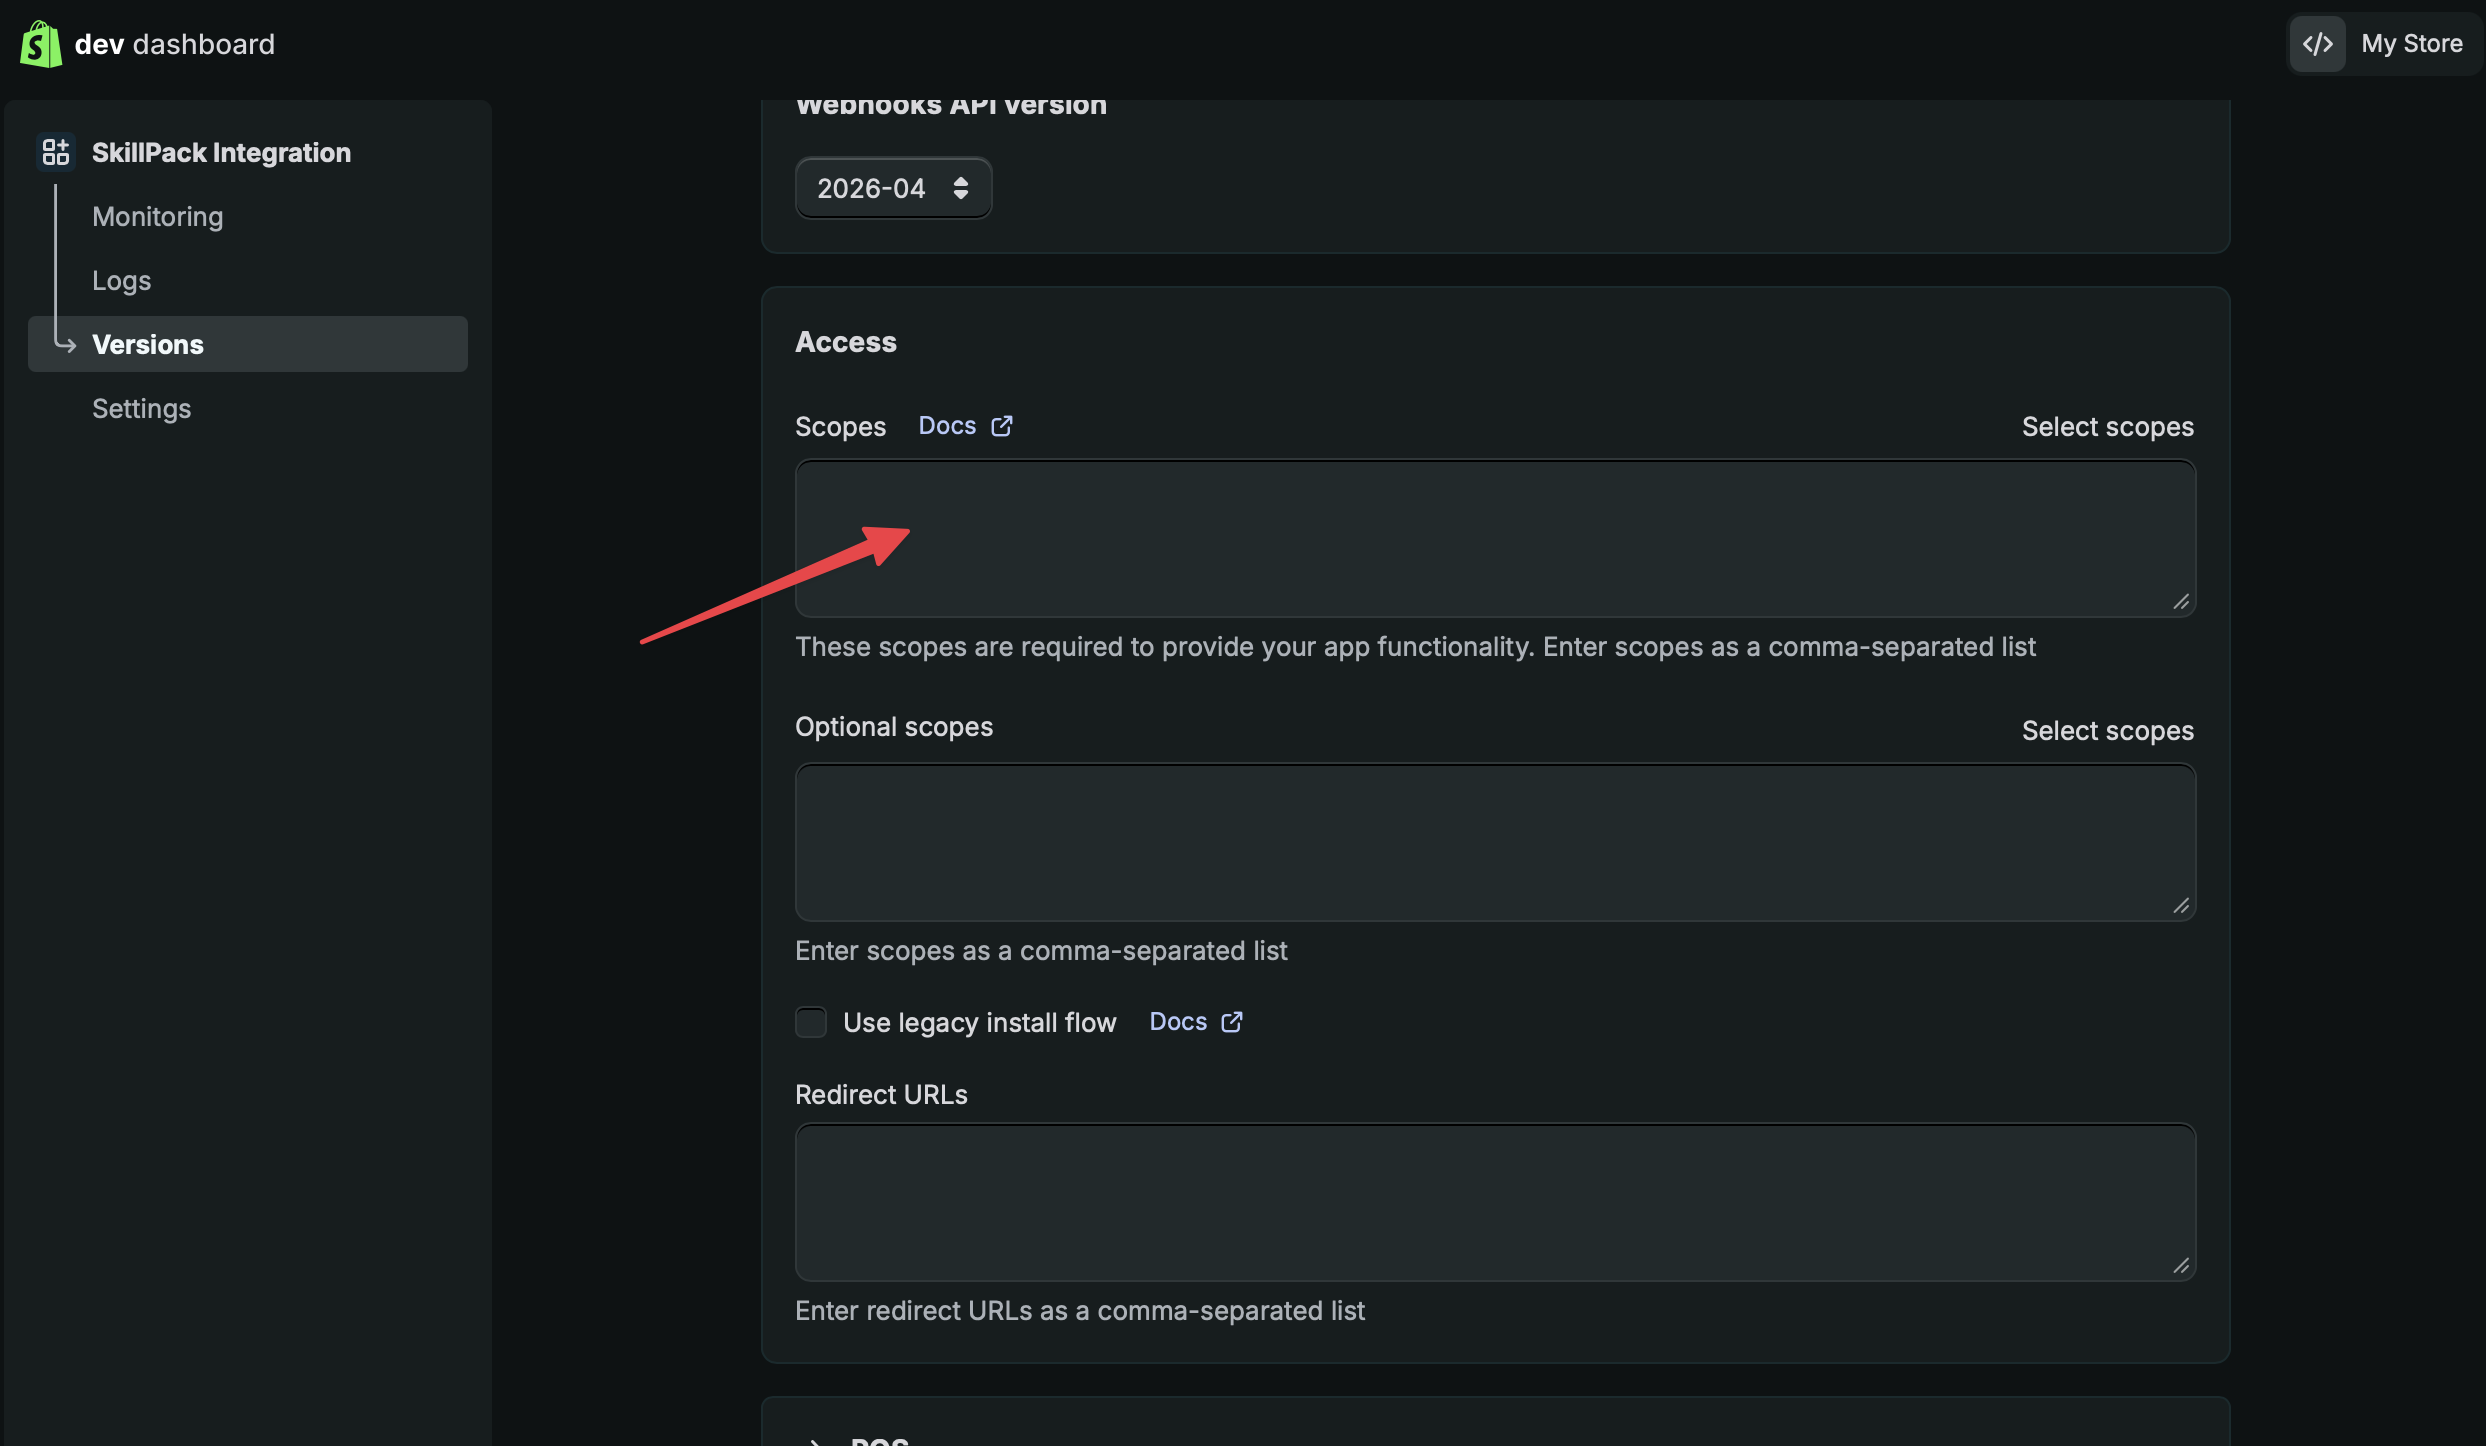
- Then, copy and paste the exact content below to "Access - Scopes"
read_products,write_products,read_content,write_content,read_online_store_pages,write_online_store_pages,read_orders,read_inventory,write_inventory,read_customers,read_discounts,write_discounts,read_reports,read_checkouts,read_locations,read_themes,write_themes
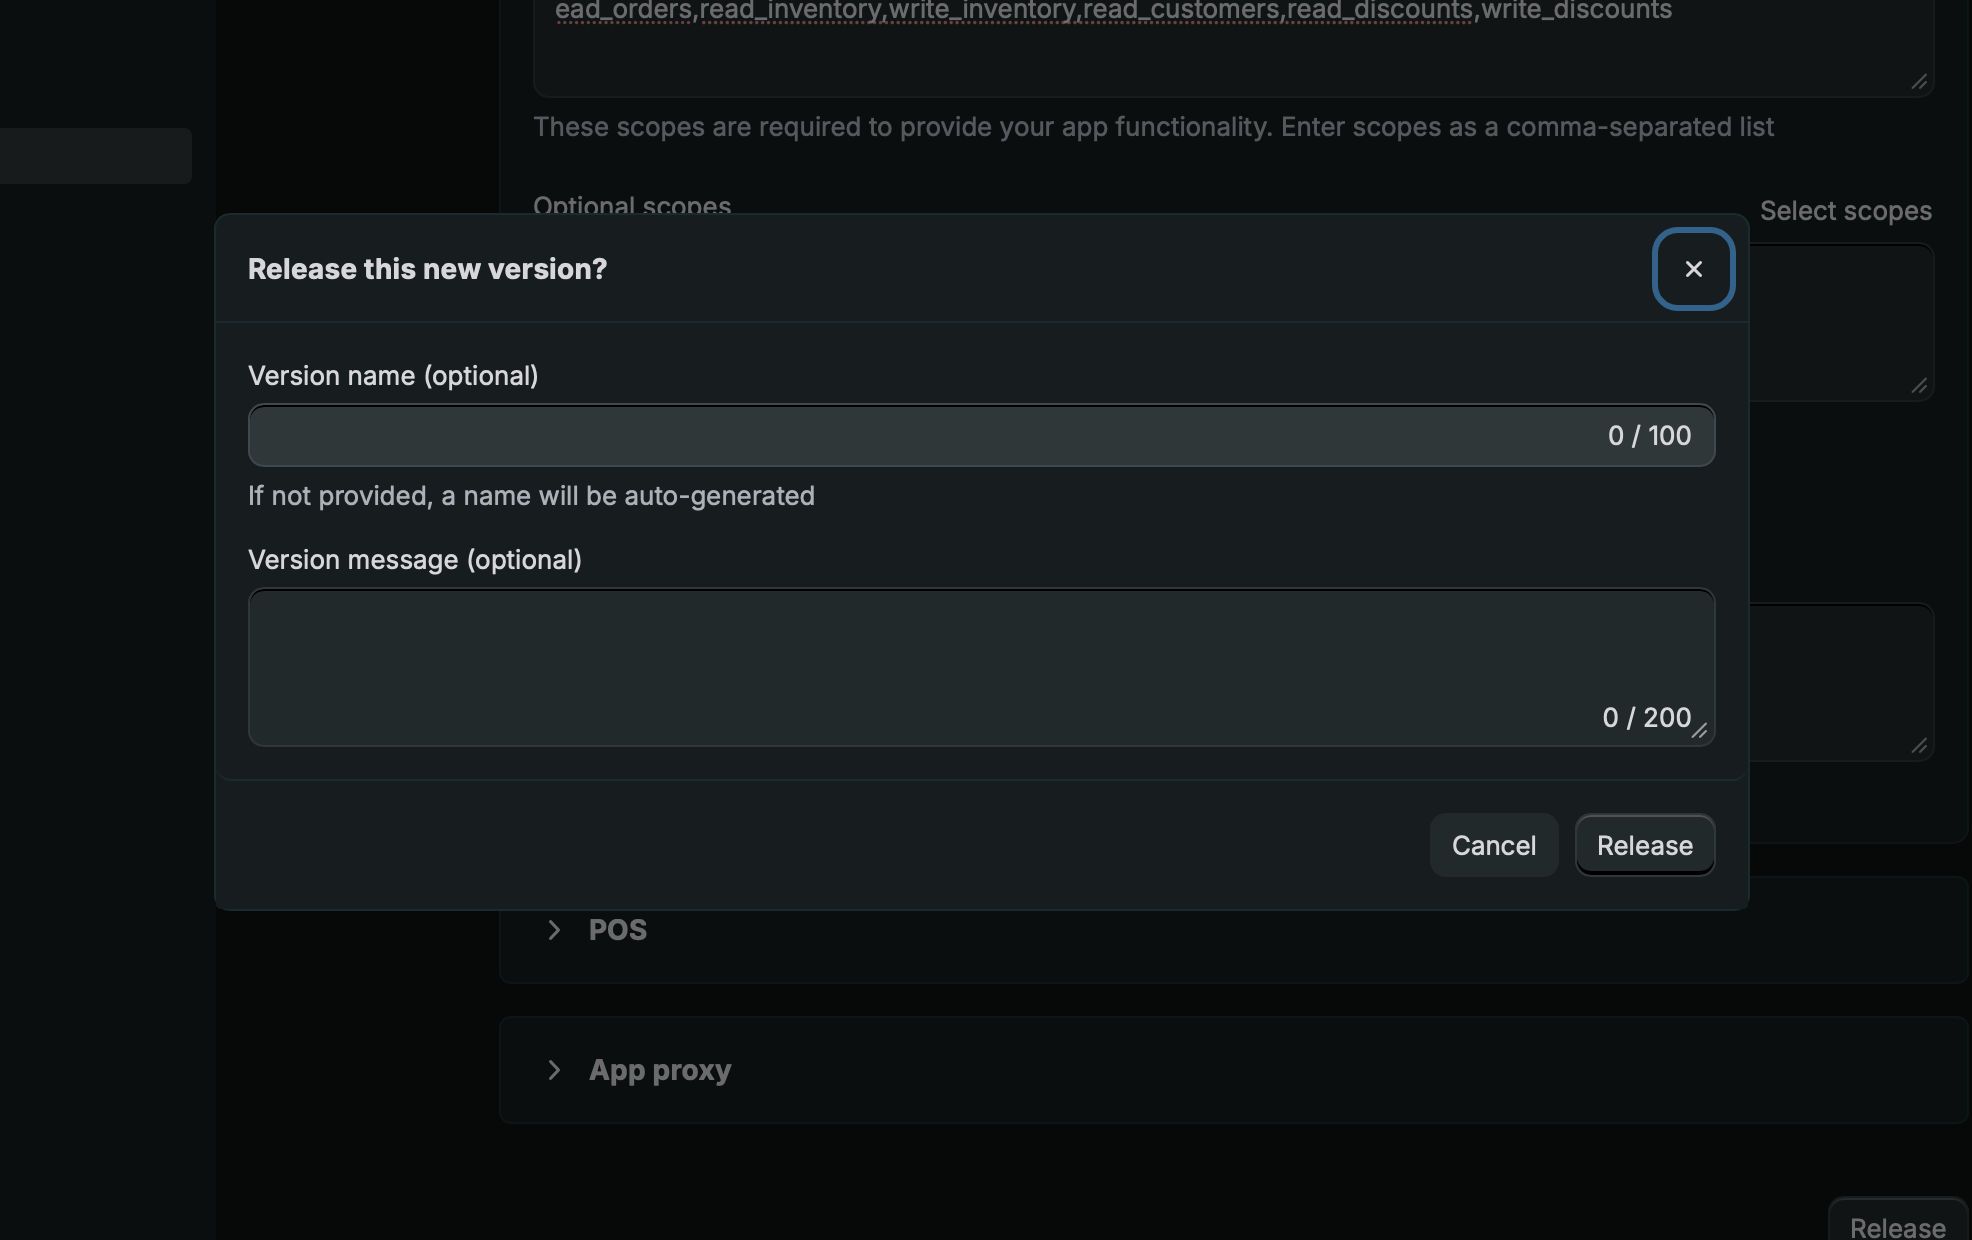
- Scroll to the bottom, click Release, and confirm the release.
Step 3. Get Client ID and Secret
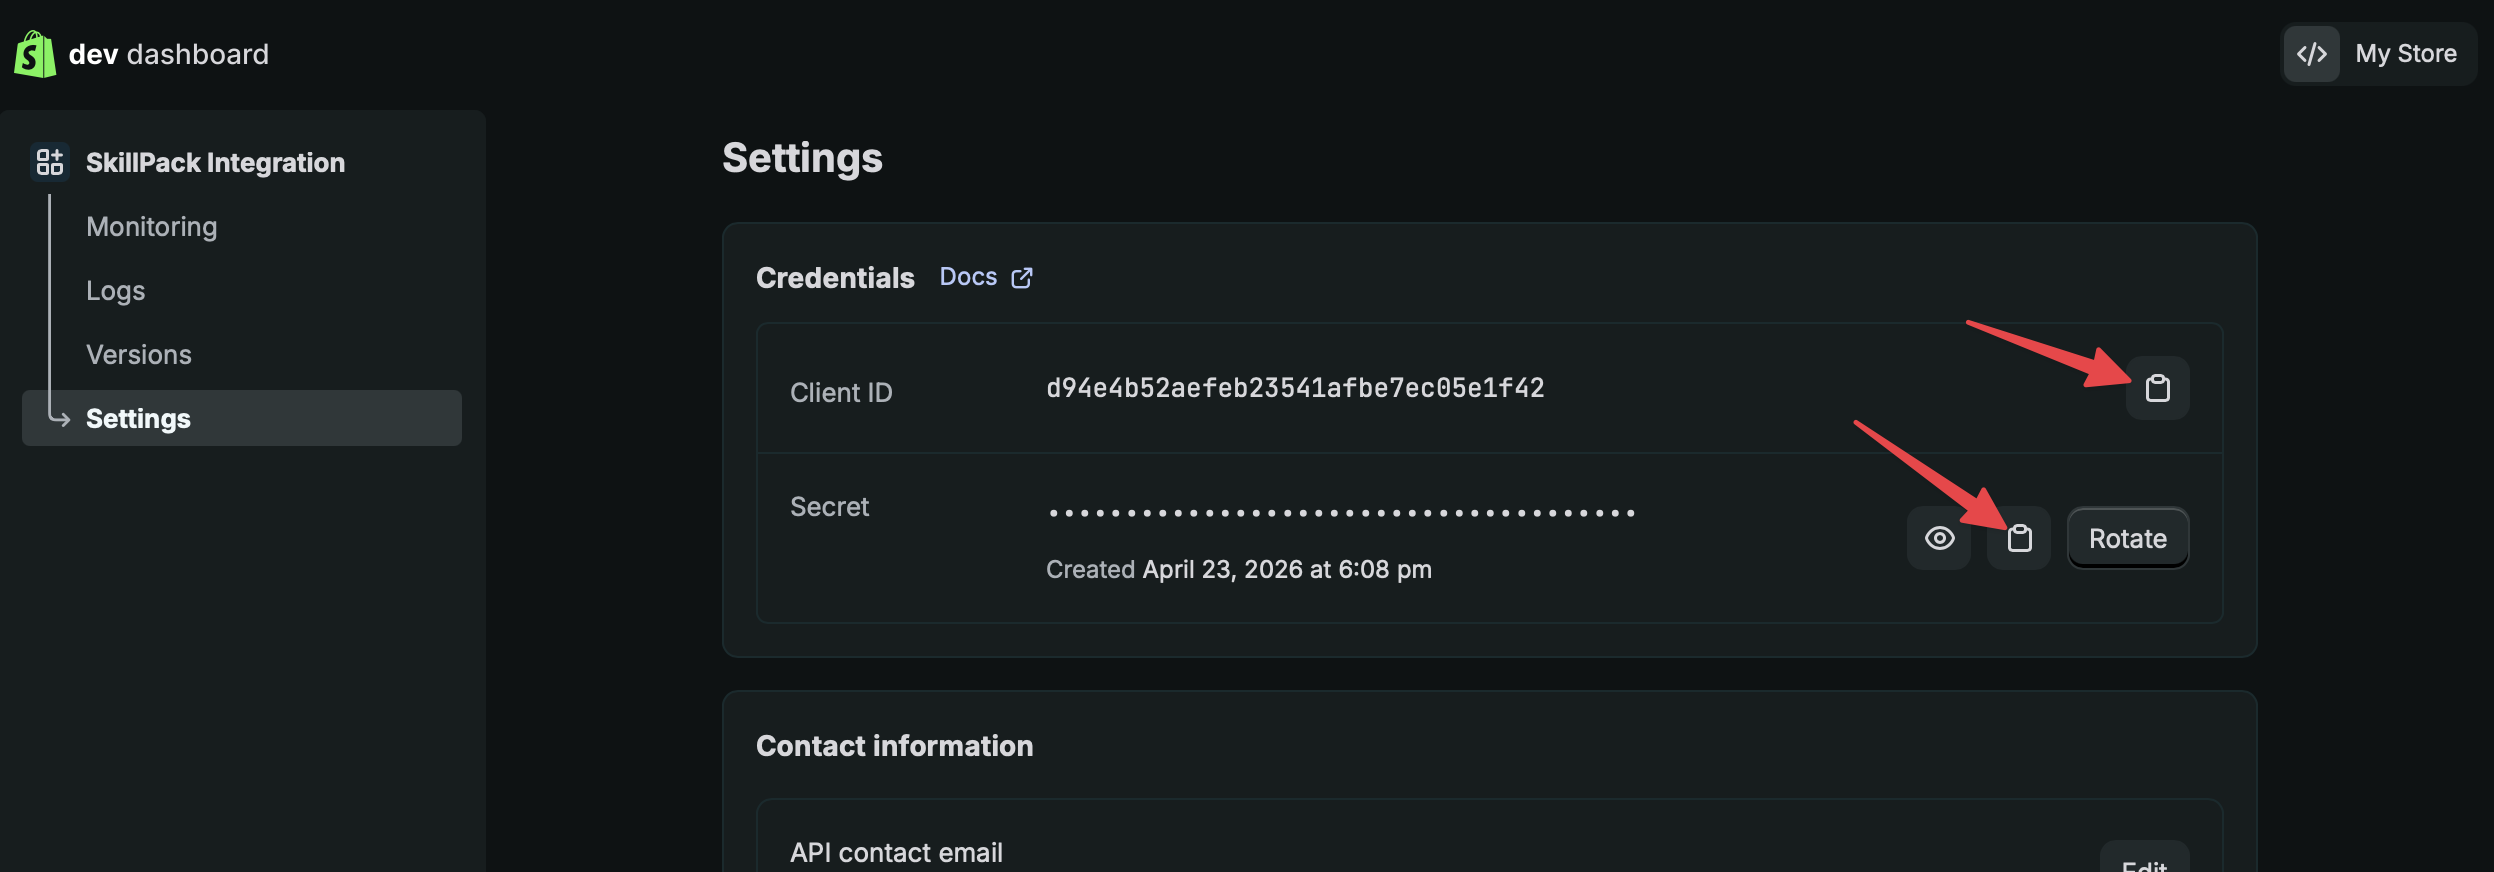
- On the side menu, tap on Settings to go to settings page.
- Then on the right, you'll see Client ID and Secret. Copy them separately and paste to the Frevana Chat page.
Step 4. Install app
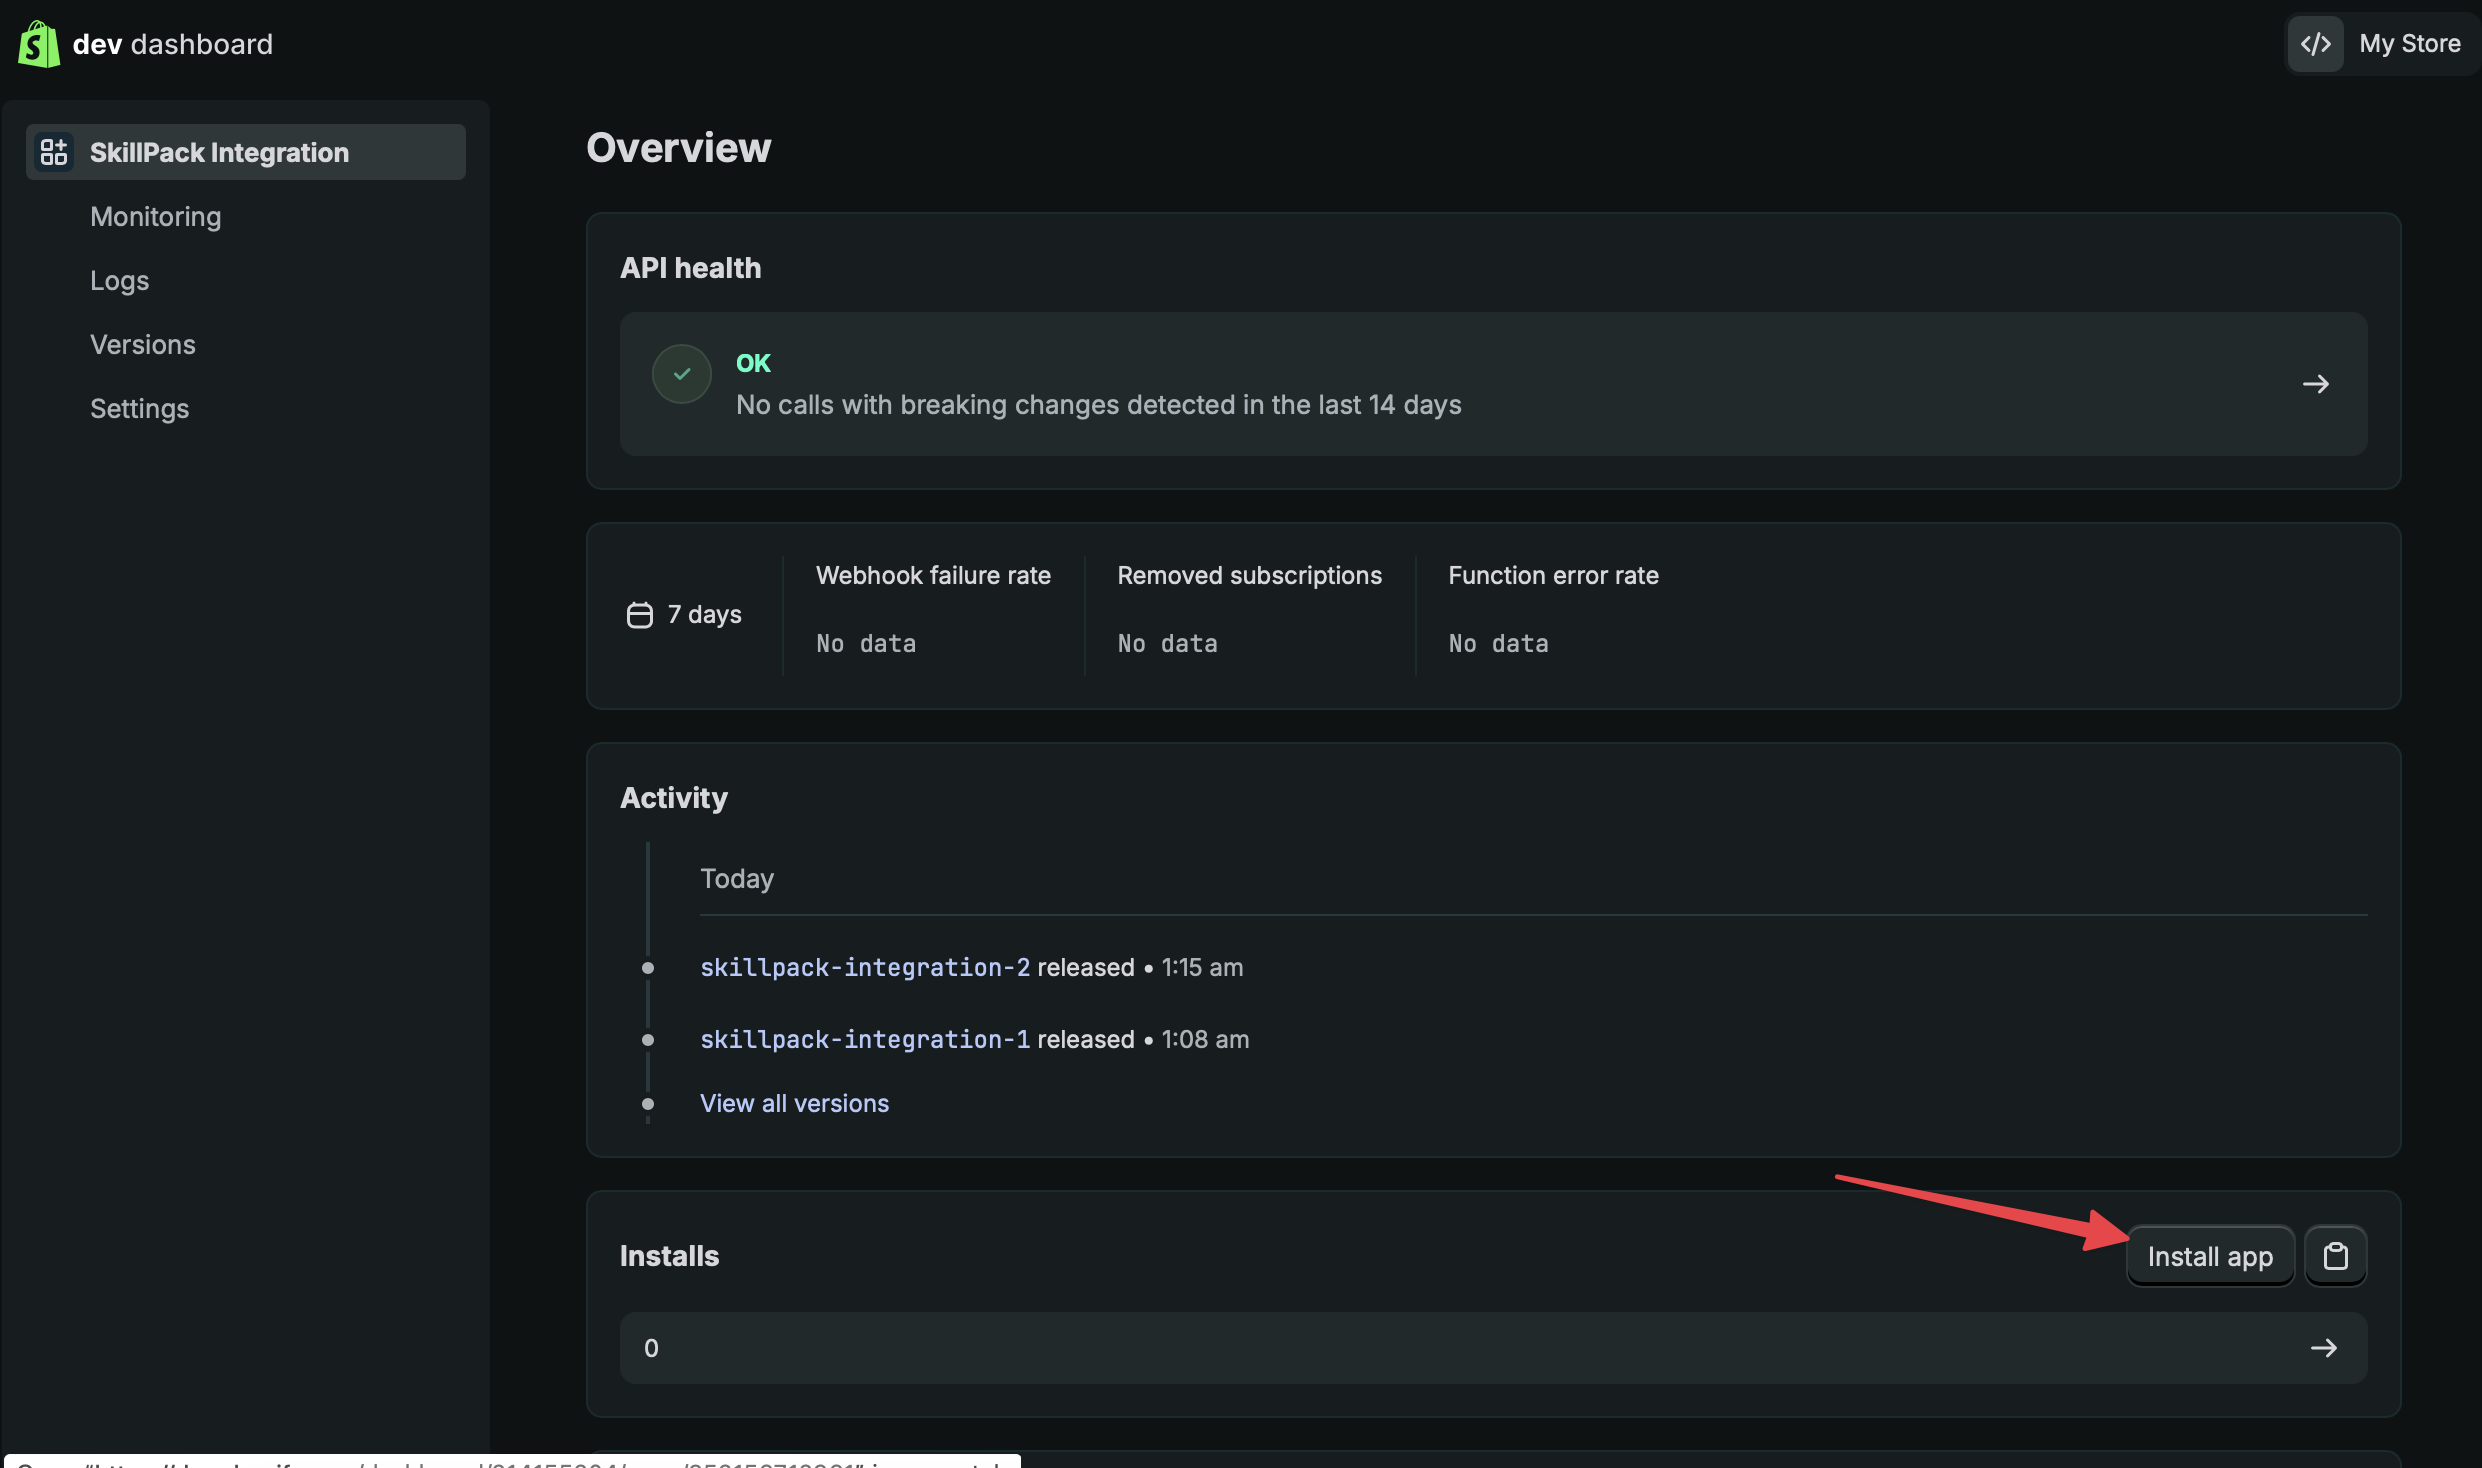
- On the side menu, tap on <YOUR APP NAME> to go back to App's home page. (e.g. In this case, the button name is "Frevana Integration")
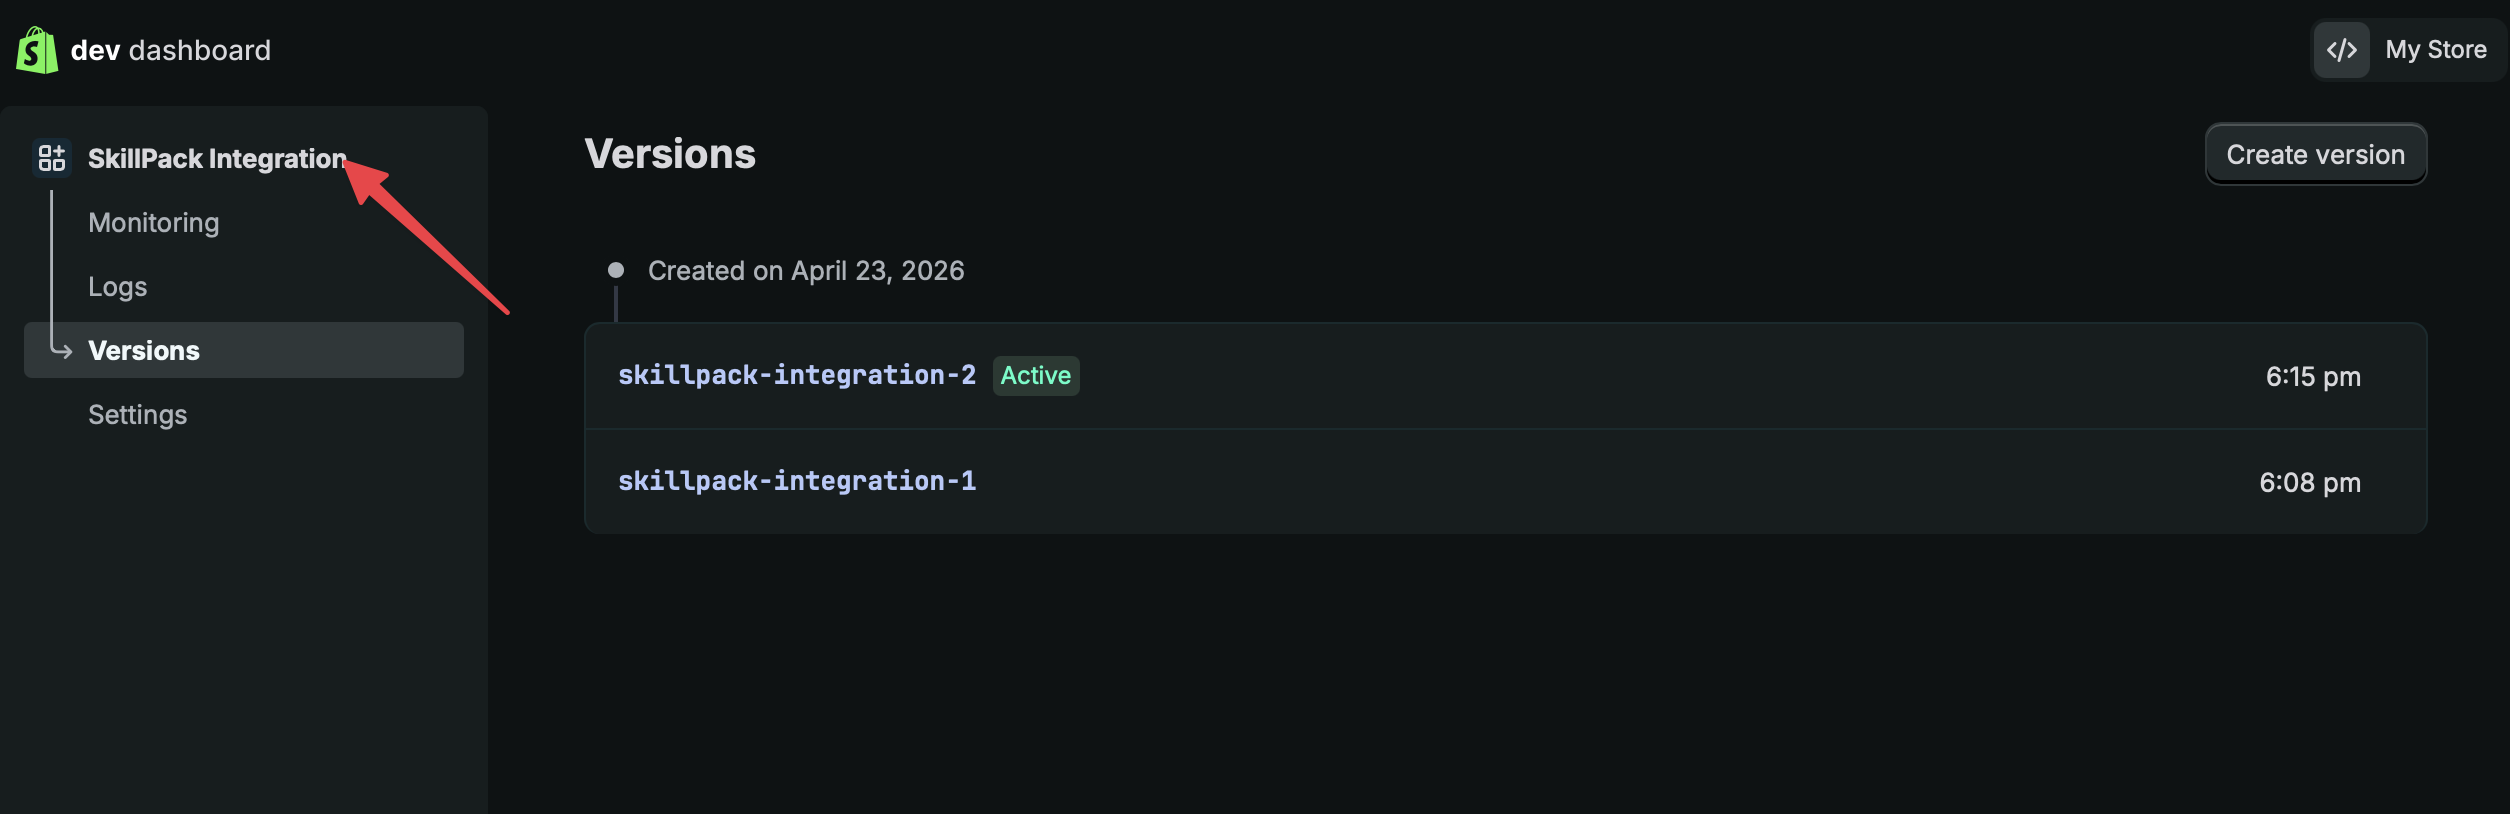
- On bottom right, tap on "Install app"
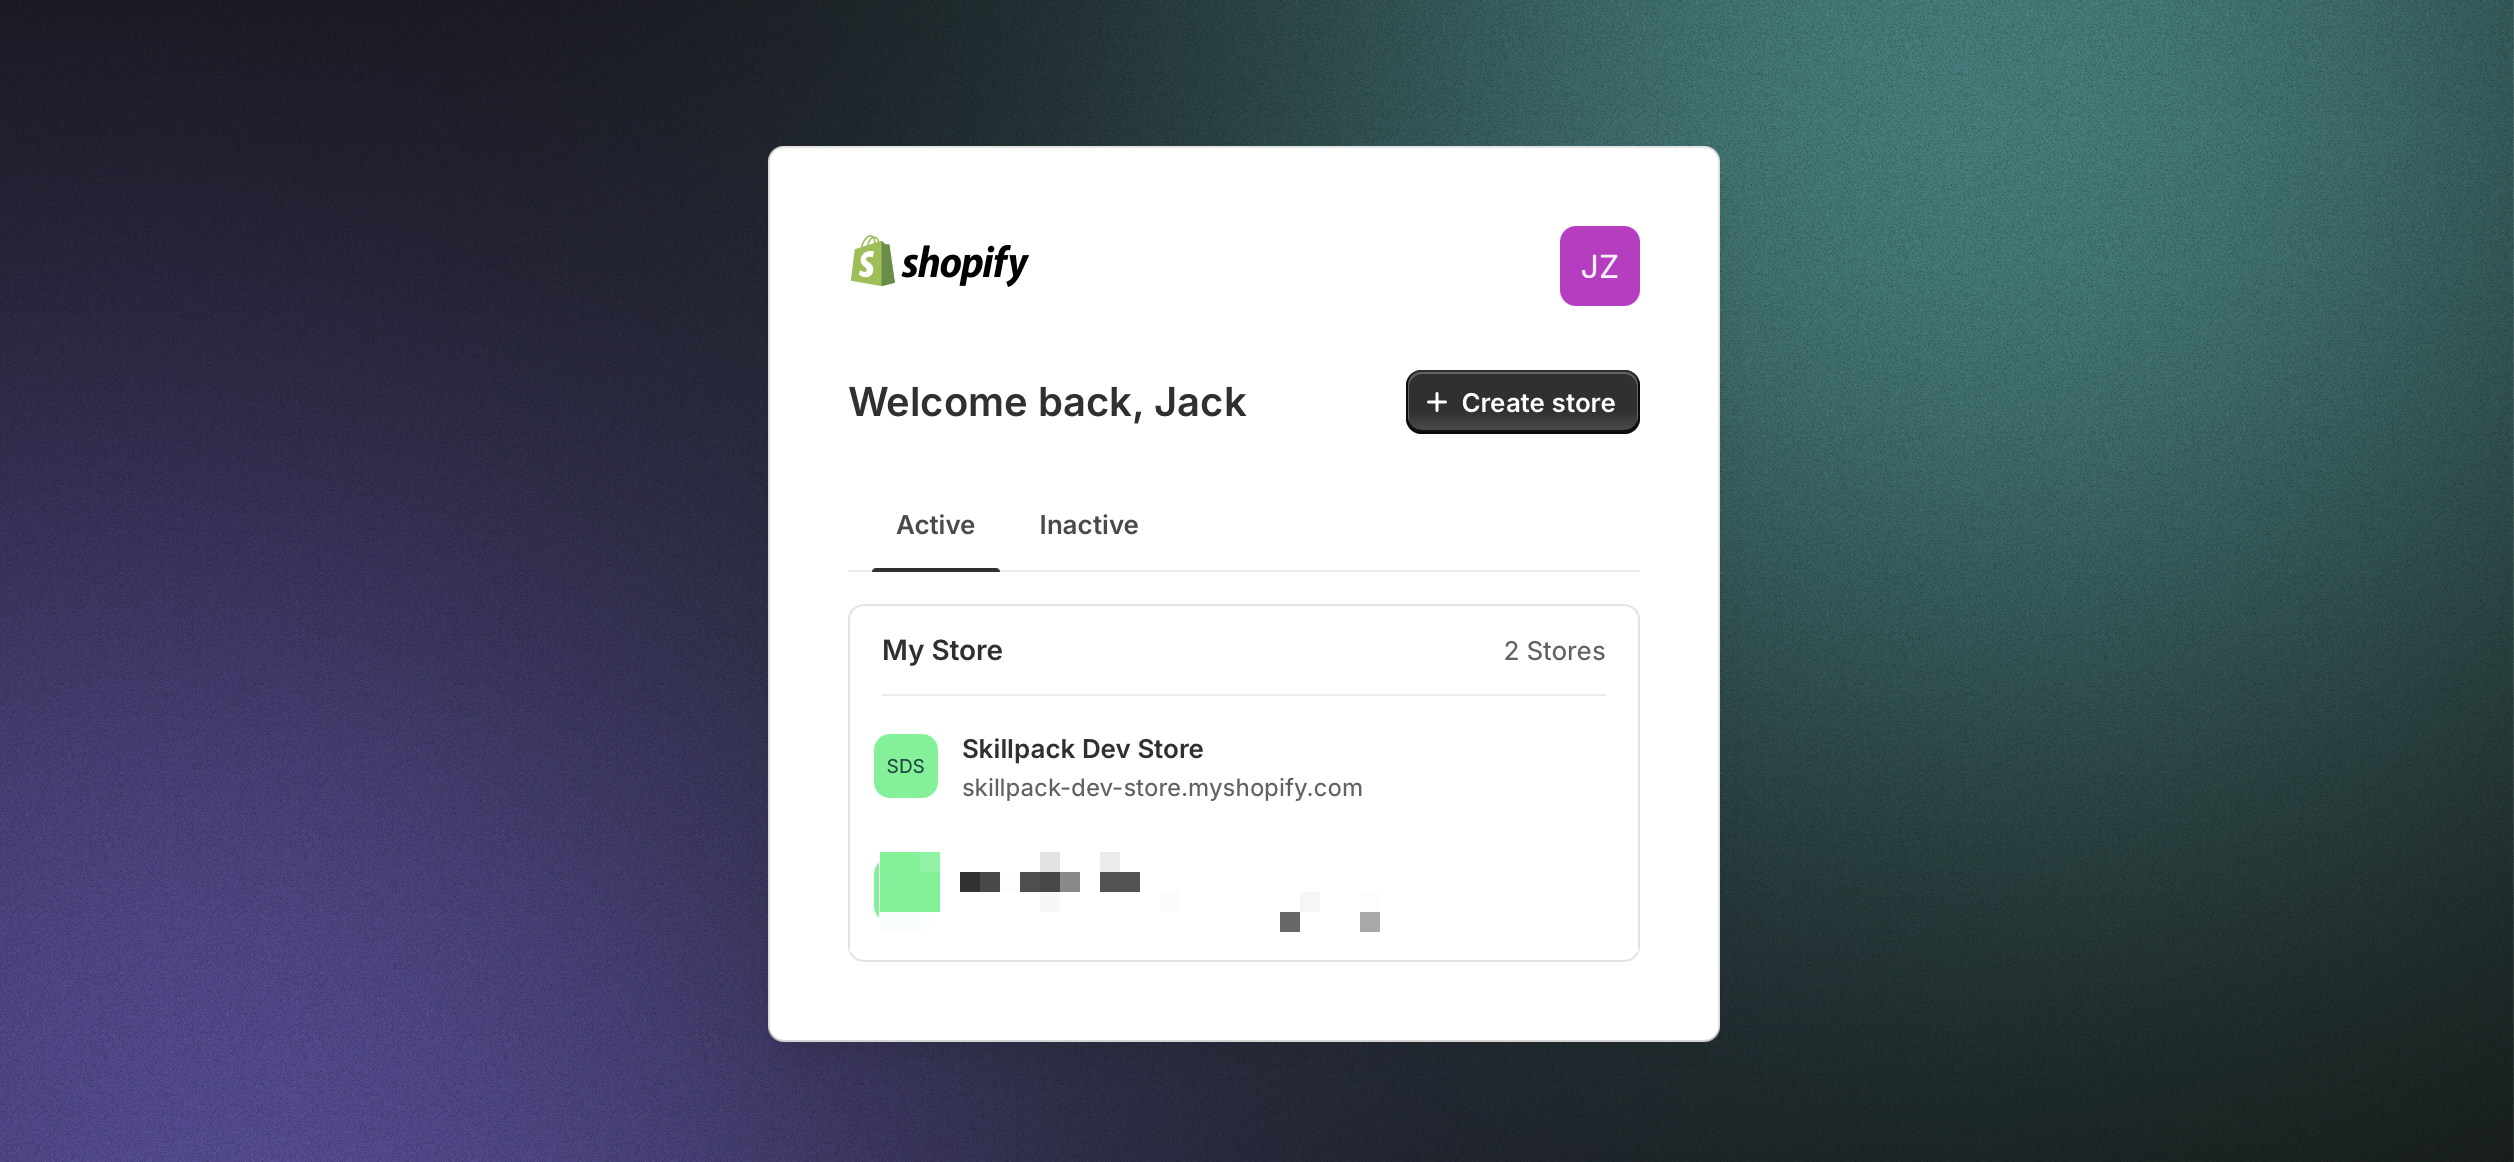
- Then select the store you wish to install the app. (Frevana can later have access to this store)
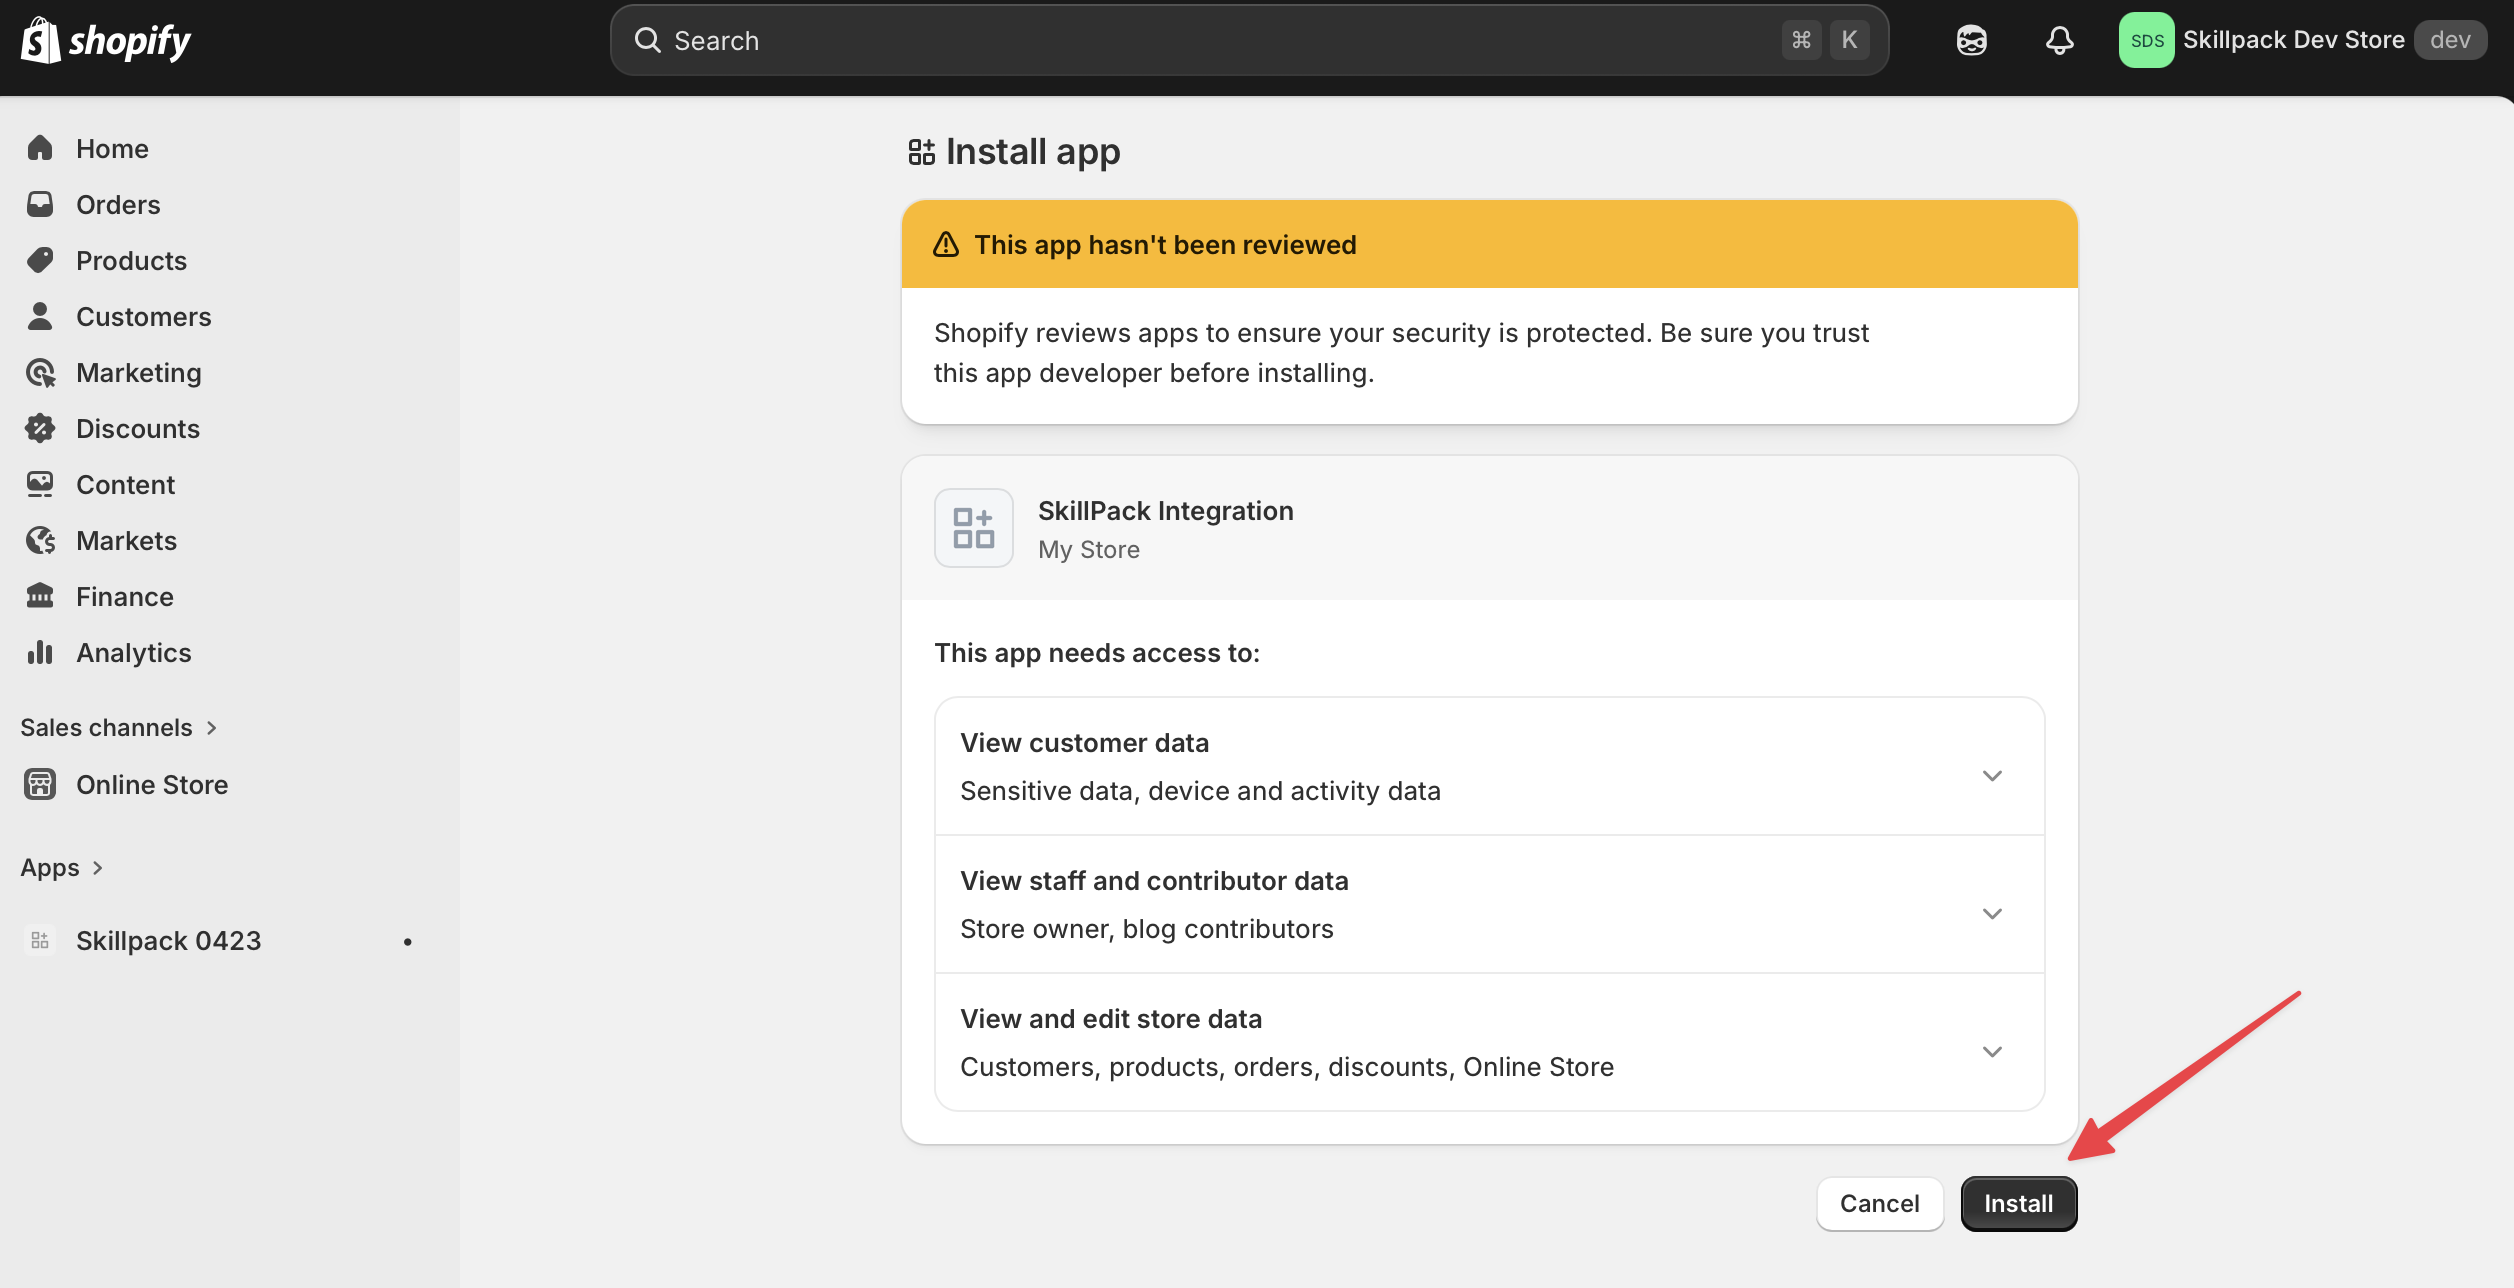
- Tap install
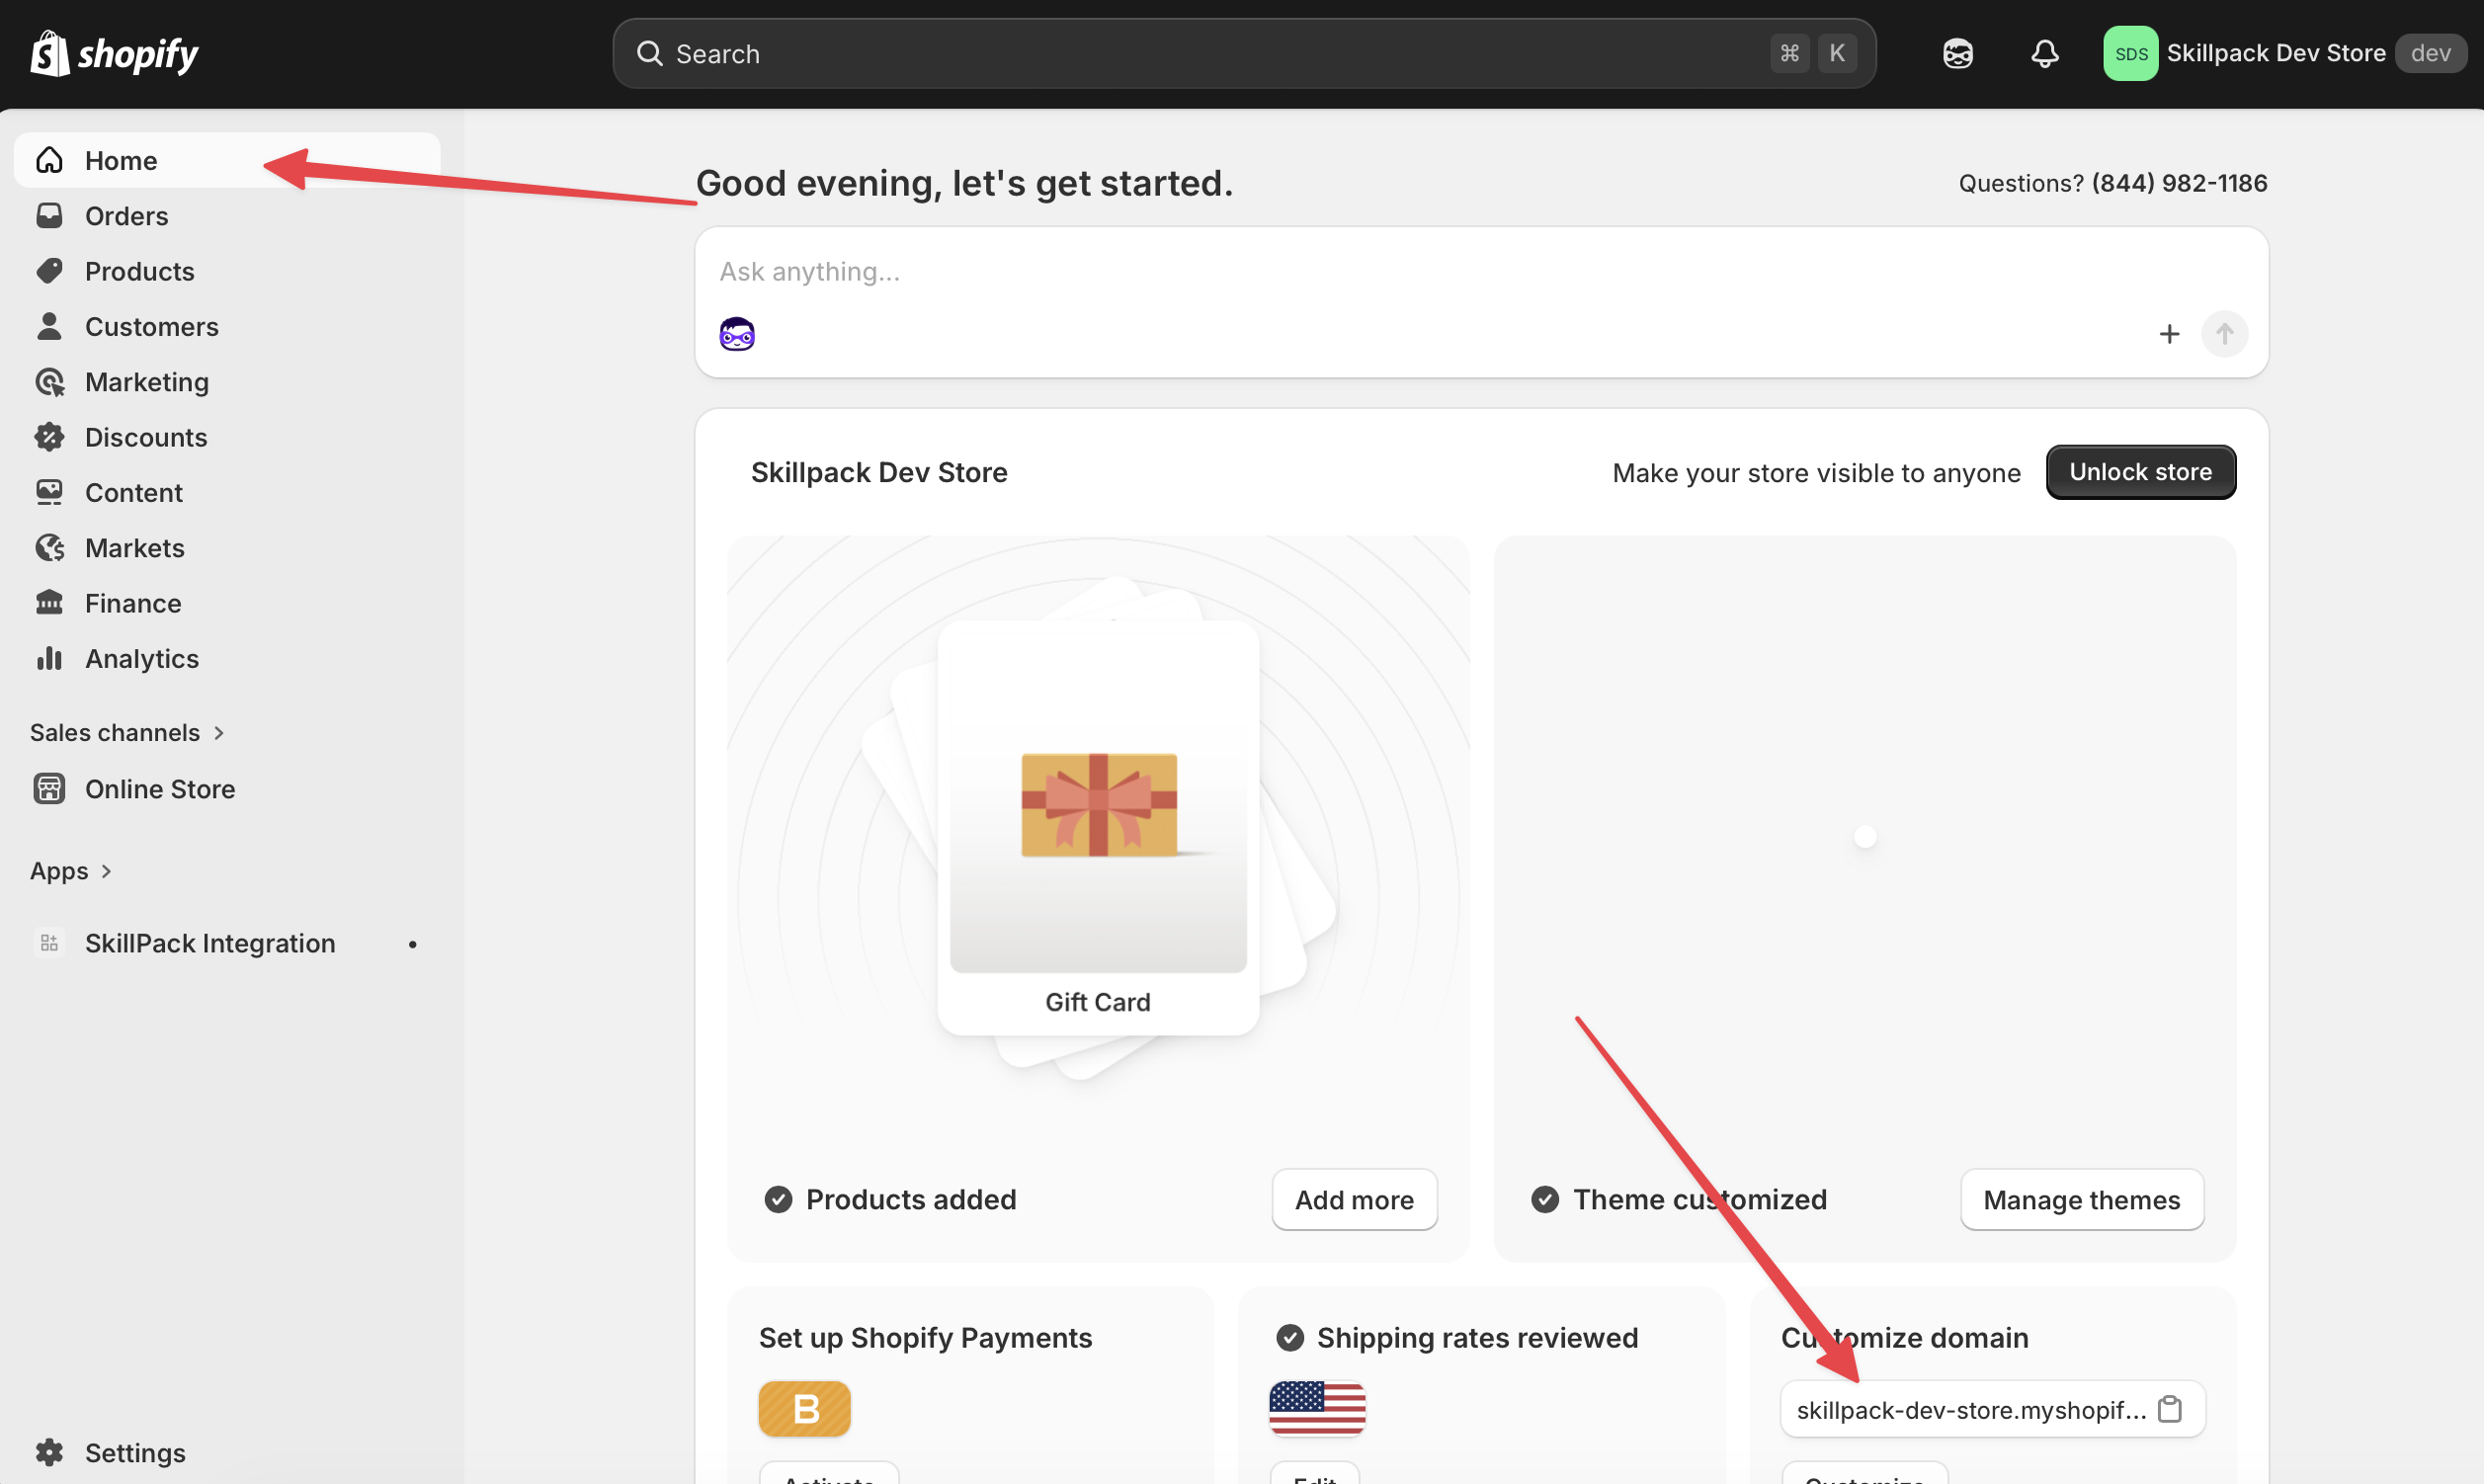
Step 5. Store domain
- Go to store home page, then you'll find your domain here.
Done
You now have your store domain, Client ID, and Client Secret. Return to Frevana chat to complete the connection.