Google Connect Setup
Connect your Google services to Frevana by creating a Google Cloud project and an OAuth client. This guide will help you find the three values you need: your Project ID, Client ID, and Client Secret.
Allow approximately 9 minutes for the initial setup. Google’s interface may look slightly different from the screenshots as it changes over time.
Before you begin
You’ll need a Google account—either a Google Workspace account or a personal Gmail account—and Google Chrome.
If you’re setting up Google Ads, use the same Google account you use for your Google Ads Manager account.
1. Create a Google Cloud project
Your Google Cloud project provides the Project ID you’ll enter in Frevana. If you already have a suitable project, select it and copy its Project ID; you can then continue to Set up the OAuth consent screen.
-
Open the Google Cloud Console, sign in, and accept any terms presented.
-
Select Select a project at the top of the page.
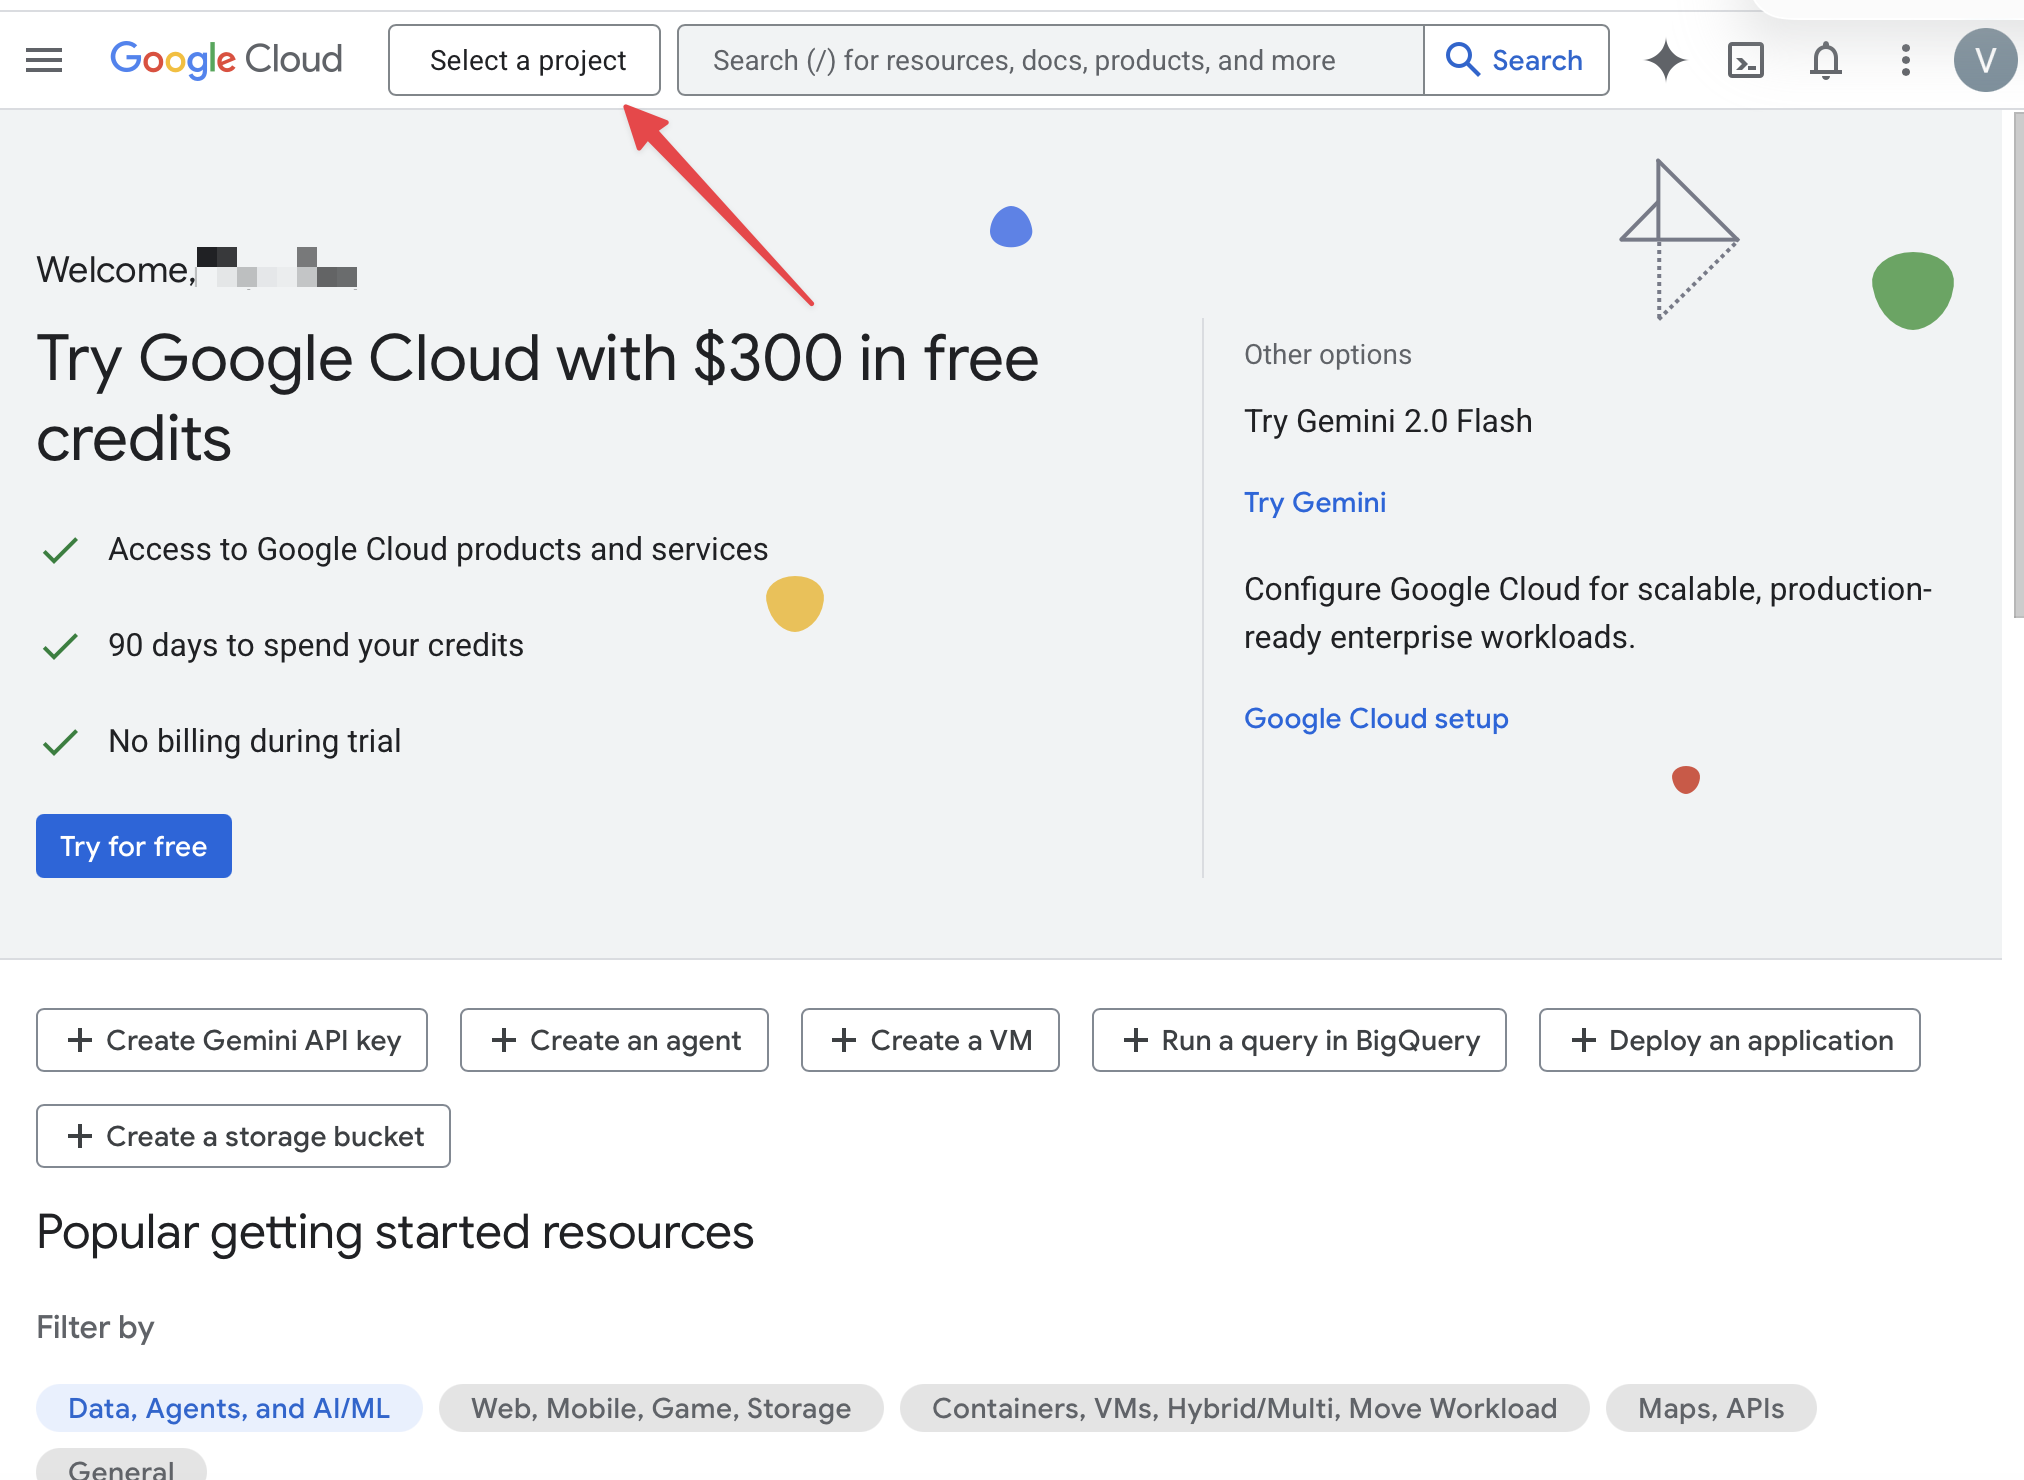
-
In the project picker, select New Project.
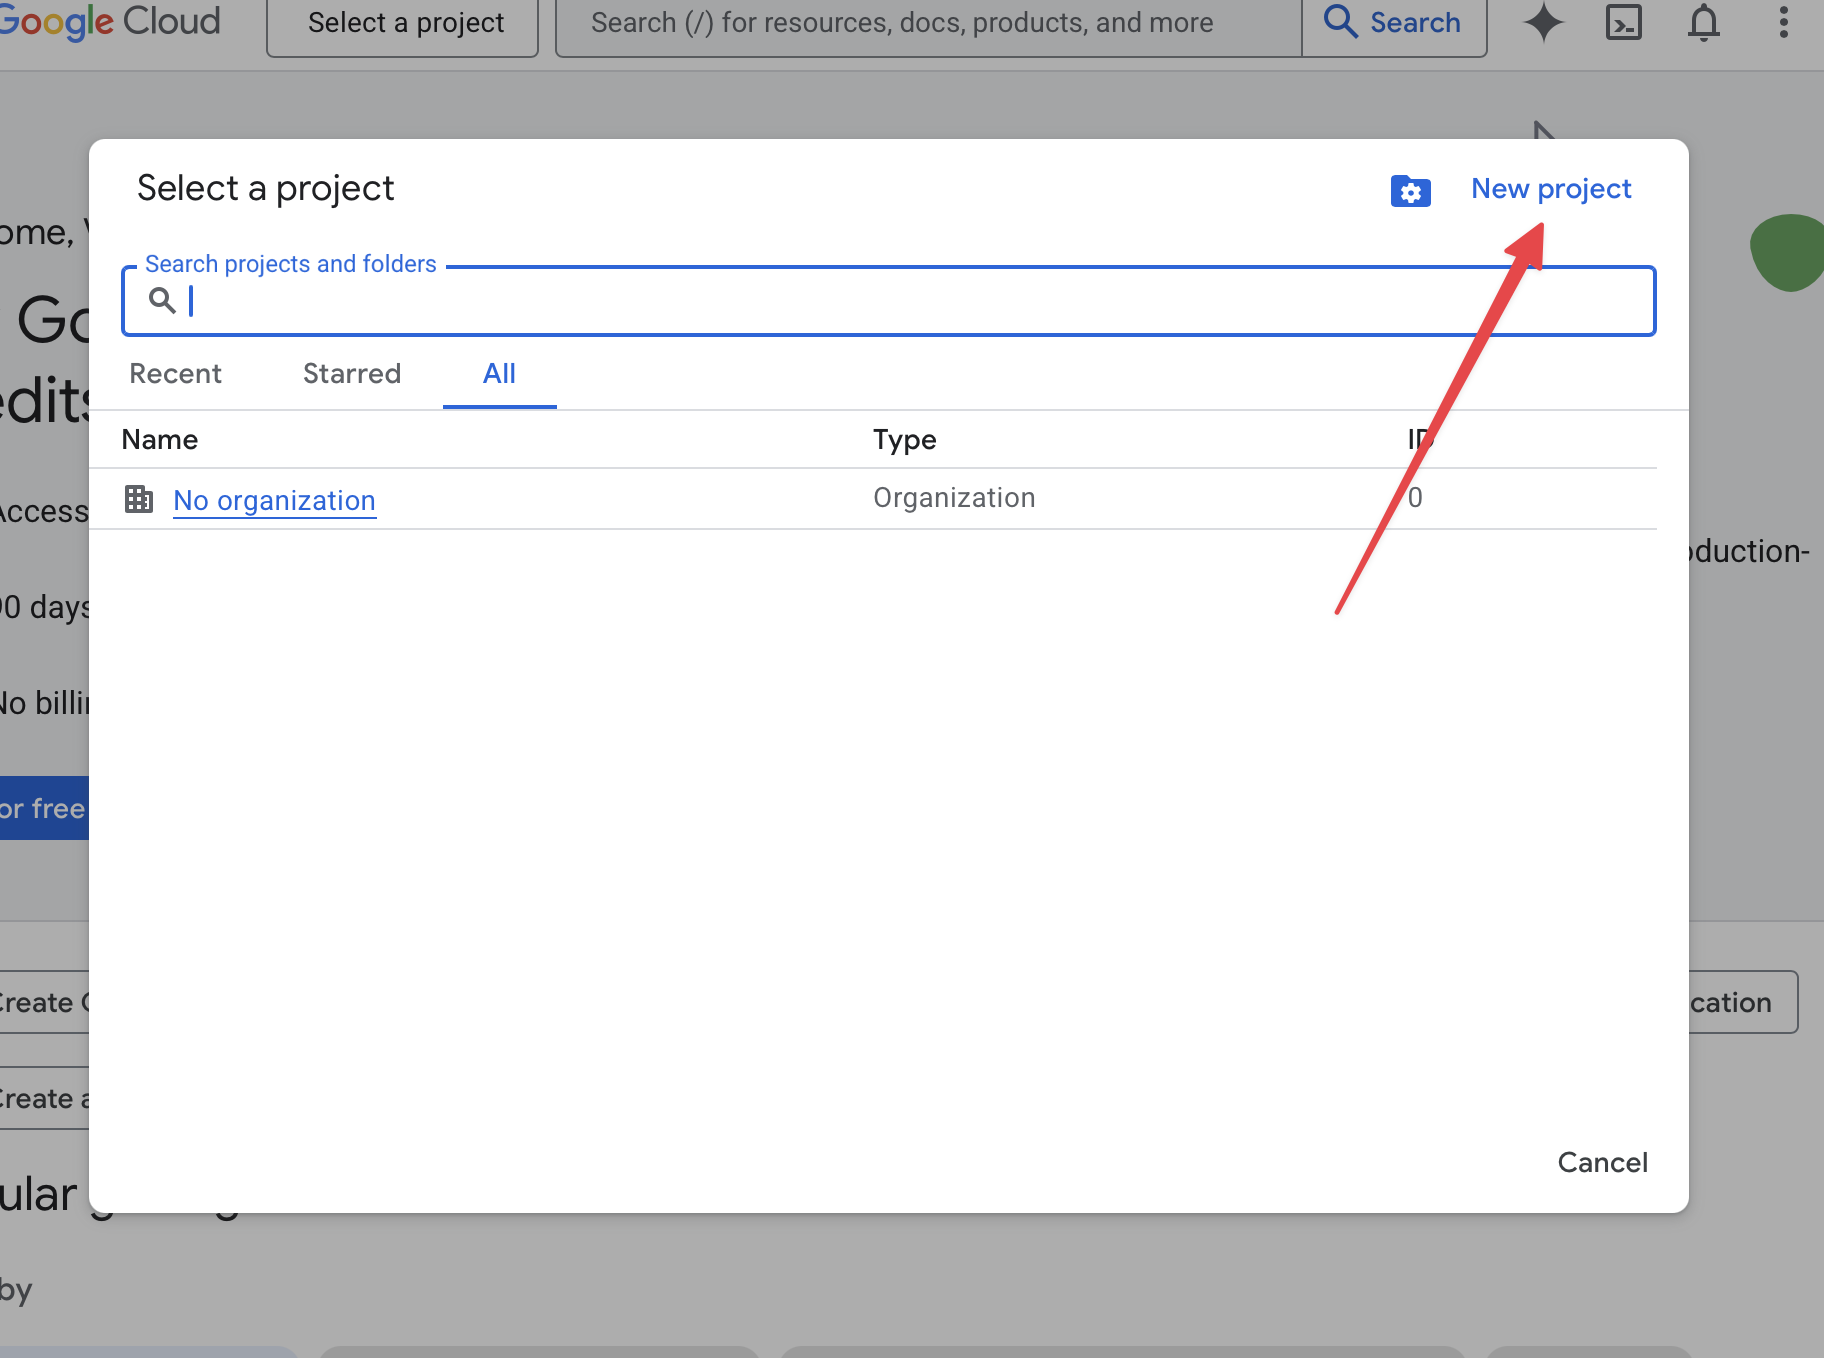
-
Enter a project name that is meaningful to you, then select Create.
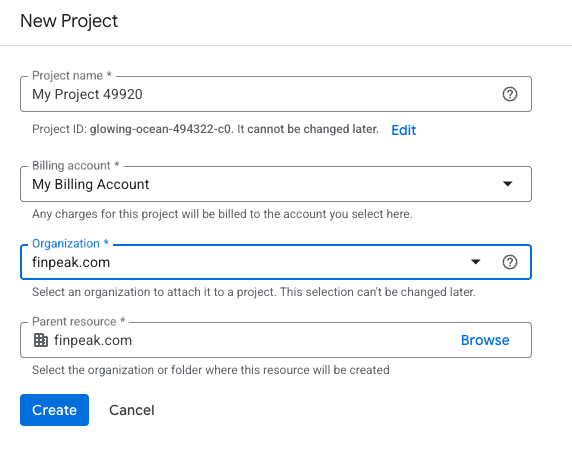
-
When Google Cloud finishes creating the project, open the notification and select Select Project.
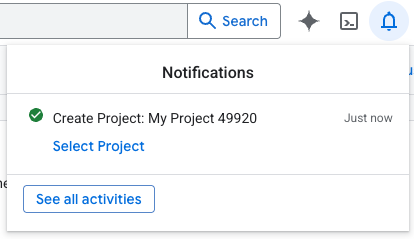
-
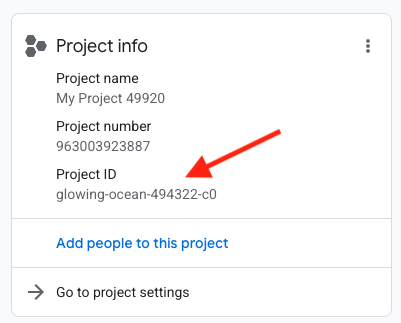
Find and copy the Project ID. Keep it handy for the connection step later in this guide.
2. Set up the OAuth consent screen
The consent screen explains which Google account and permissions will be used when you connect Frevana.
-
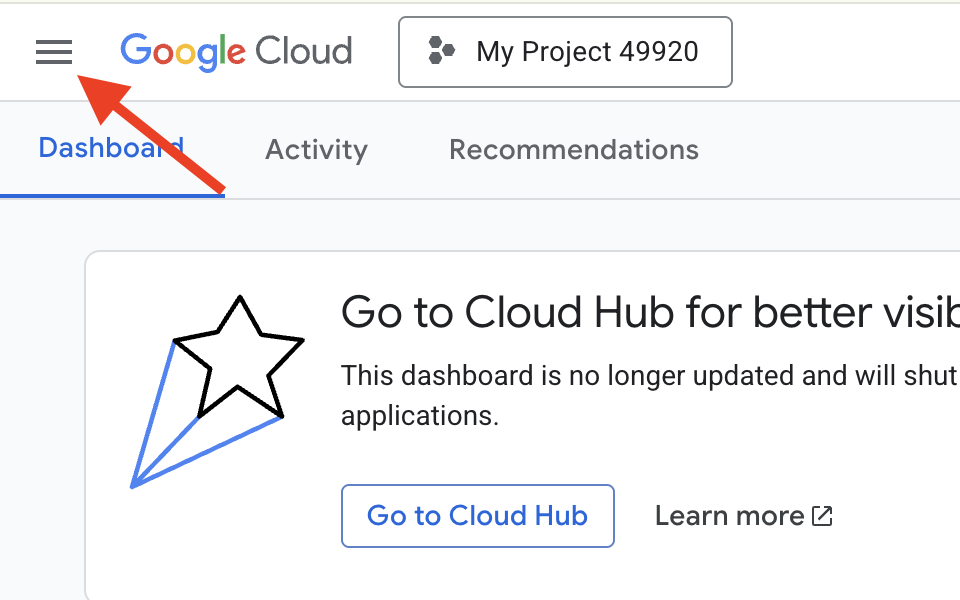
In the Google Cloud Console, make sure your project is selected and open the navigation menu.
-
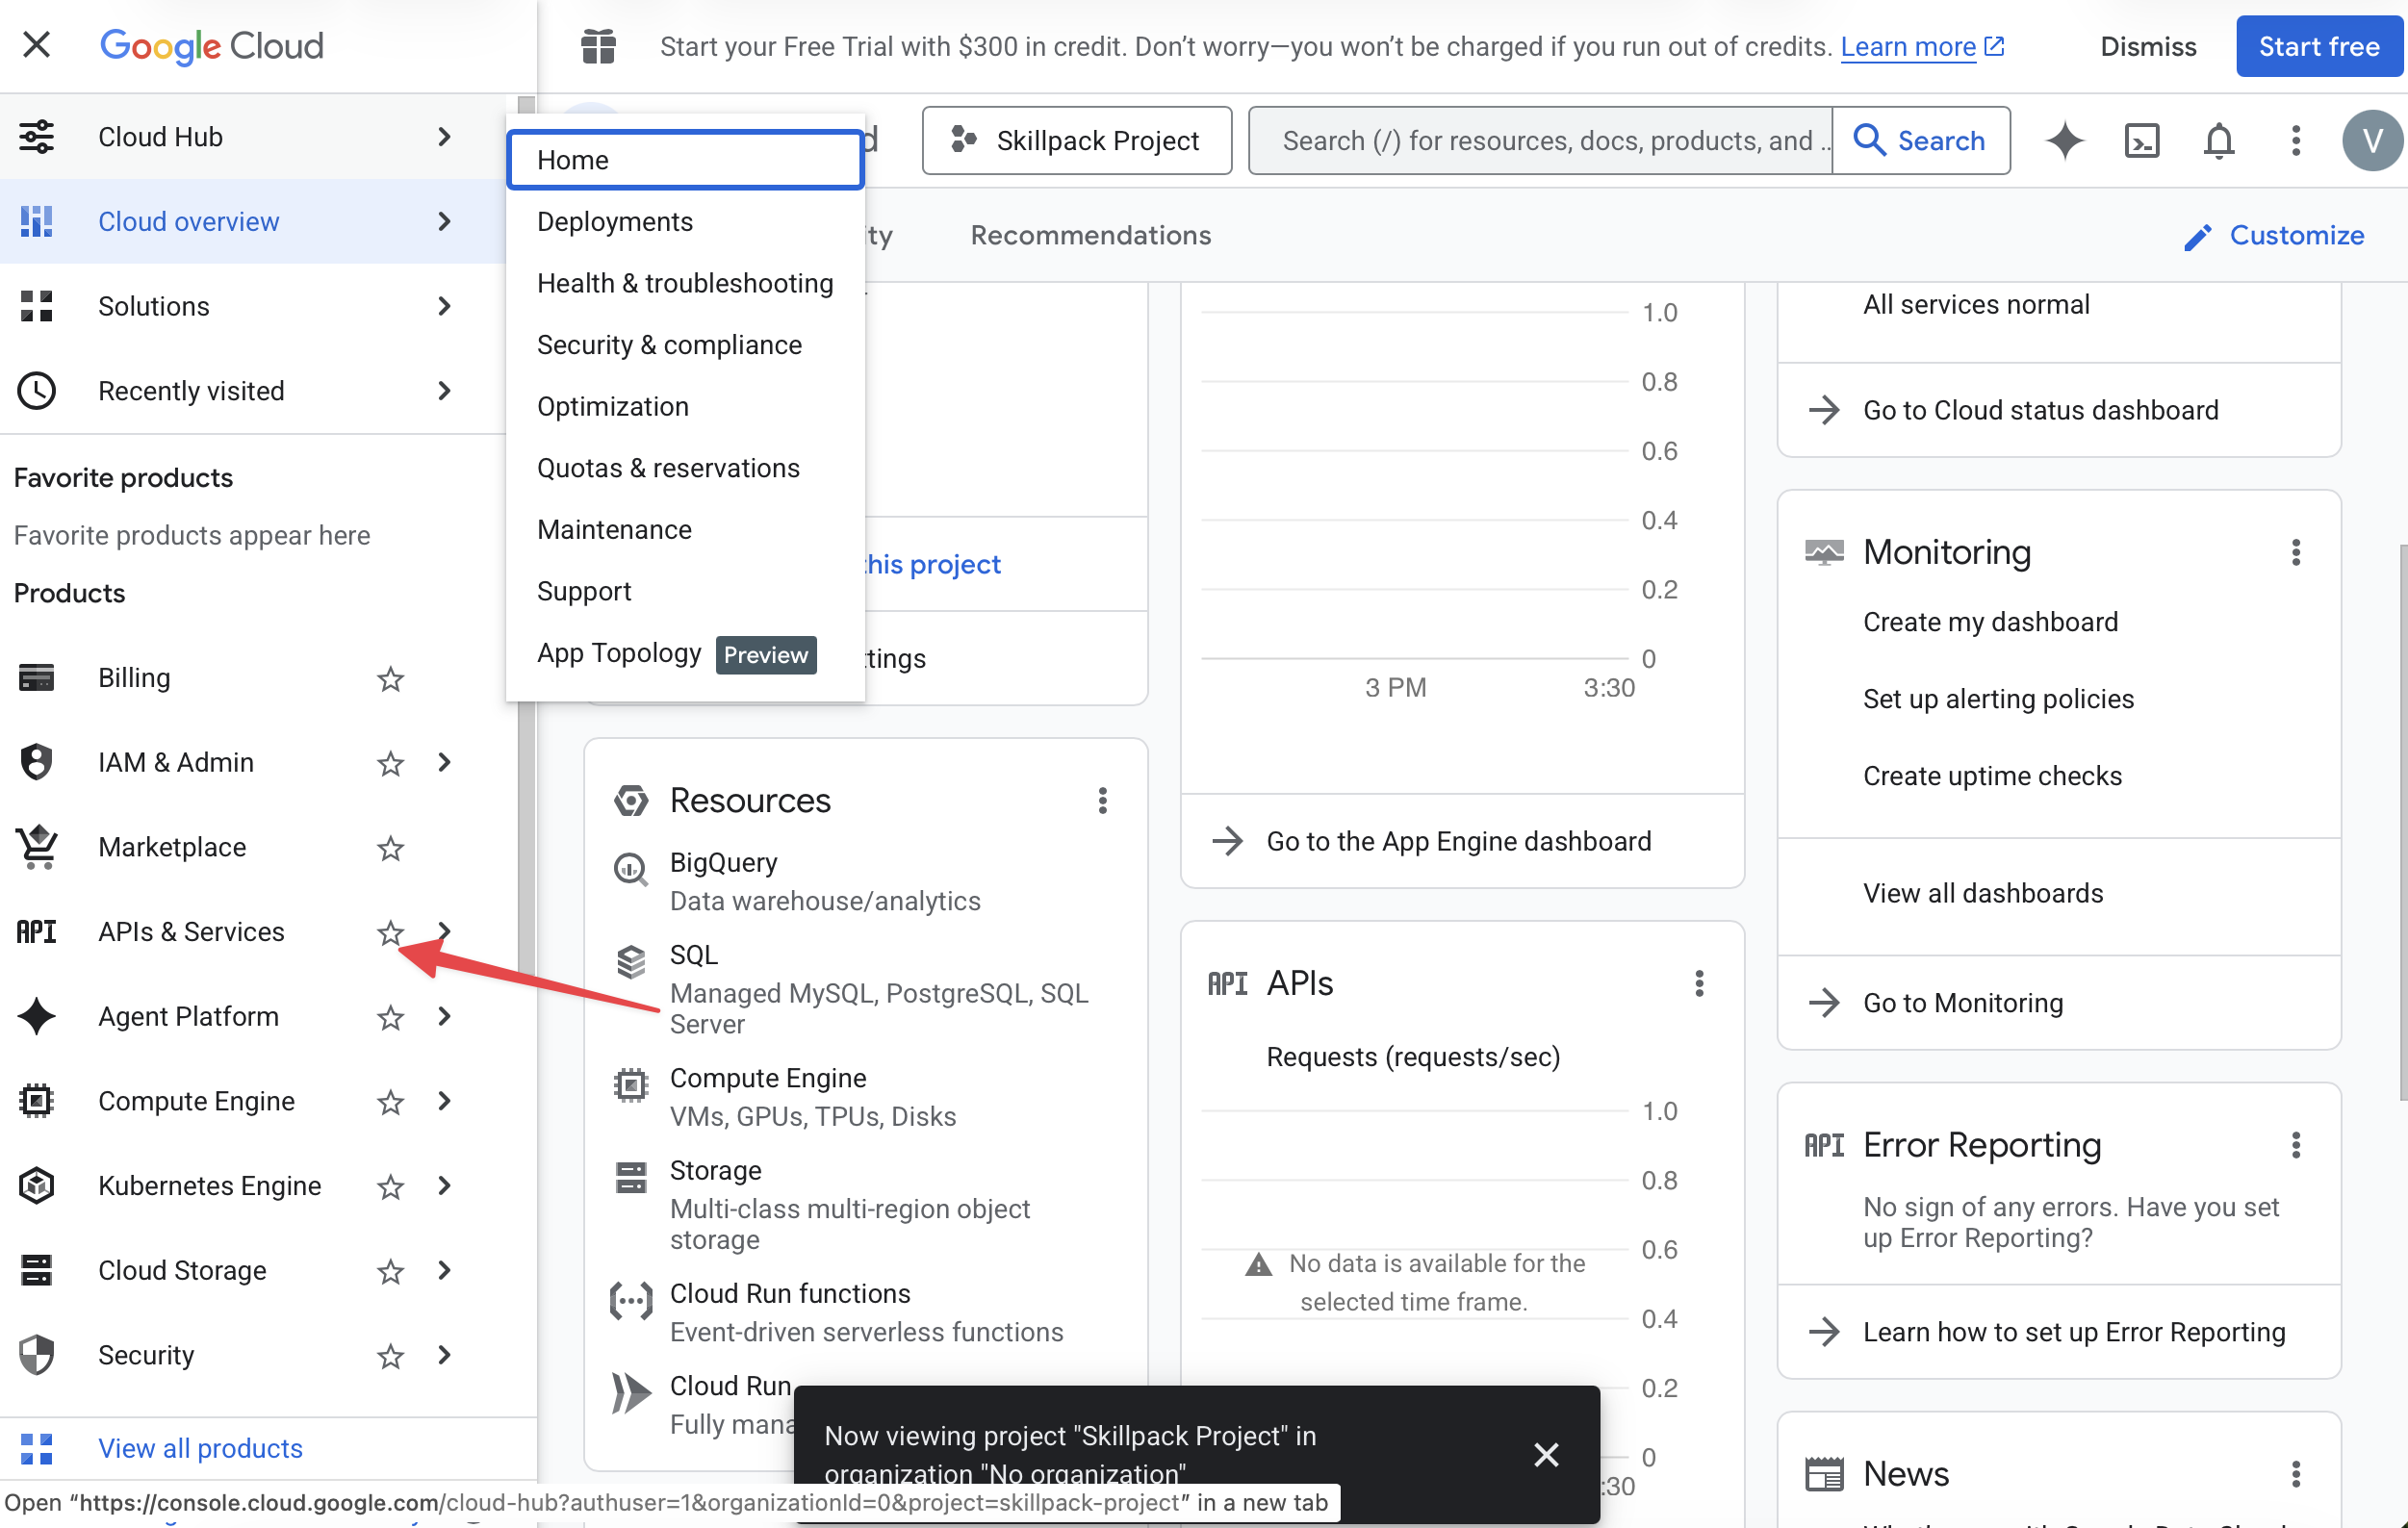
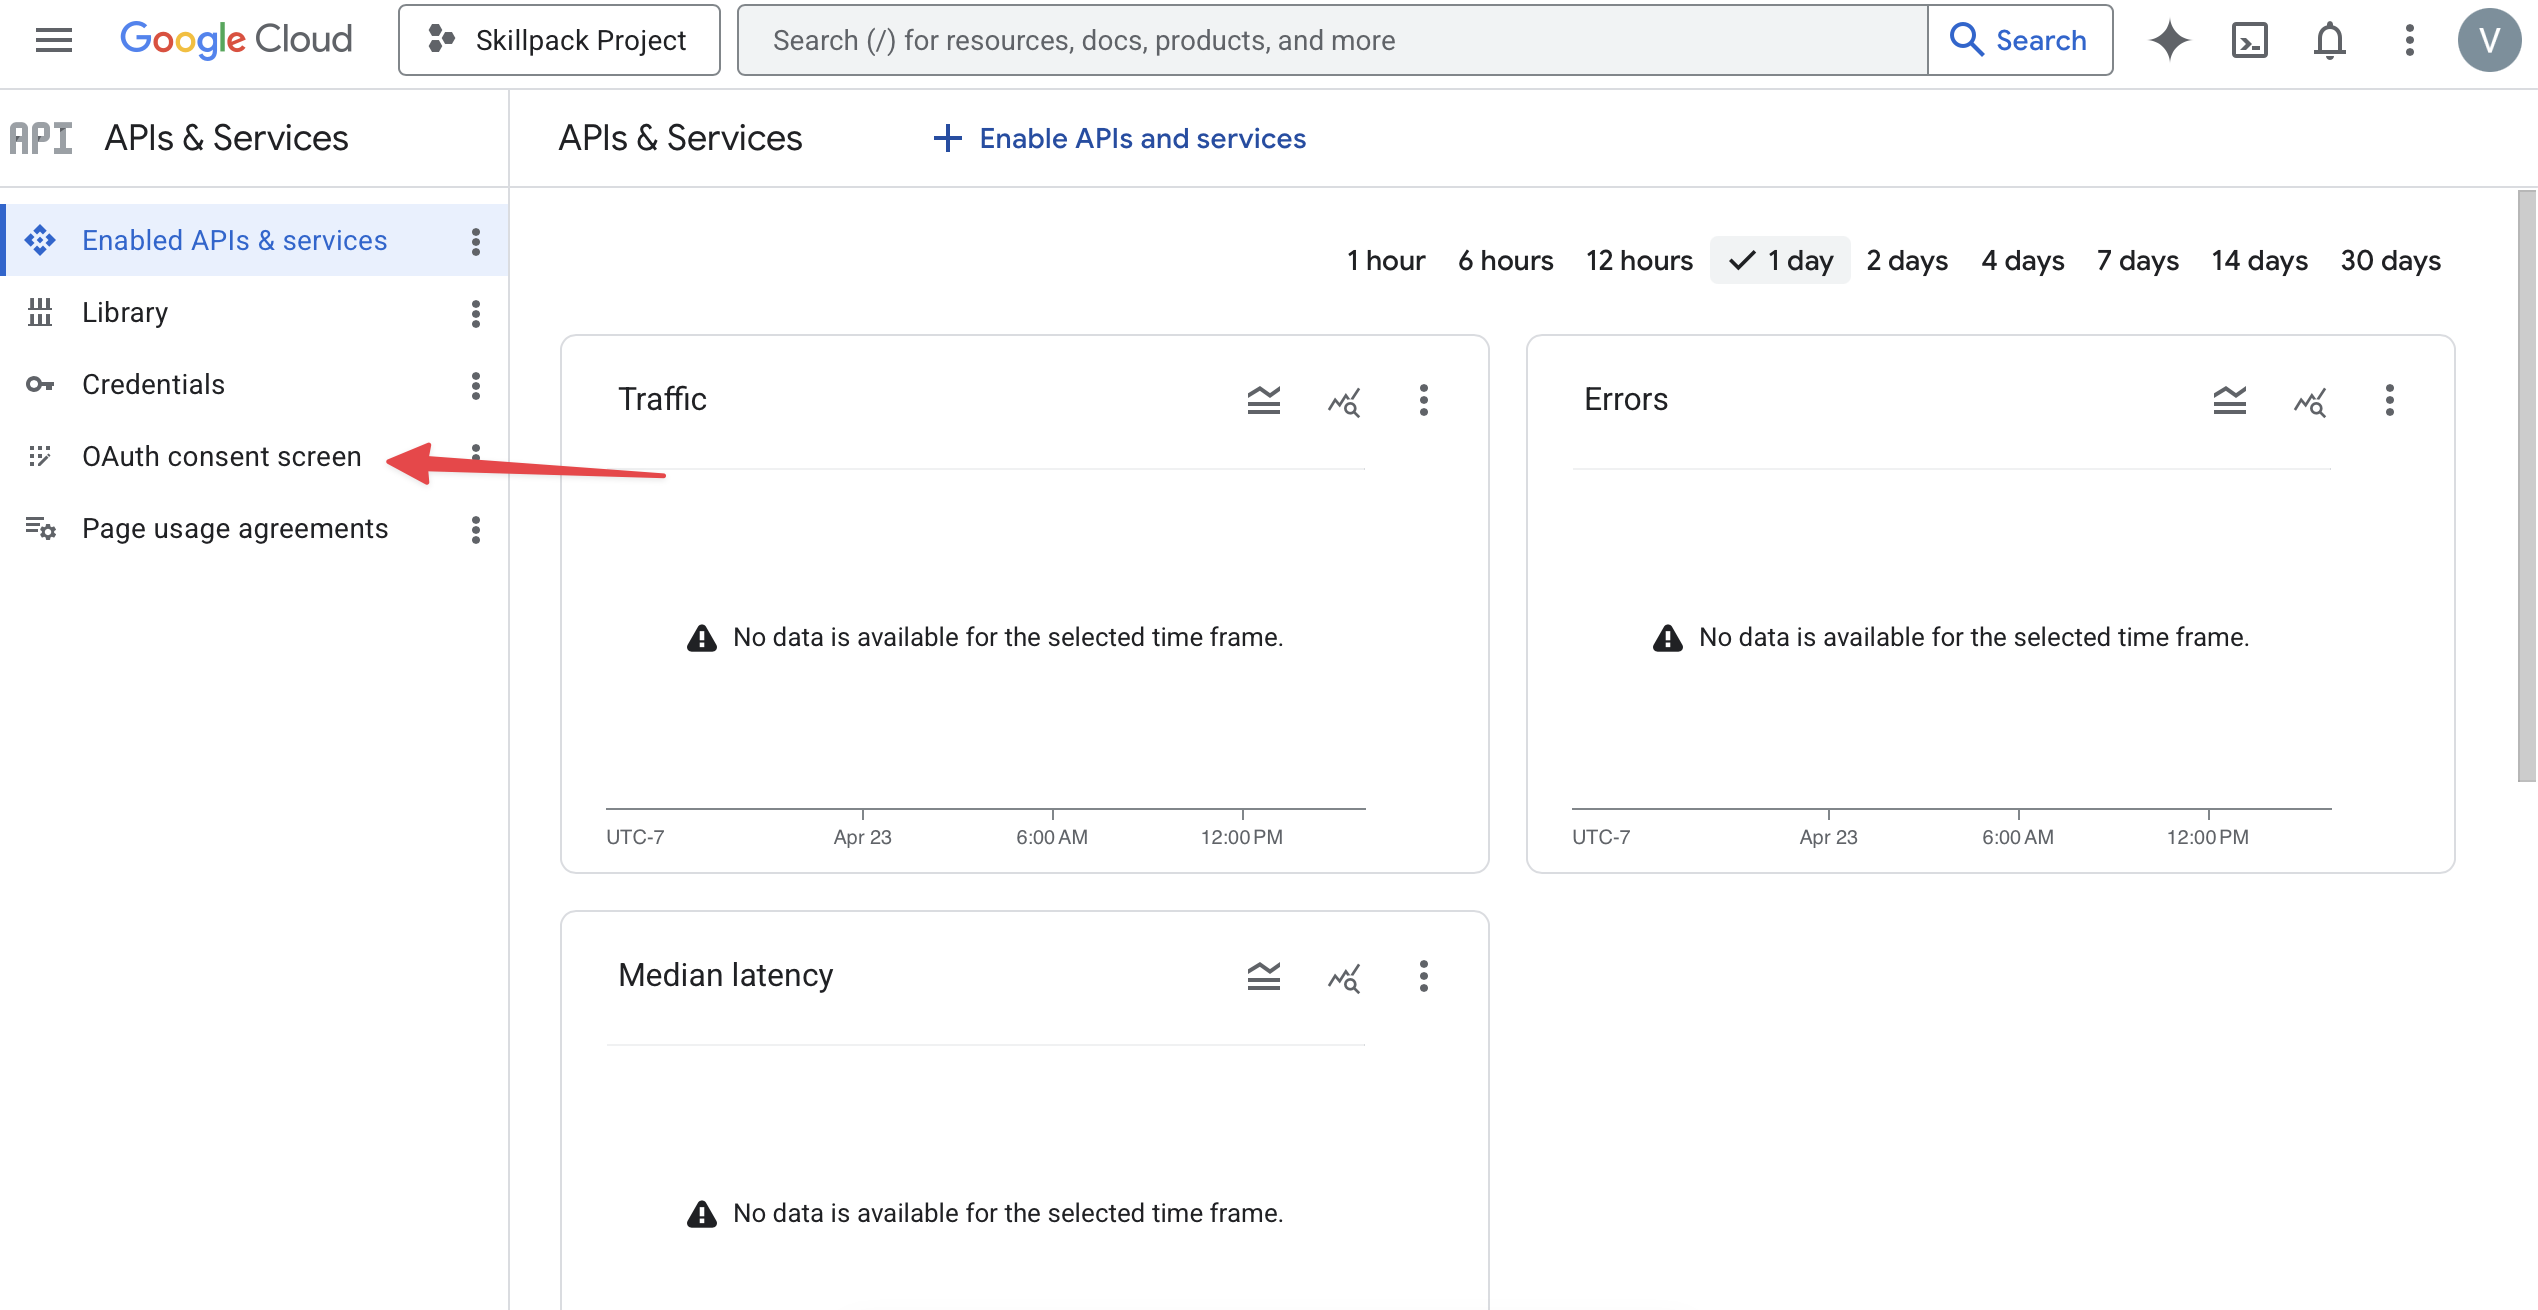
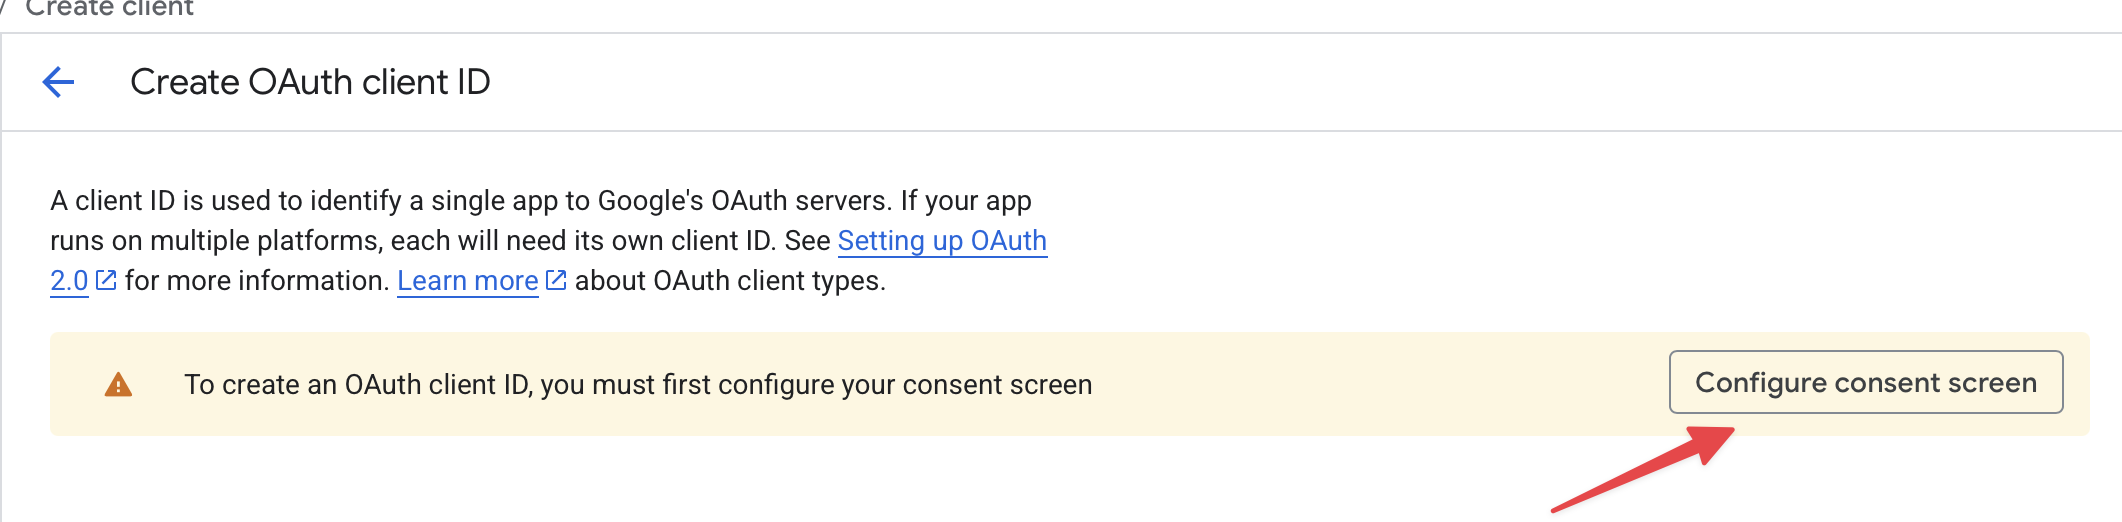
Select APIs & Services, then open OAuth consent screen. If you see Configure consent screen, select it.
-
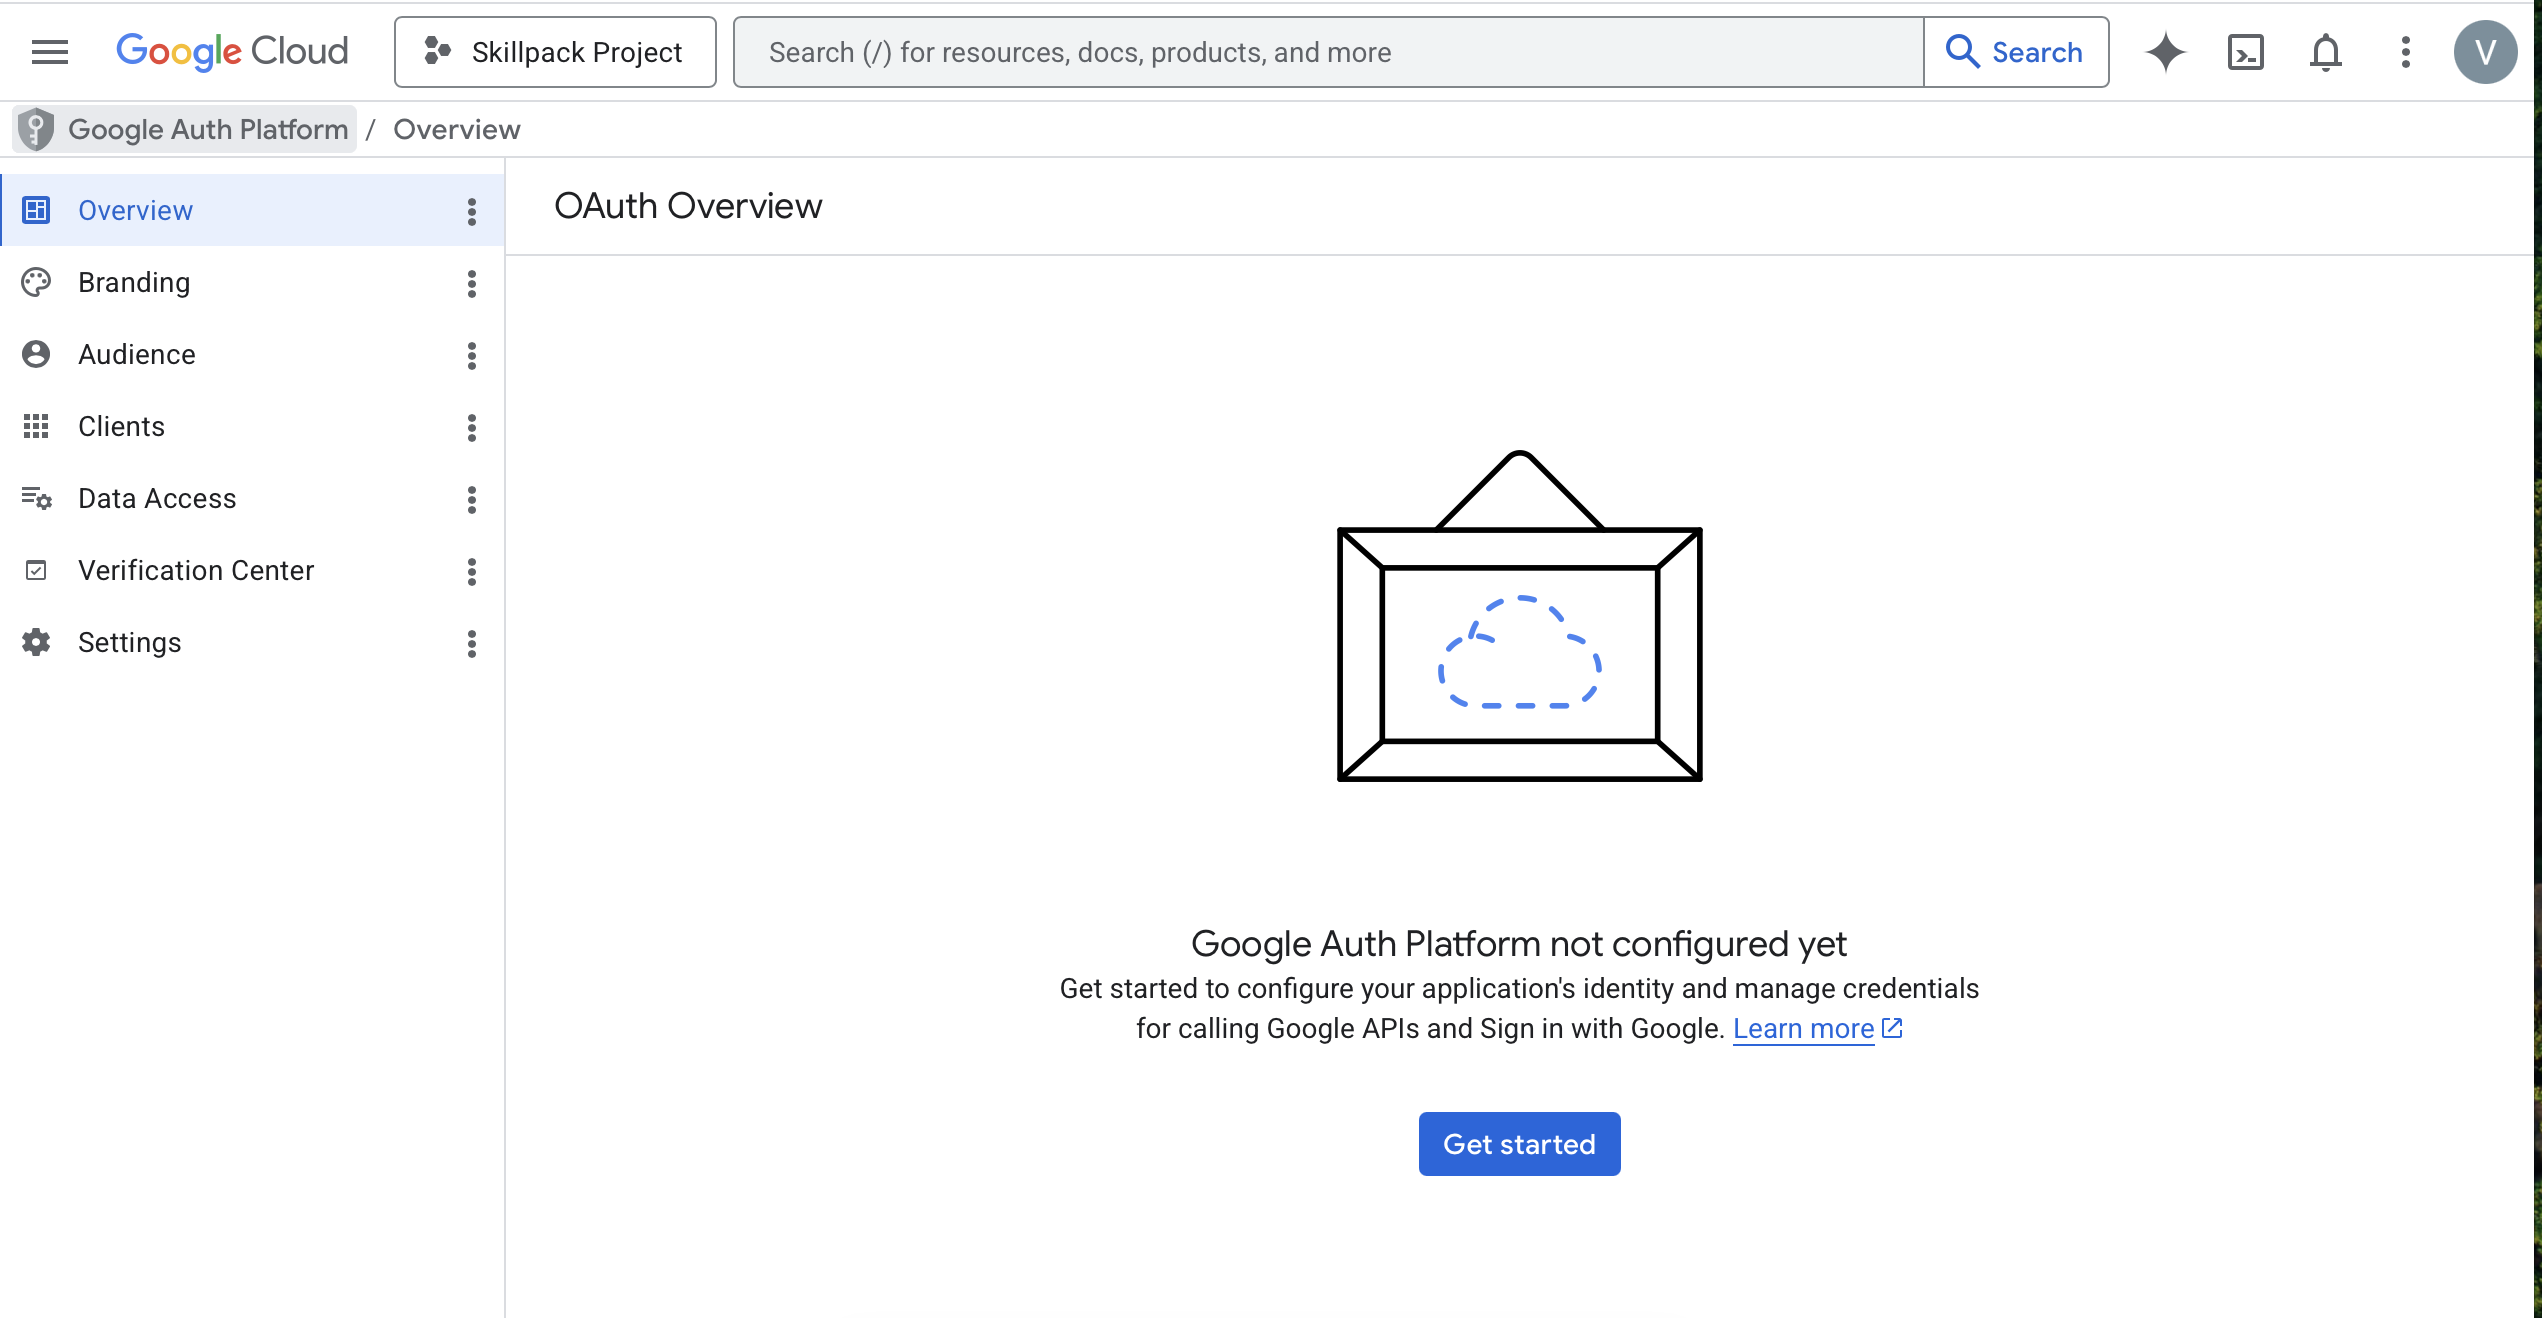
Select Get started, then complete the app information:
- App name: Choose a recognizable name, such as
My AI Tool. - User support email: Select your email address.
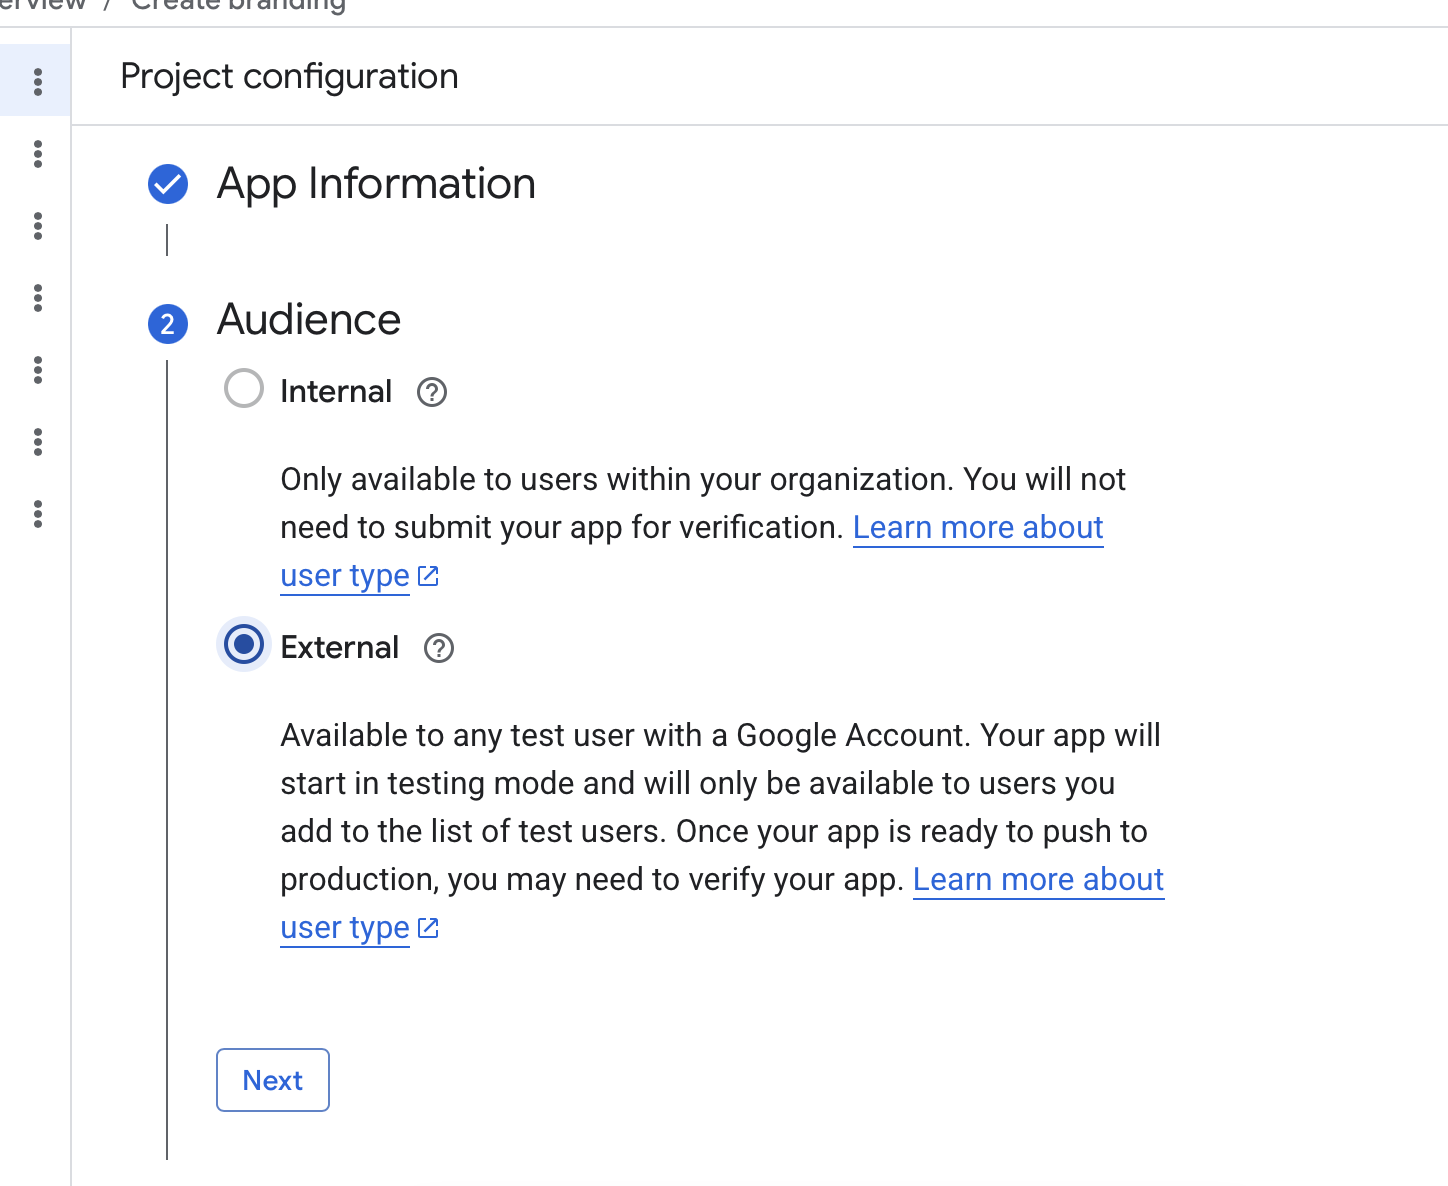
- Audience: Choose Internal if it is available and the app is only for users in your Google Workspace organization. Otherwise, choose External.
- Contact information: Enter your email address.
- App name: Choose a recognizable name, such as
-
Review the terms and select Create.
Add test users, if needed
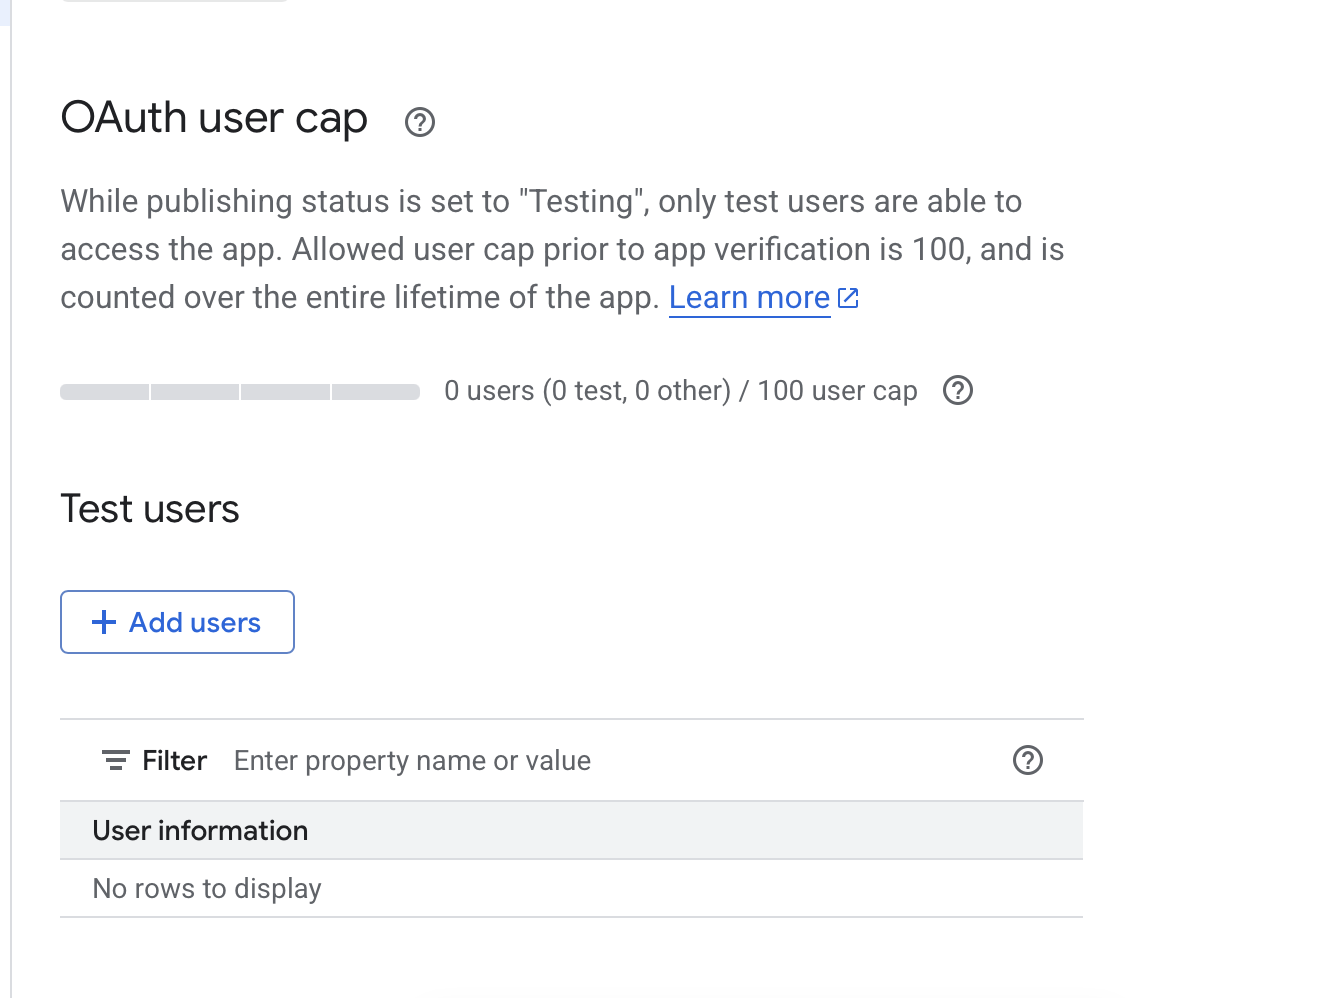
If your app has an External audience and is in testing, add the Google account you plan to use:
- Select Audience in the left sidebar.
- Under Test users, select Add users.
- Enter your Google account email address and select Save.
3. Create an OAuth client
You’ll now create a desktop OAuth client to obtain your Client ID and Client Secret.
If you already have a Desktop app OAuth client in this project and have both credentials, you can reuse it. You may prefer to create a separate client for each Agent team.
-
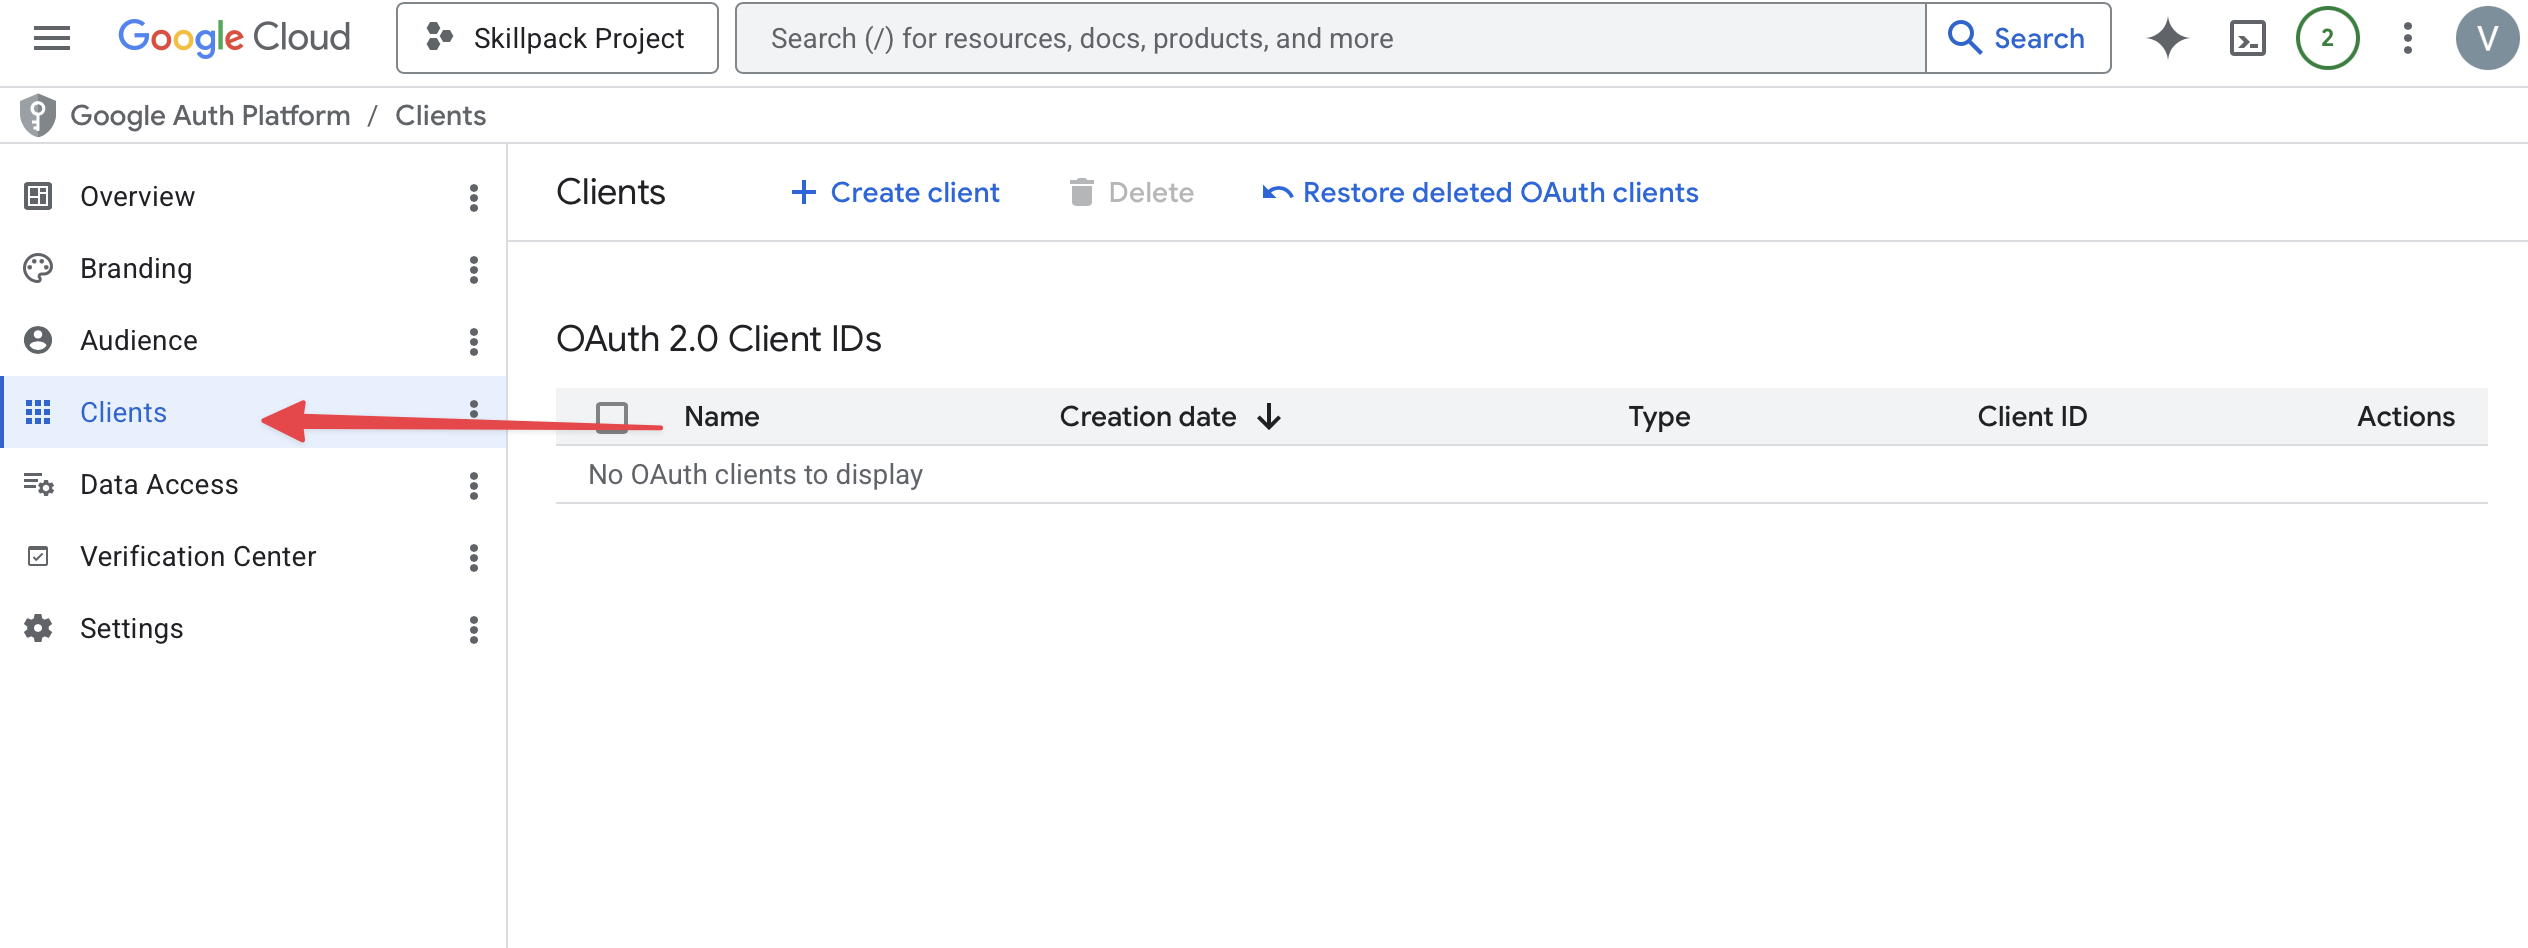
In the Google Cloud console, select Clients or Credentials in the sidebar.
-
Select Create client.

-
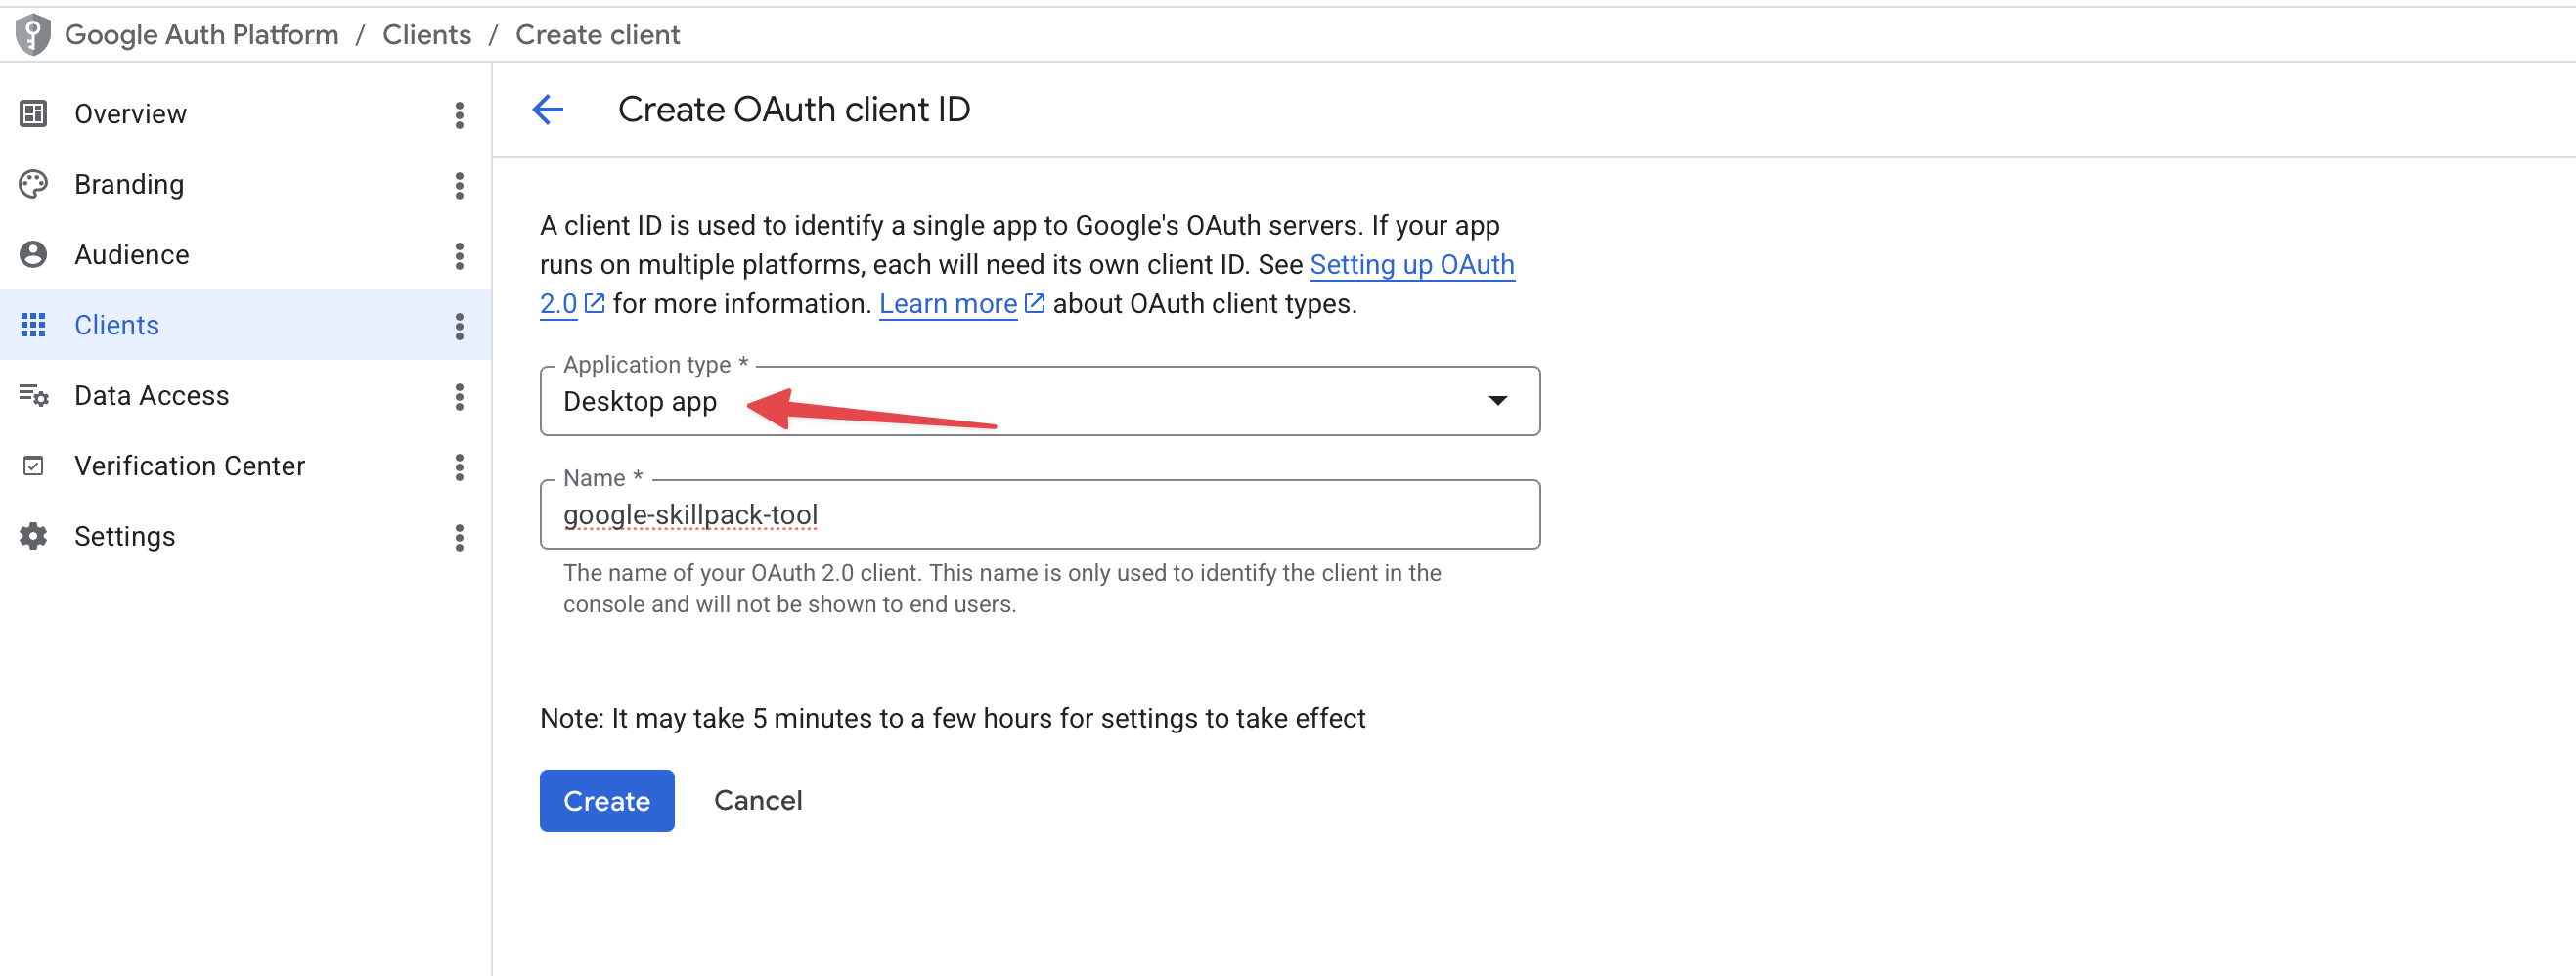
For Application type, choose Desktop app. Give the client a recognizable name, then select Create.
-
Copy the Client ID and Client Secret from the confirmation dialog. You can also select Download JSON and keep the file somewhere secure. Save the secret before closing the dialog, as Google may not show it again.
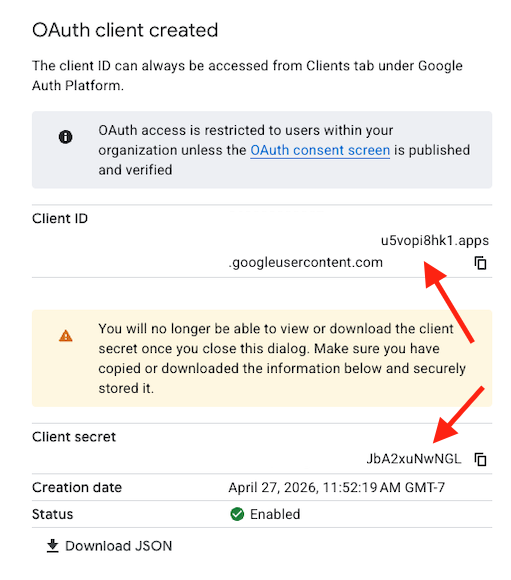
Treat your Client Secret and downloaded credentials file like passwords. Keep them private and store them securely.
4. Connect and authorize in Frevana
-
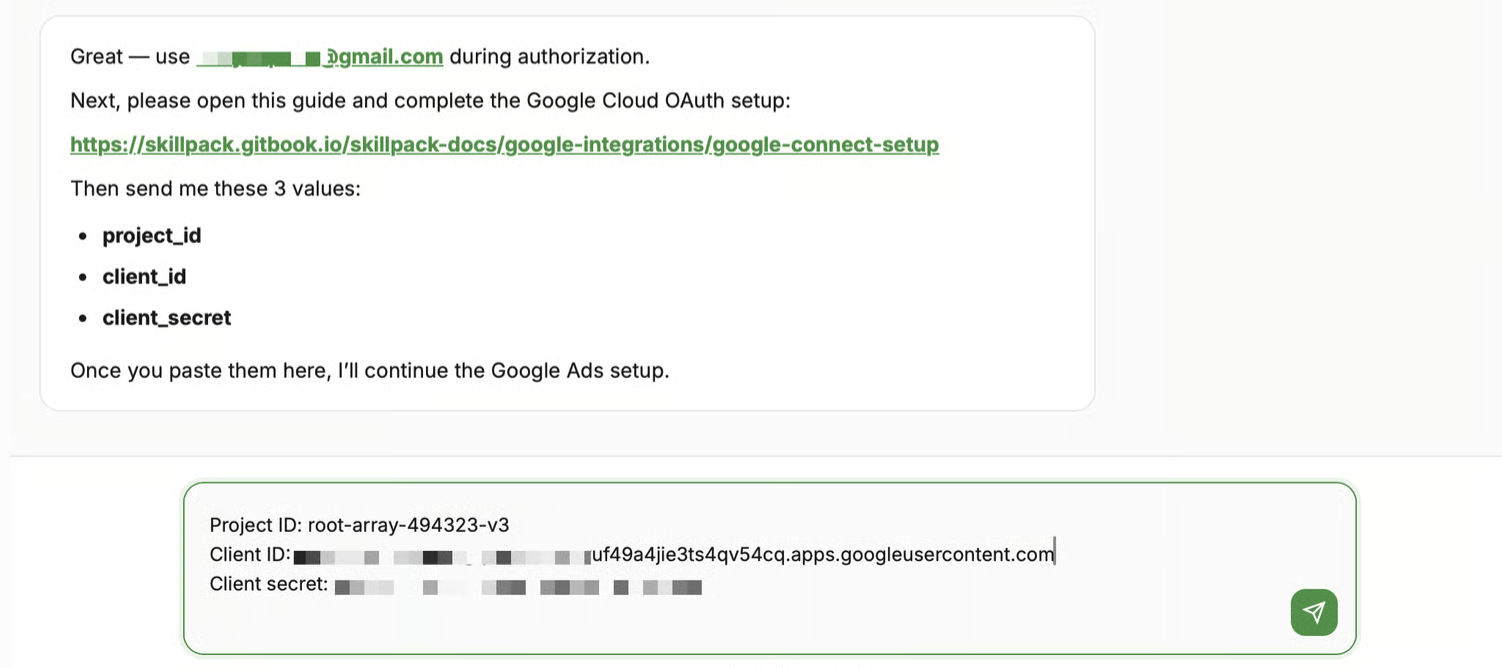
Return to your Frevana Agent team’s chat and provide the Project ID, Client ID, and Client Secret when prompted.
-
Frevana will open a browser page for authorization. Sign in with the Google account you intend to connect.
-
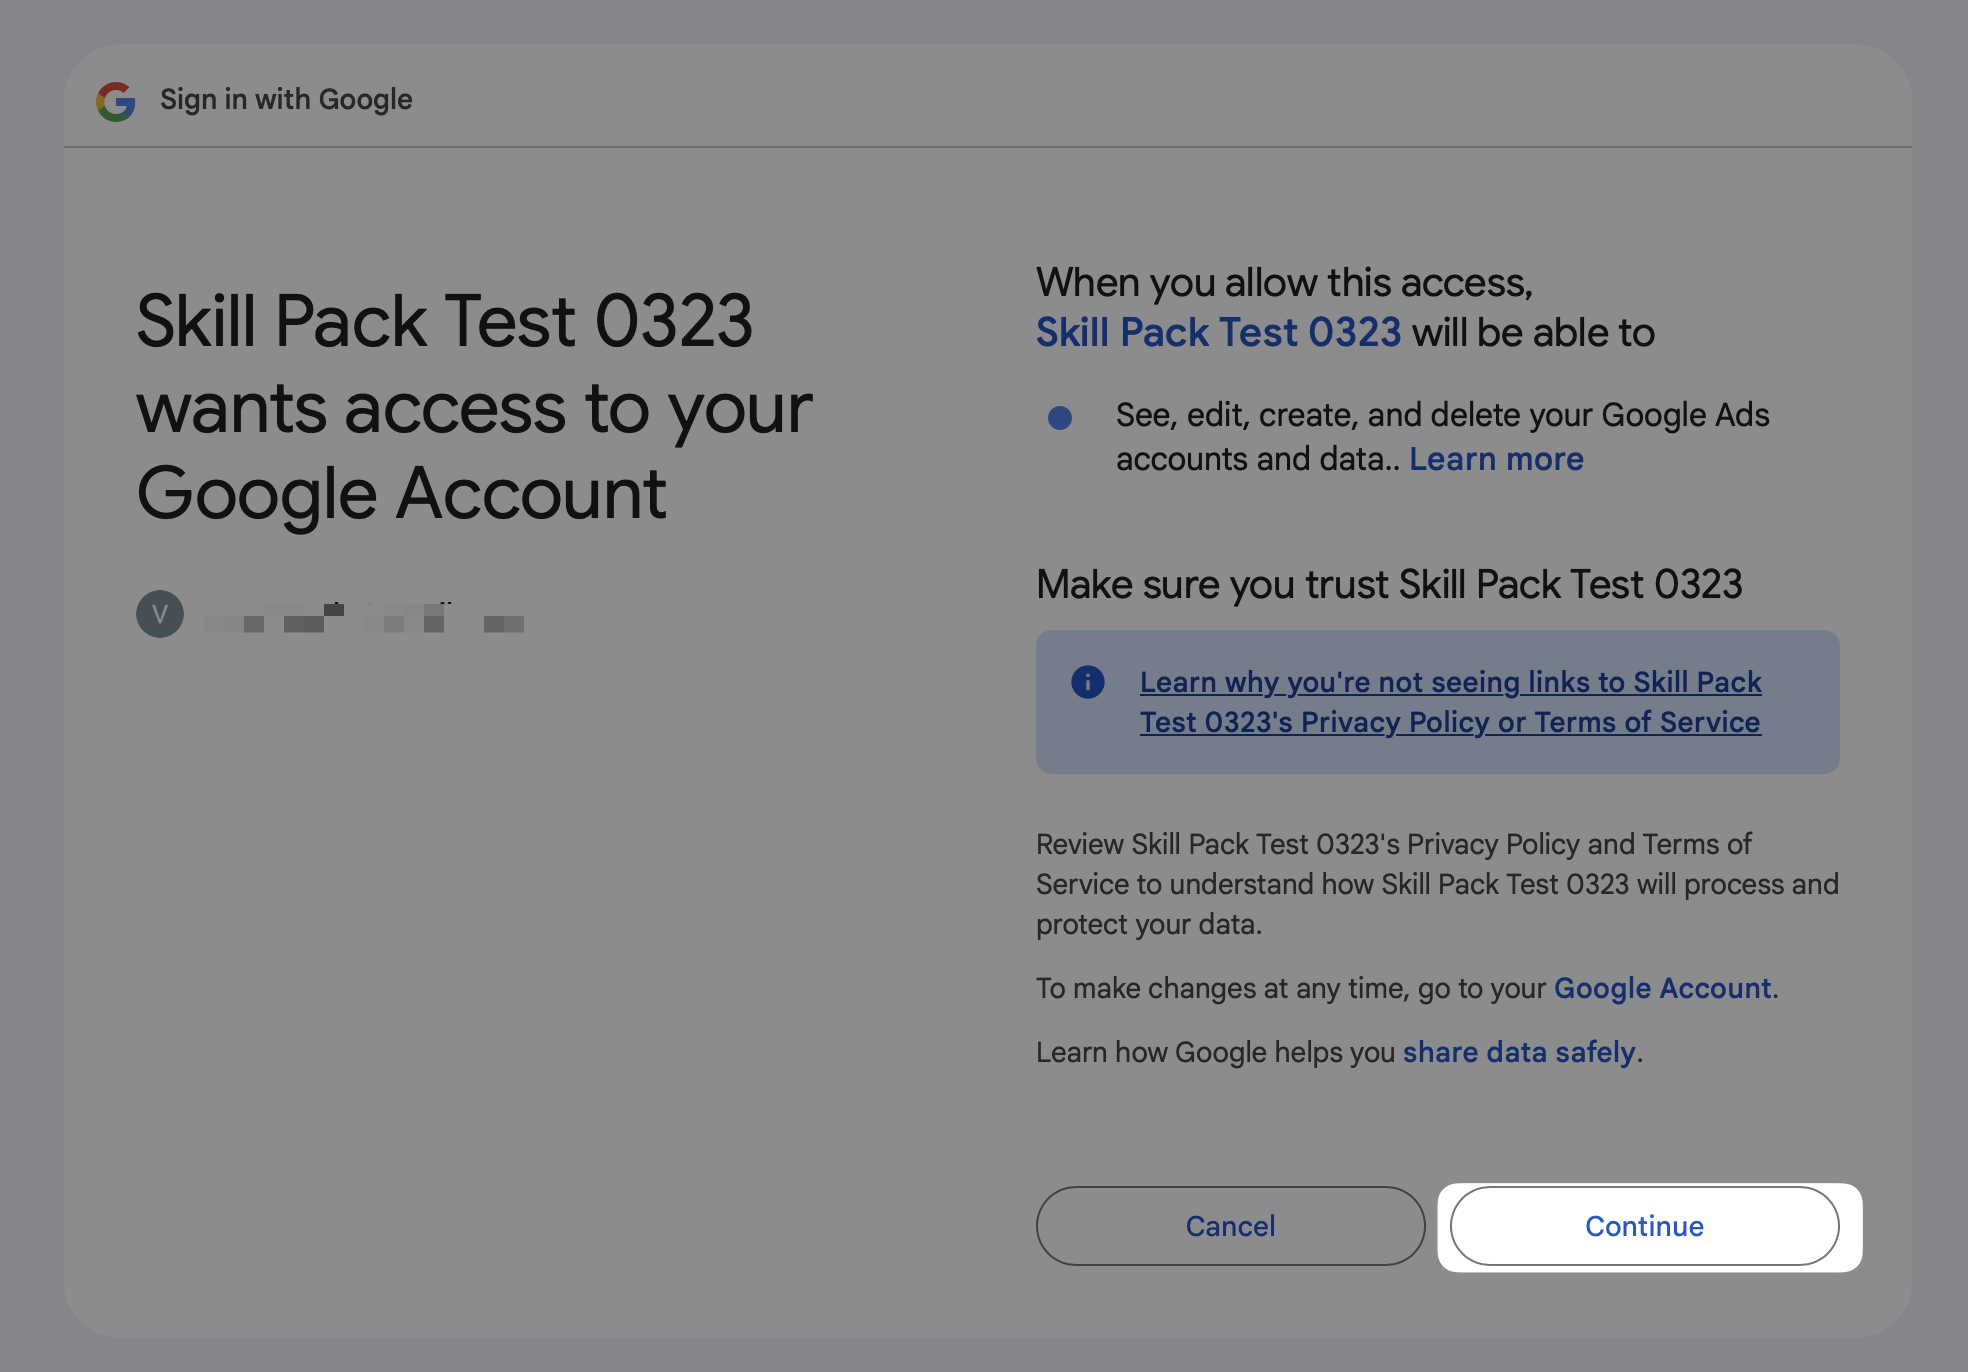
Review the permissions requested for the Google services you plan to use. If you agree, select Continue or Allow. The exact screen may vary by service.
-
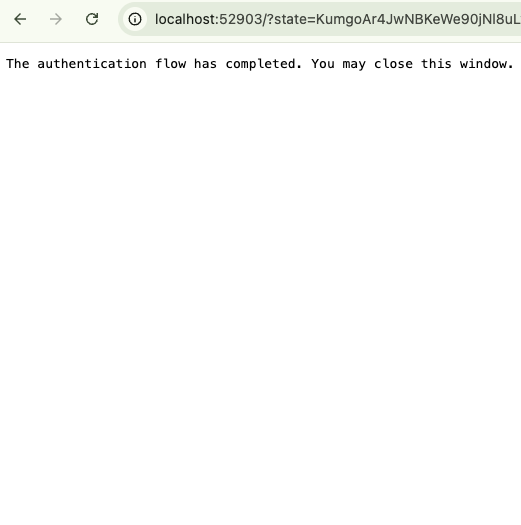
Once authorization is complete, return to the chat. Frevana will confirm when the connection is ready.
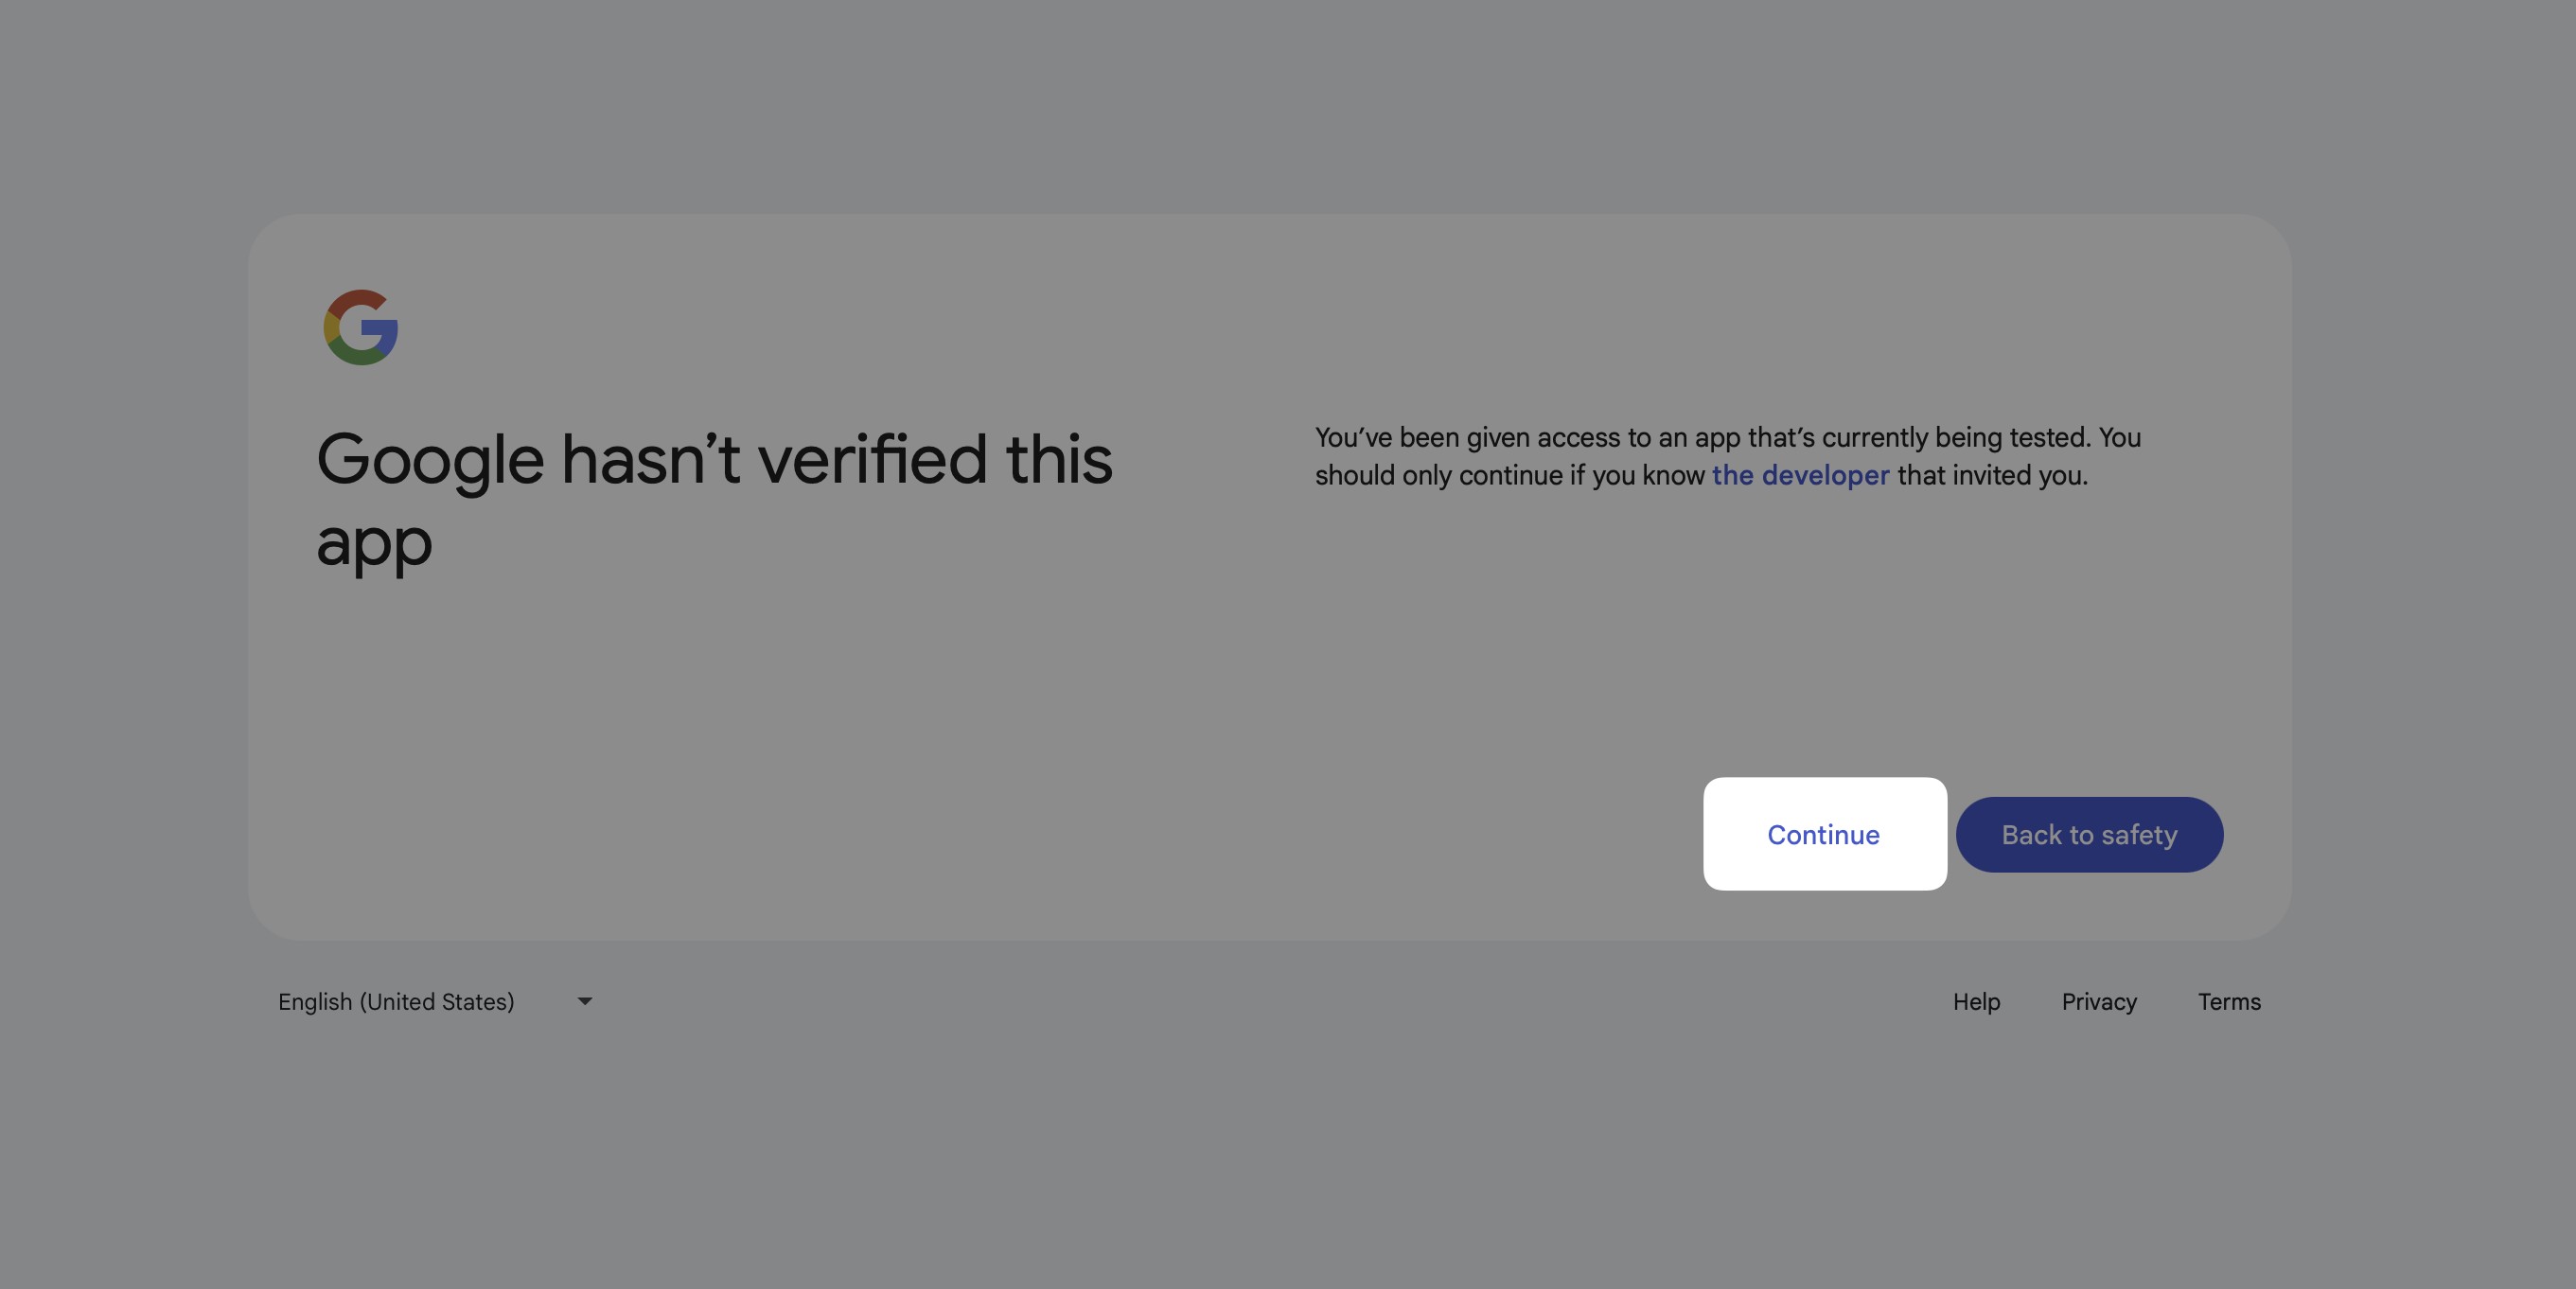
If Google says an app has not been verified, review the warning carefully. Continue only if you recognize and trust the app you configured and understand the permissions it requests.
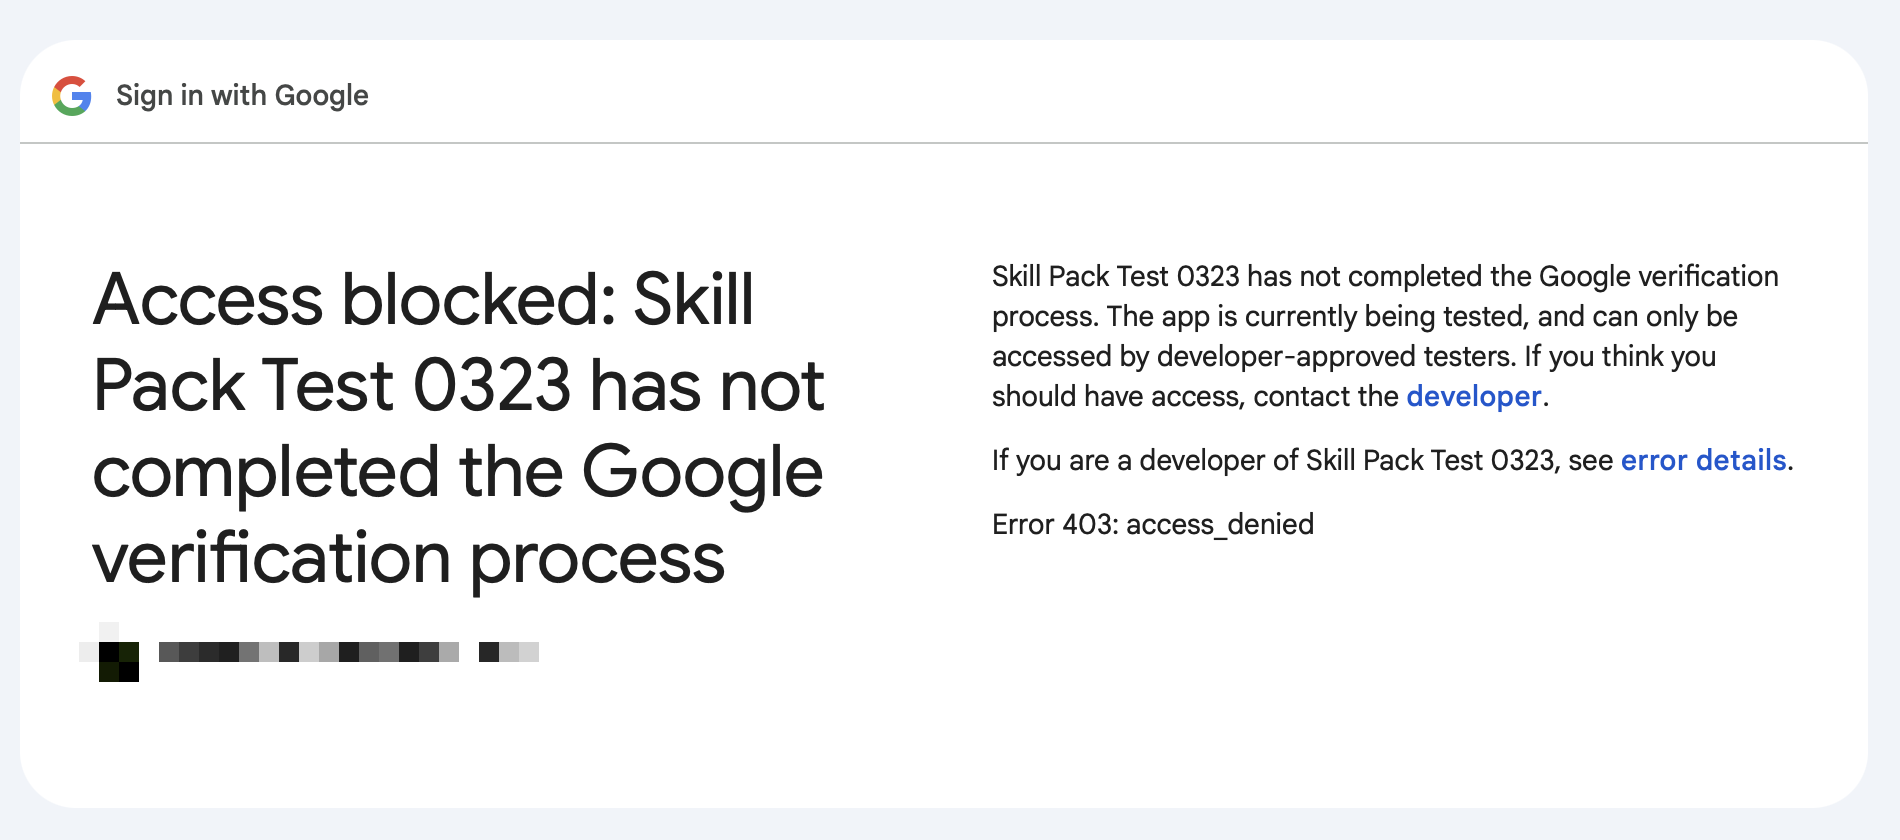
If you see an Access blocked message while your external app is in testing, check that the account you’re signing in with is listed under Audience > Test users.
5. What to expect next
Some Google services require additional setup or authorization. Review each permission request before approving it.
| Google service | Additional setup |
|---|---|
| Google Workspace (Gmail, Drive, Calendar, Sheets, Docs) | Your Agent team may request additional write permissions when needed. |
| Google Ads | You may need a Developer Token and Customer ID. |
| Google Search Console | Your Agent team may ask you to enable the Search Console API. |
| Google Analytics | Your Agent team may ask you to enable Analytics APIs. |
Enabling an API in your project does not by itself grant access to your Google account data. Review the scopes requested during authorization to understand what access you’re granting.
Google Cloud CLI on Windows
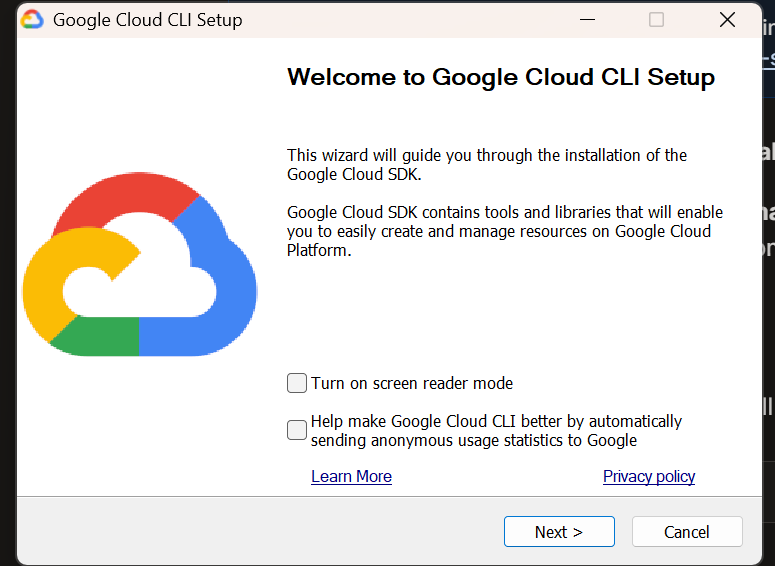
On Windows, your Google Agent team may download and launch the official Google Cloud CLI installer. If it does not open, follow Google’s installation guide.
-
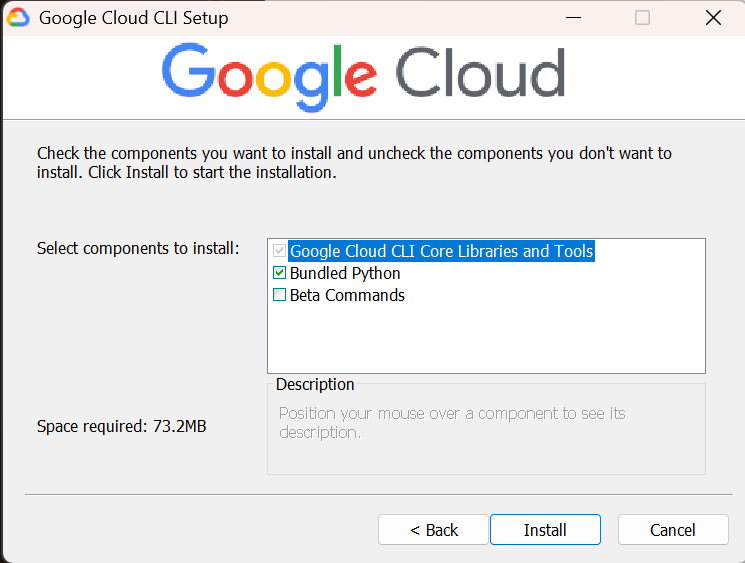
When the installer opens, keep the default installation options.
-
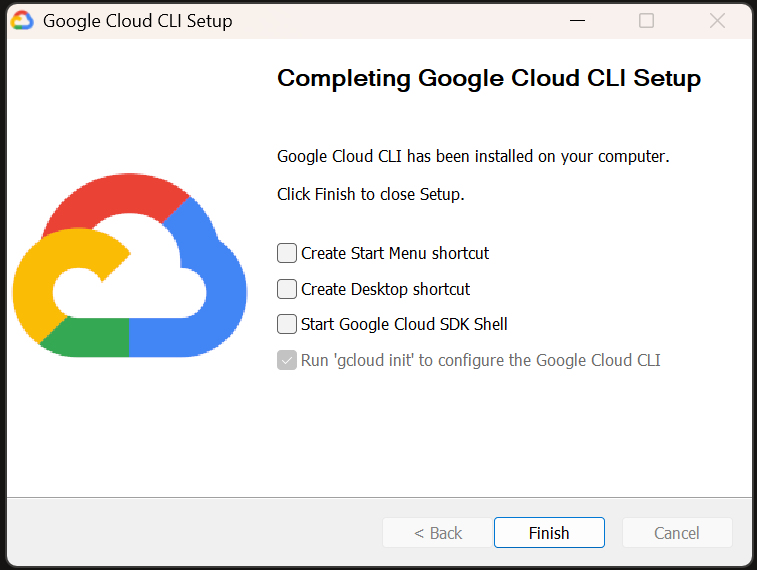
At the end of installation, uncheck the optional actions, including Run gcloud init. This option may become unavailable after another option is unchecked.
-
Return to your Agent team so it can continue the Google Cloud setup.
Managing your connection
Switch Google accounts
To connect a different account, ask your Agent team:
Help me reconnect my Google account
It will guide you through the authorization process for the new account.
Use multiple Agent teams
Each Agent team keeps its own connection credentials in its data/google-connect/ directory. You can connect different teams to different Google accounts, or authorize the same account for each team. A Google Cloud project and OAuth client may be reused when appropriate.
Review or revoke access
You can review and revoke Google account access at Google Account permissions. Keep credential files secure and share them only with people you trust.
Troubleshooting
“Access blocked” when signing in
If your external OAuth app is in testing, confirm that the account you’re using is listed as a test user:
- Open the OAuth consent screen in Google Cloud Console.
- Select Audience and find Test users.
- Add your Google account email address, save, and retry the connection in Frevana.
“Token invalid” or “OAuth client was deleted”
Your credentials may have expired or been removed. Ask your Agent team to help you reconnect, and check that your OAuth client still exists in Google Cloud.
The browser does not open automatically
If an authorization link appears in the terminal output, copy it into your browser and continue there.
“Config not found” or setup was interrupted
Ask your Agent team to help you run the setup again. If you already created a project or OAuth client, keep their details handy.
“Invalid OAuth JSON” or the wrong file type
Check that you created a Desktop app OAuth client rather than a web application, and use the JSON file downloaded for that client.