Shopify CMS Integration
Connect Shopify to Frevana to work with your store's content. This guide will help you create a custom app, install it on your store, and find the details needed to connect.
Before you begin
You'll need a Shopify account, access to the Shopify Dev Dashboard, and permission to create and install apps for your store.
Have these details ready for Frevana:
- Your store domain, such as
yourstore.myshopify.com - Your app's Client ID
- Your app's Client Secret
Step 1: Create a Shopify app
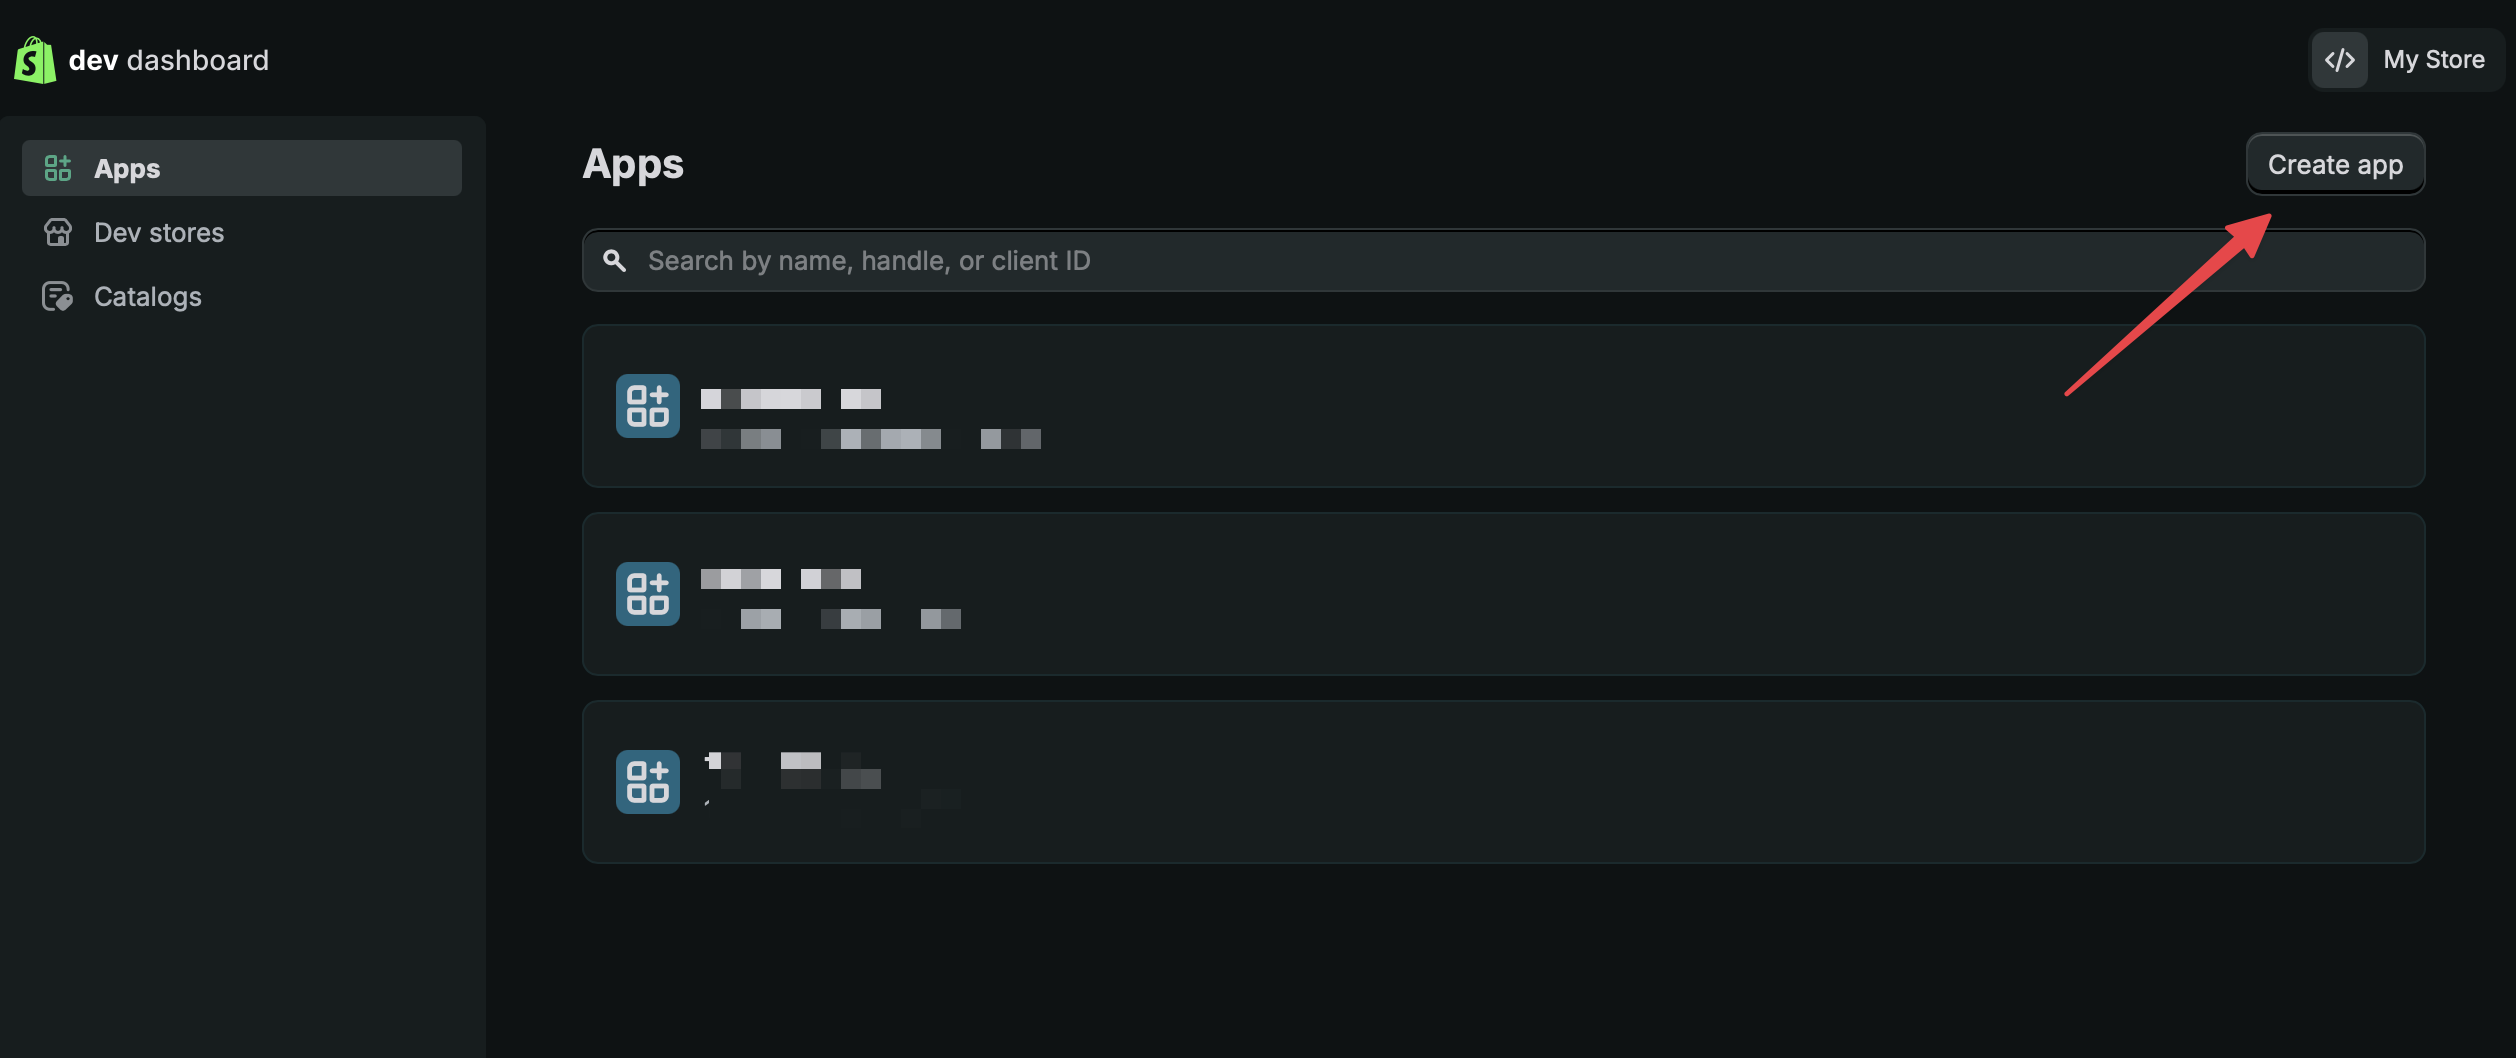
Open the Shopify Dev Dashboard and sign in. Select Create App in the upper-right corner.
Choose a name for your app. You can ignore the CLI option for this setup.
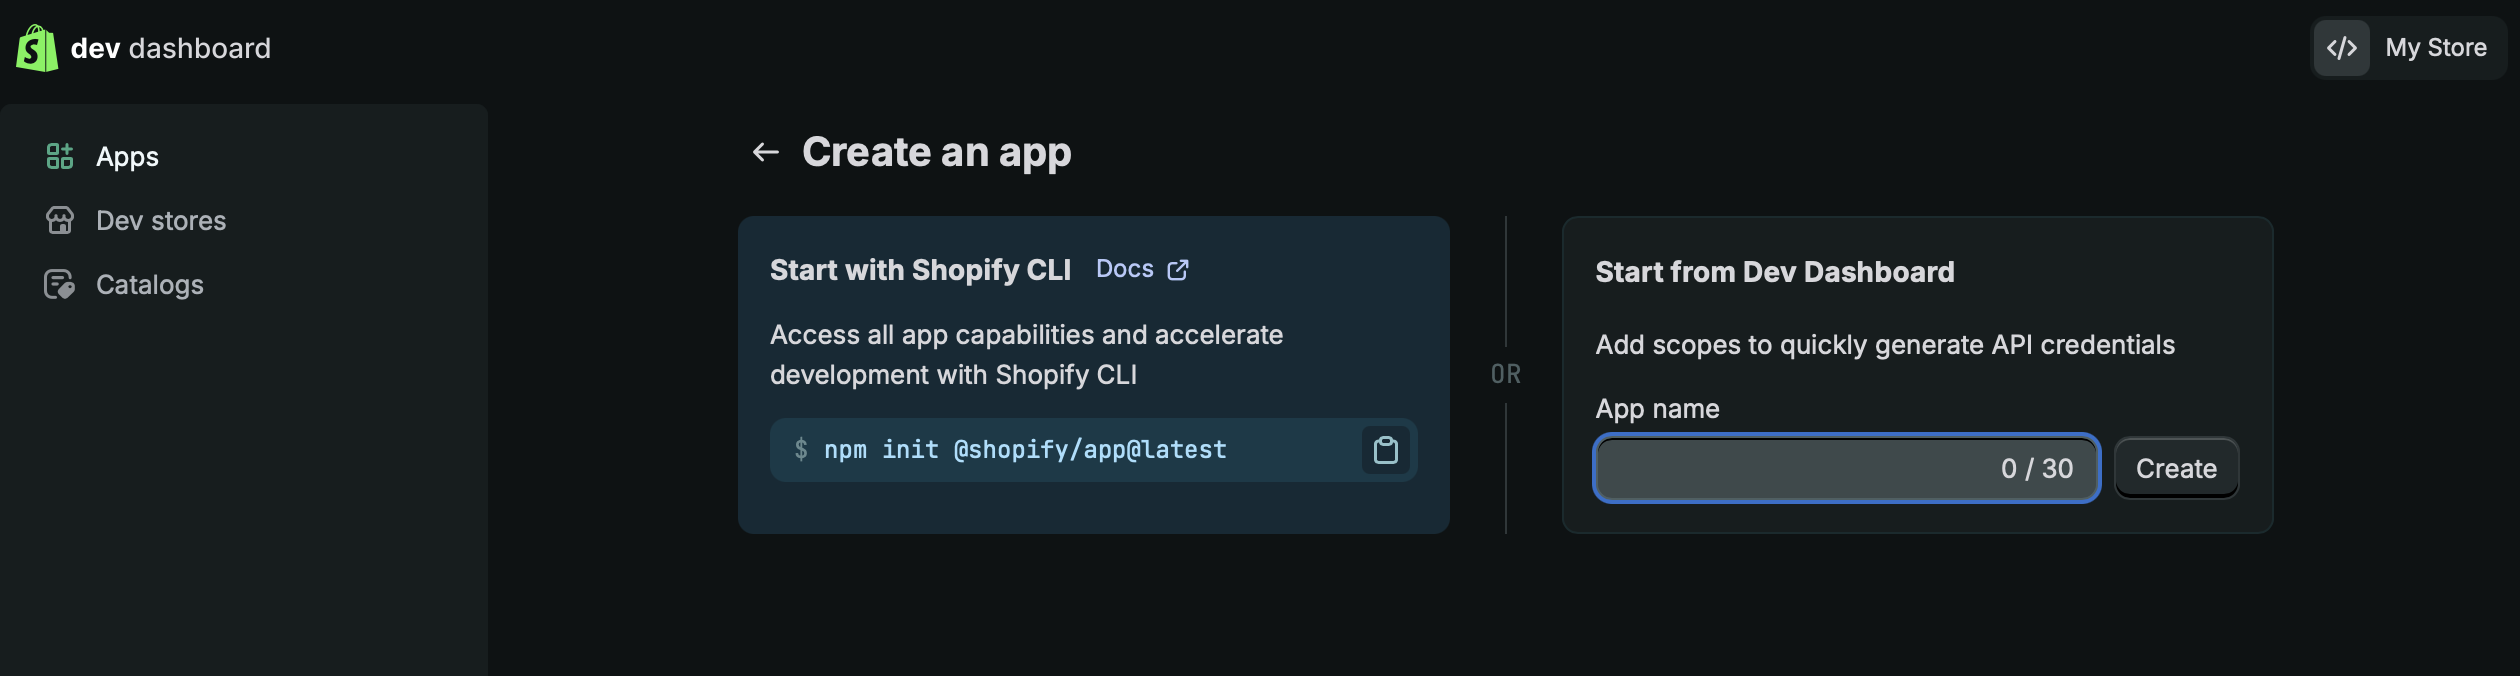
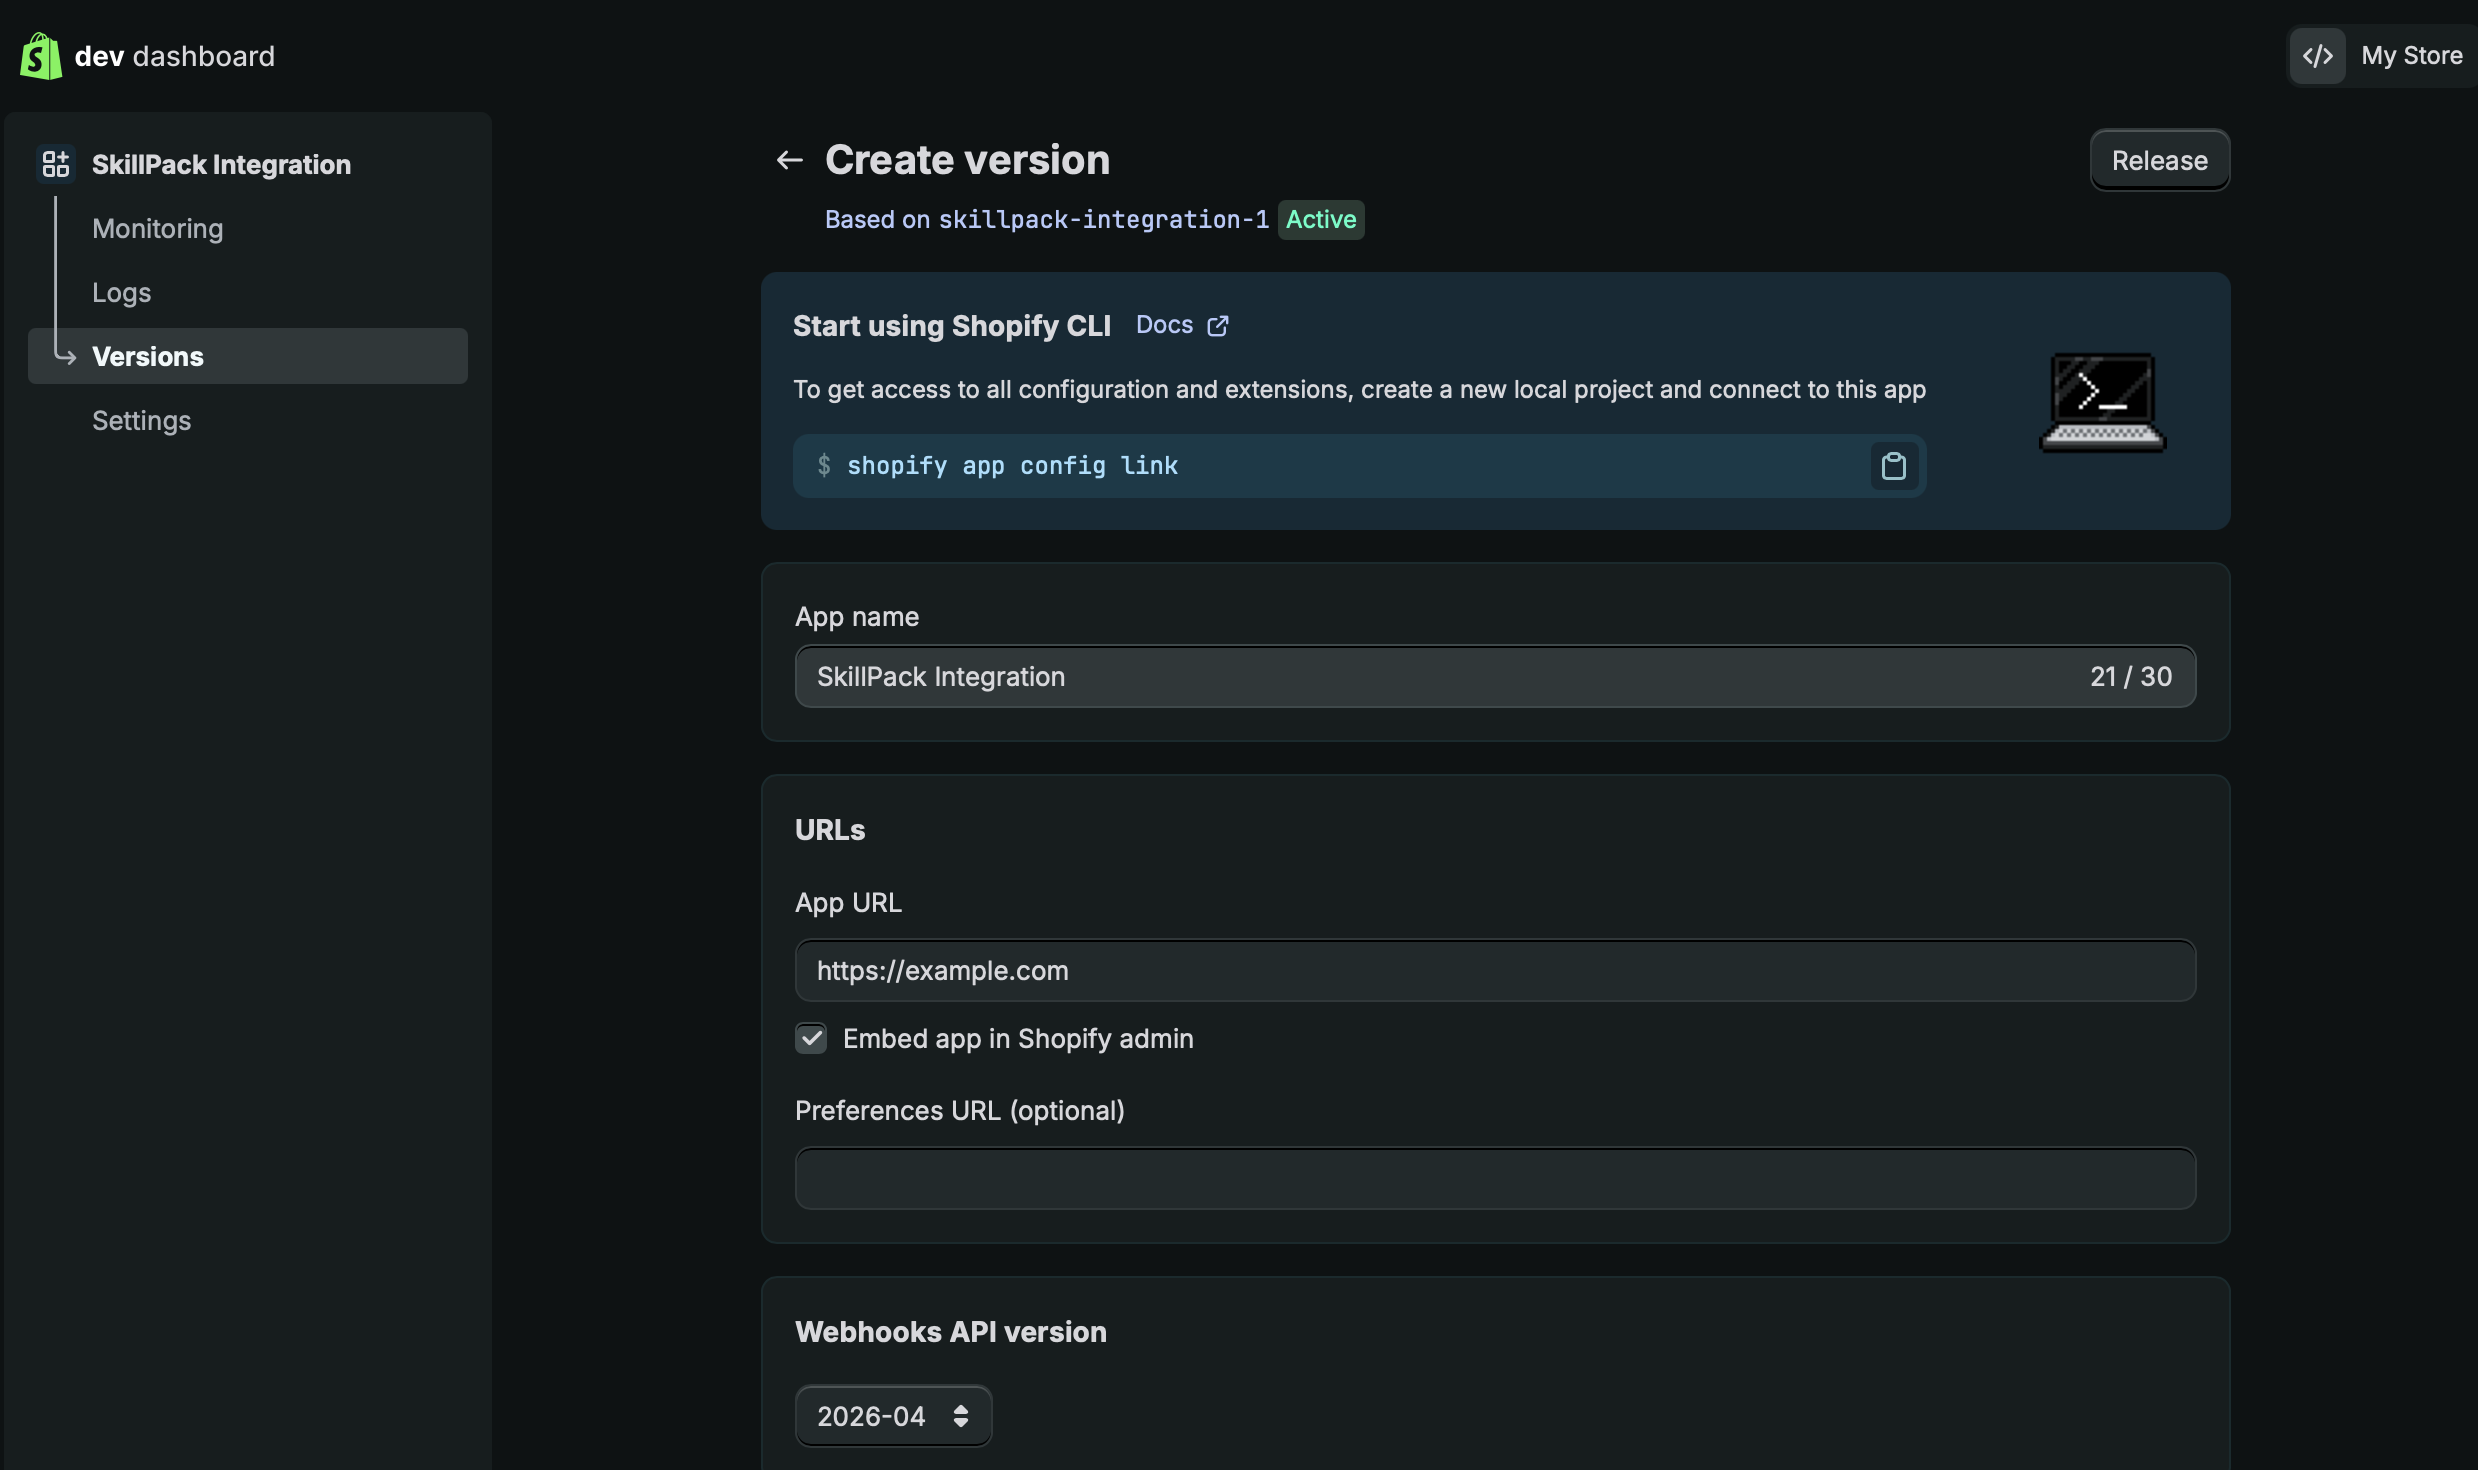
Select Create to open the Create Version page.
Step 2: Create a version and set access scopes
If you've closed the page, select Versions in the sidebar, then Create Version. Scroll to Access - Scopes.
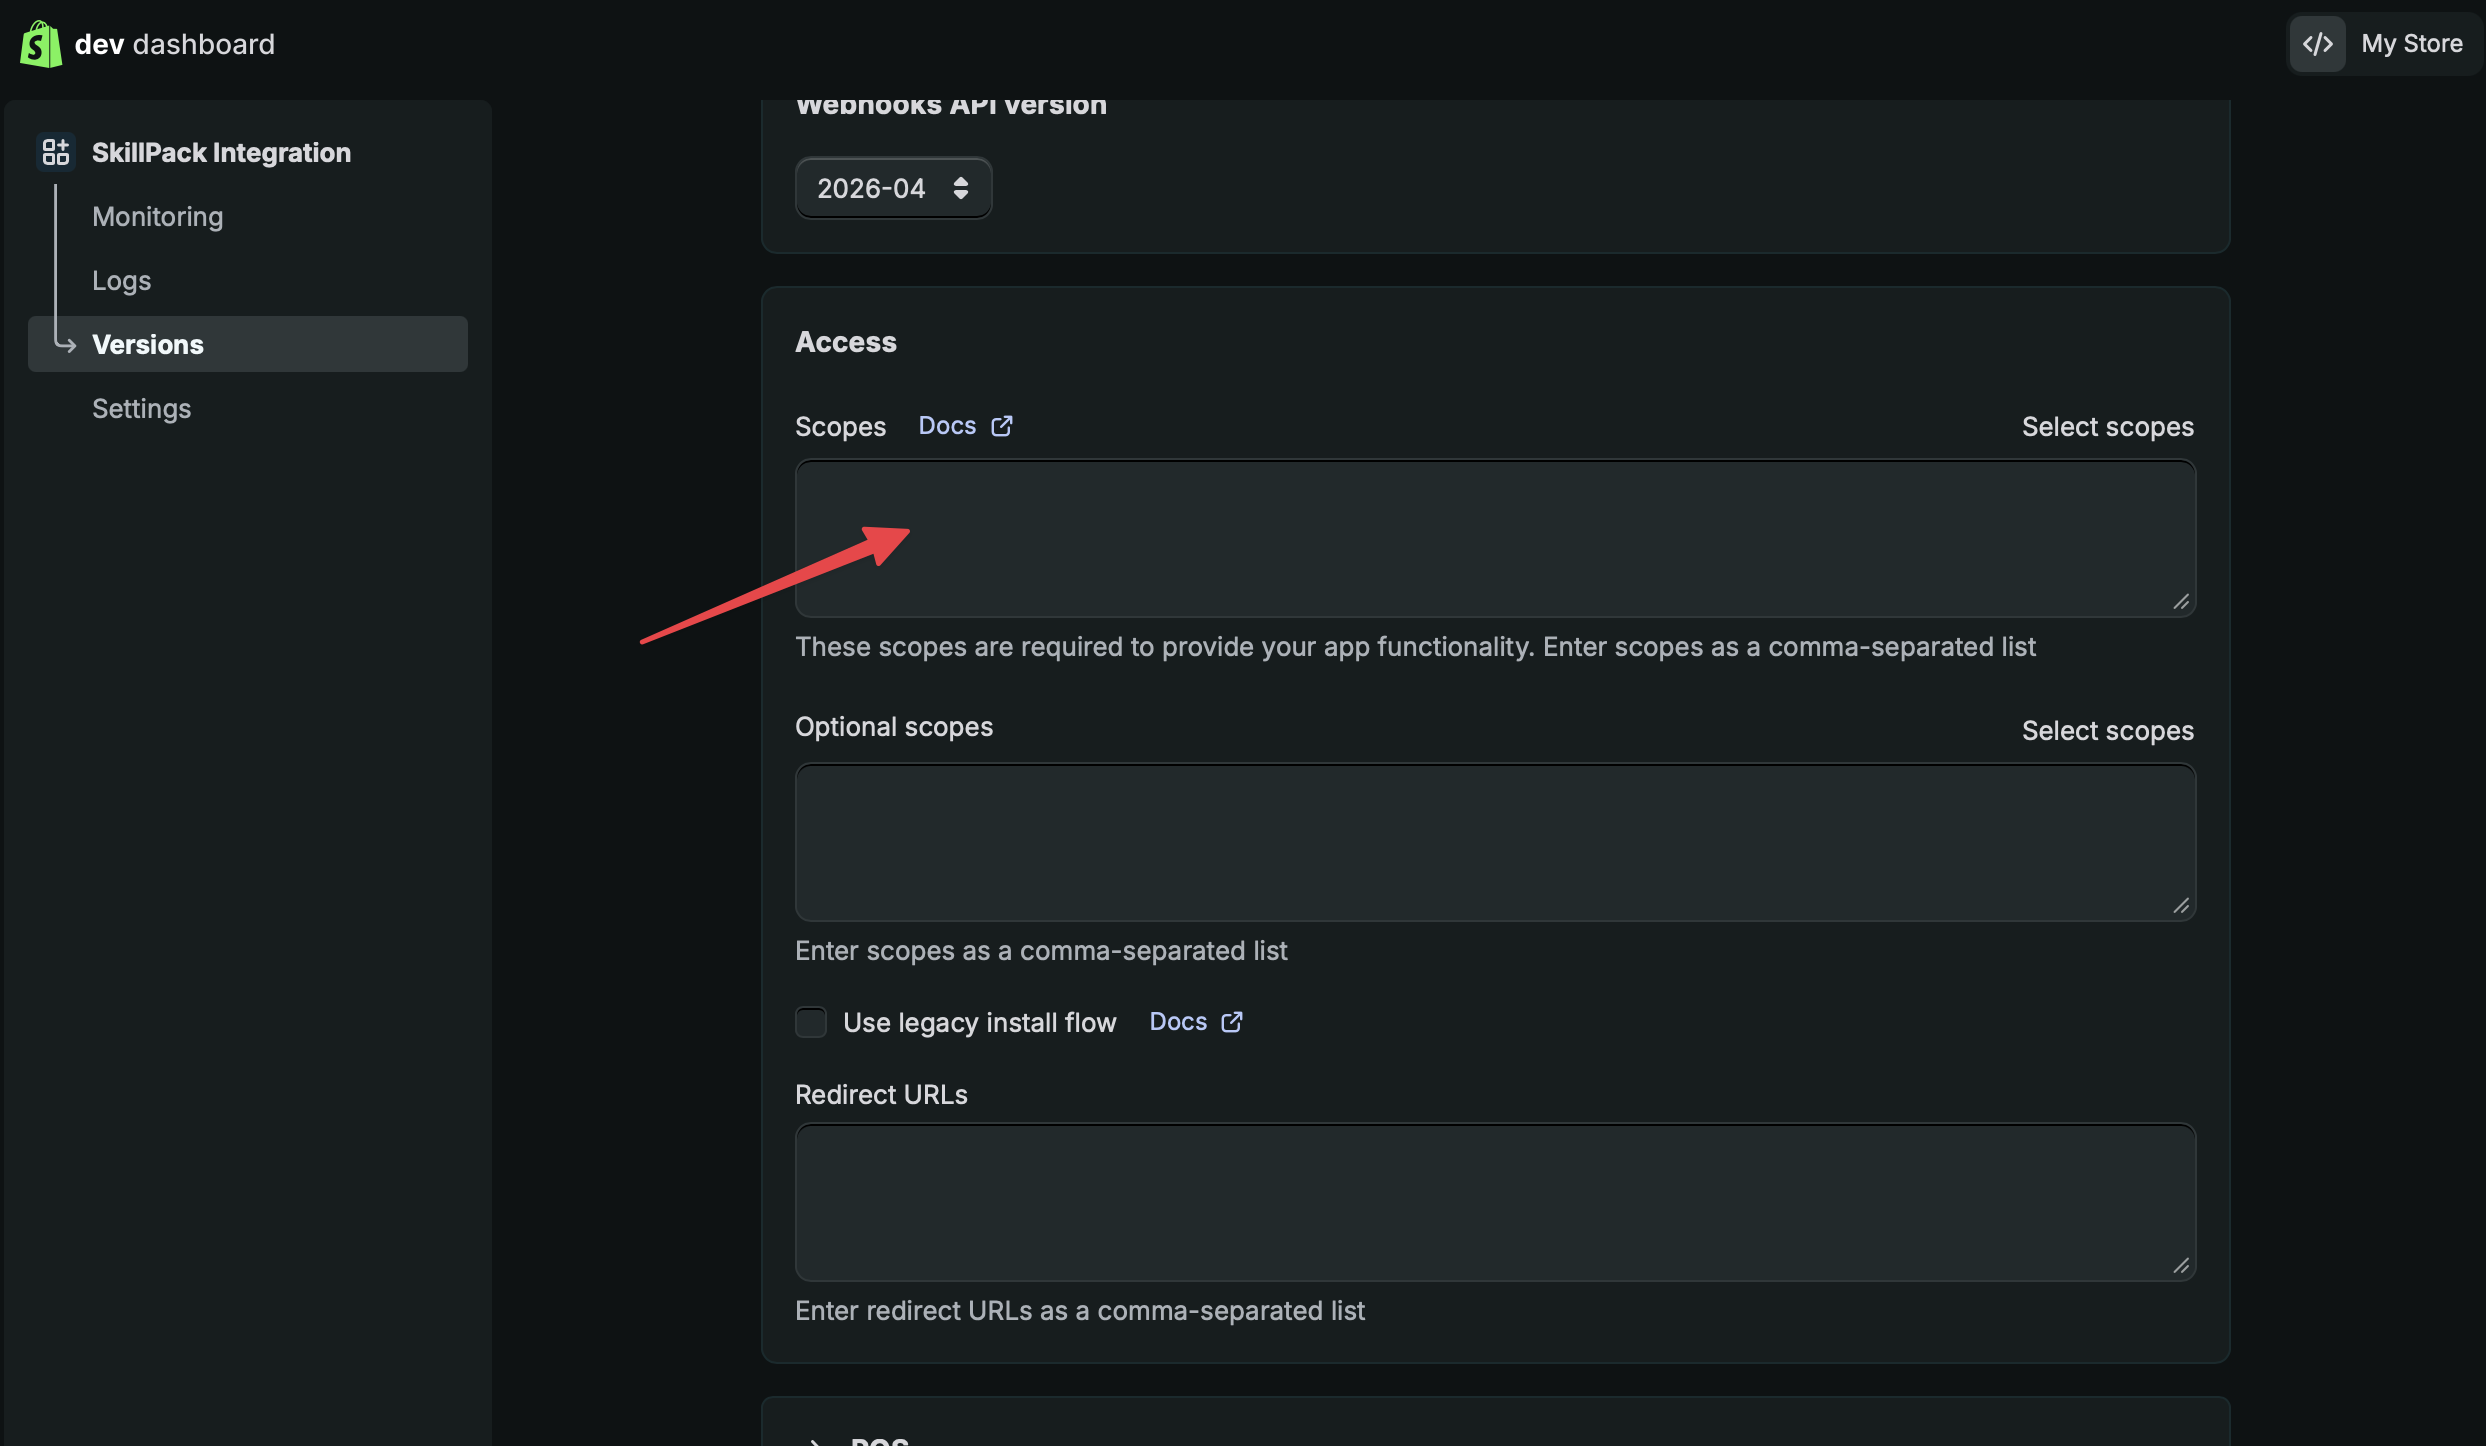
Paste the following value into Access - Scopes:
read_files,write_files,read_online_store_pages,write_online_store_pages,read_content,write_content
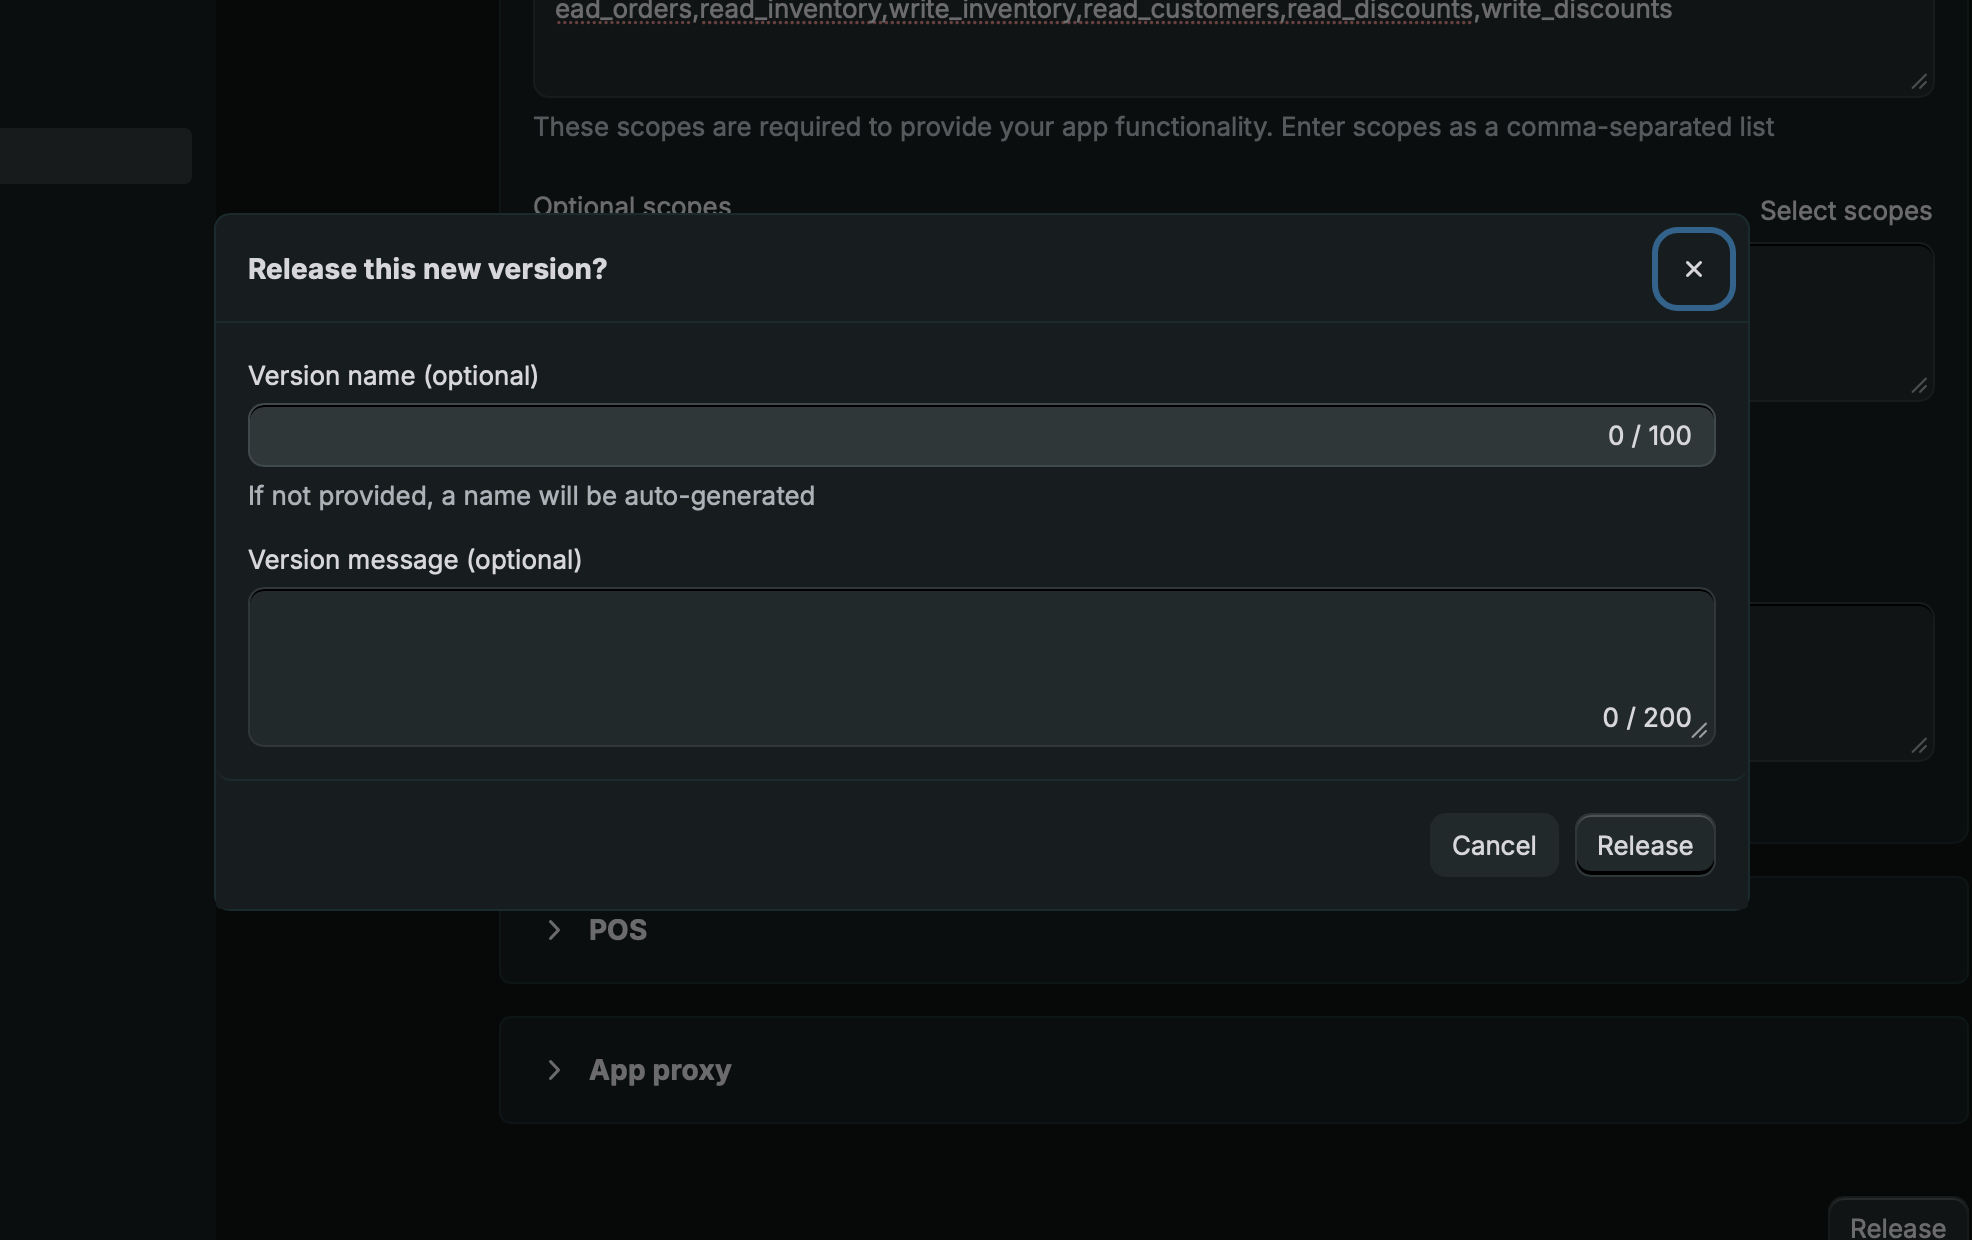
Scroll to the bottom, select Release, and confirm by selecting Release again. No additional fields are needed for this step.
Step 3: Find your Client ID and Client Secret
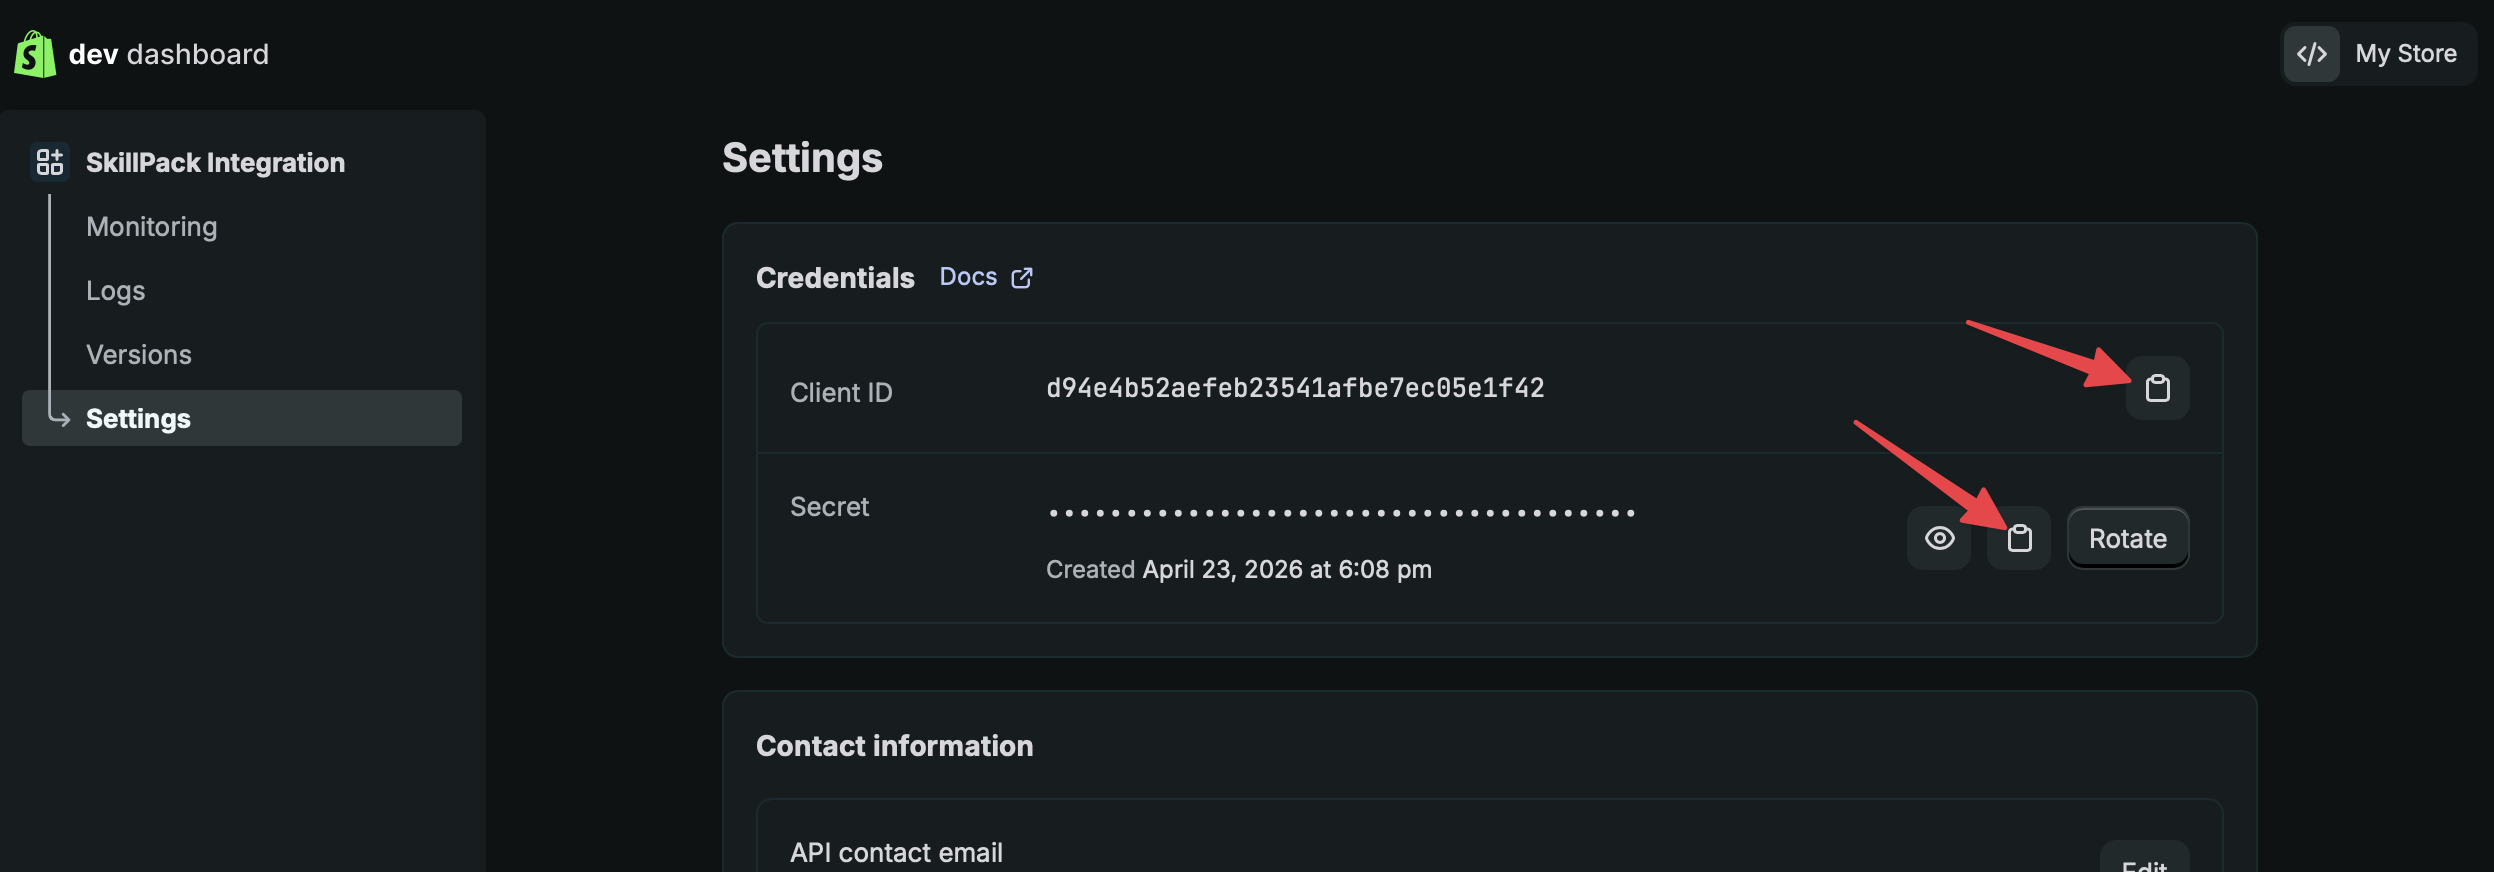
Select Settings in the sidebar, then copy the Client ID and Client Secret shown on the right.
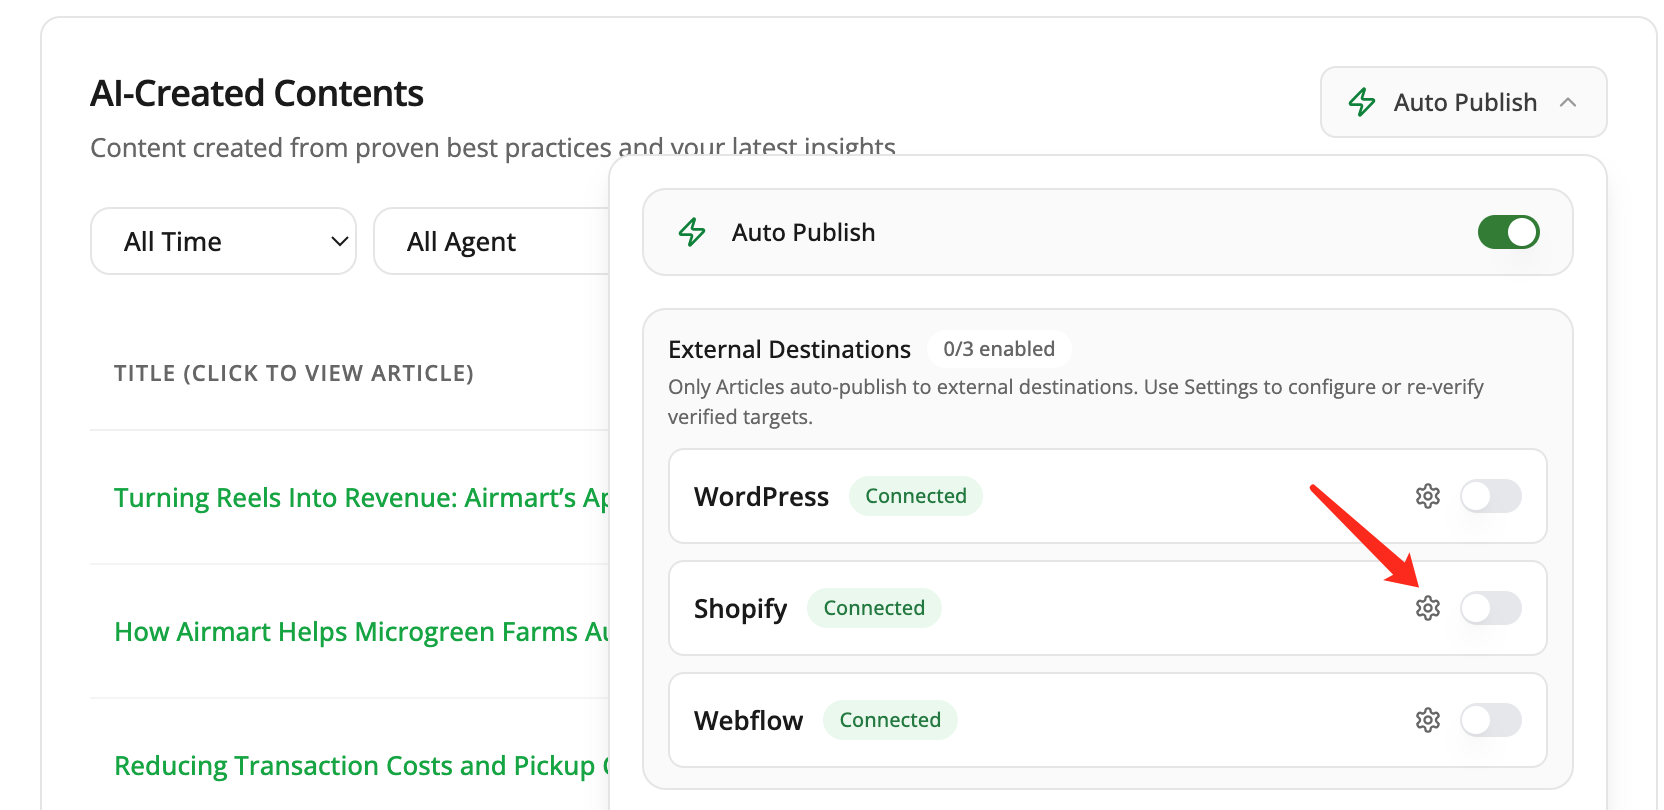
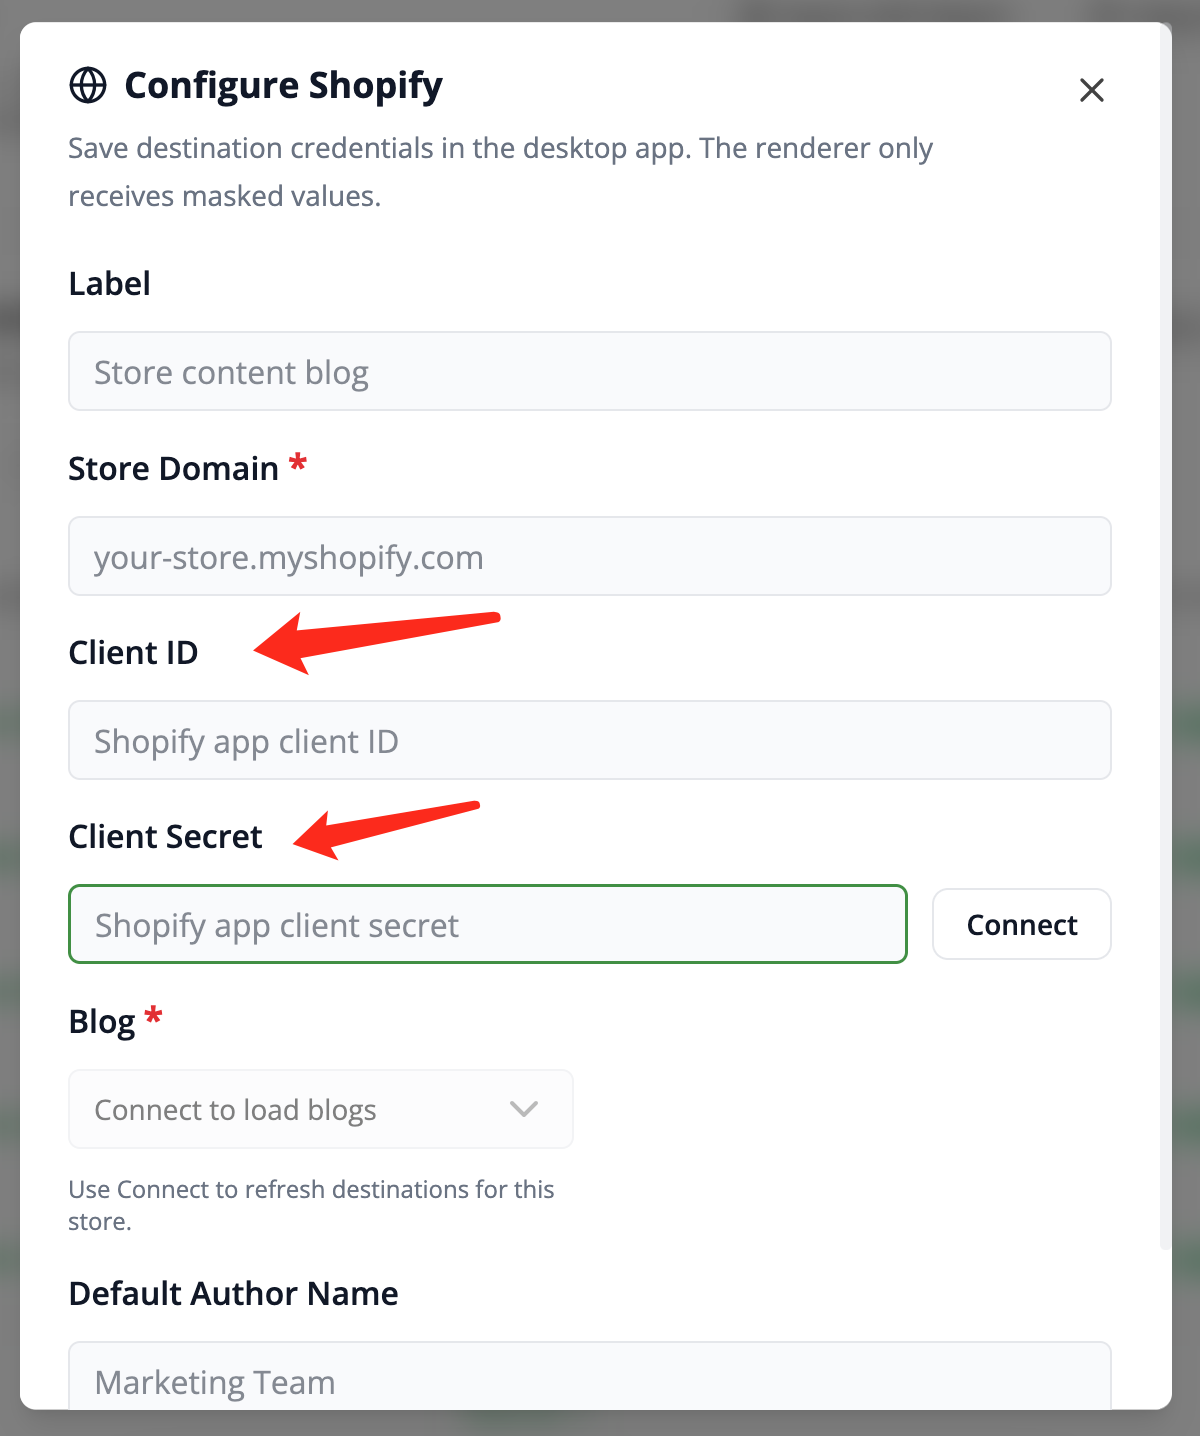
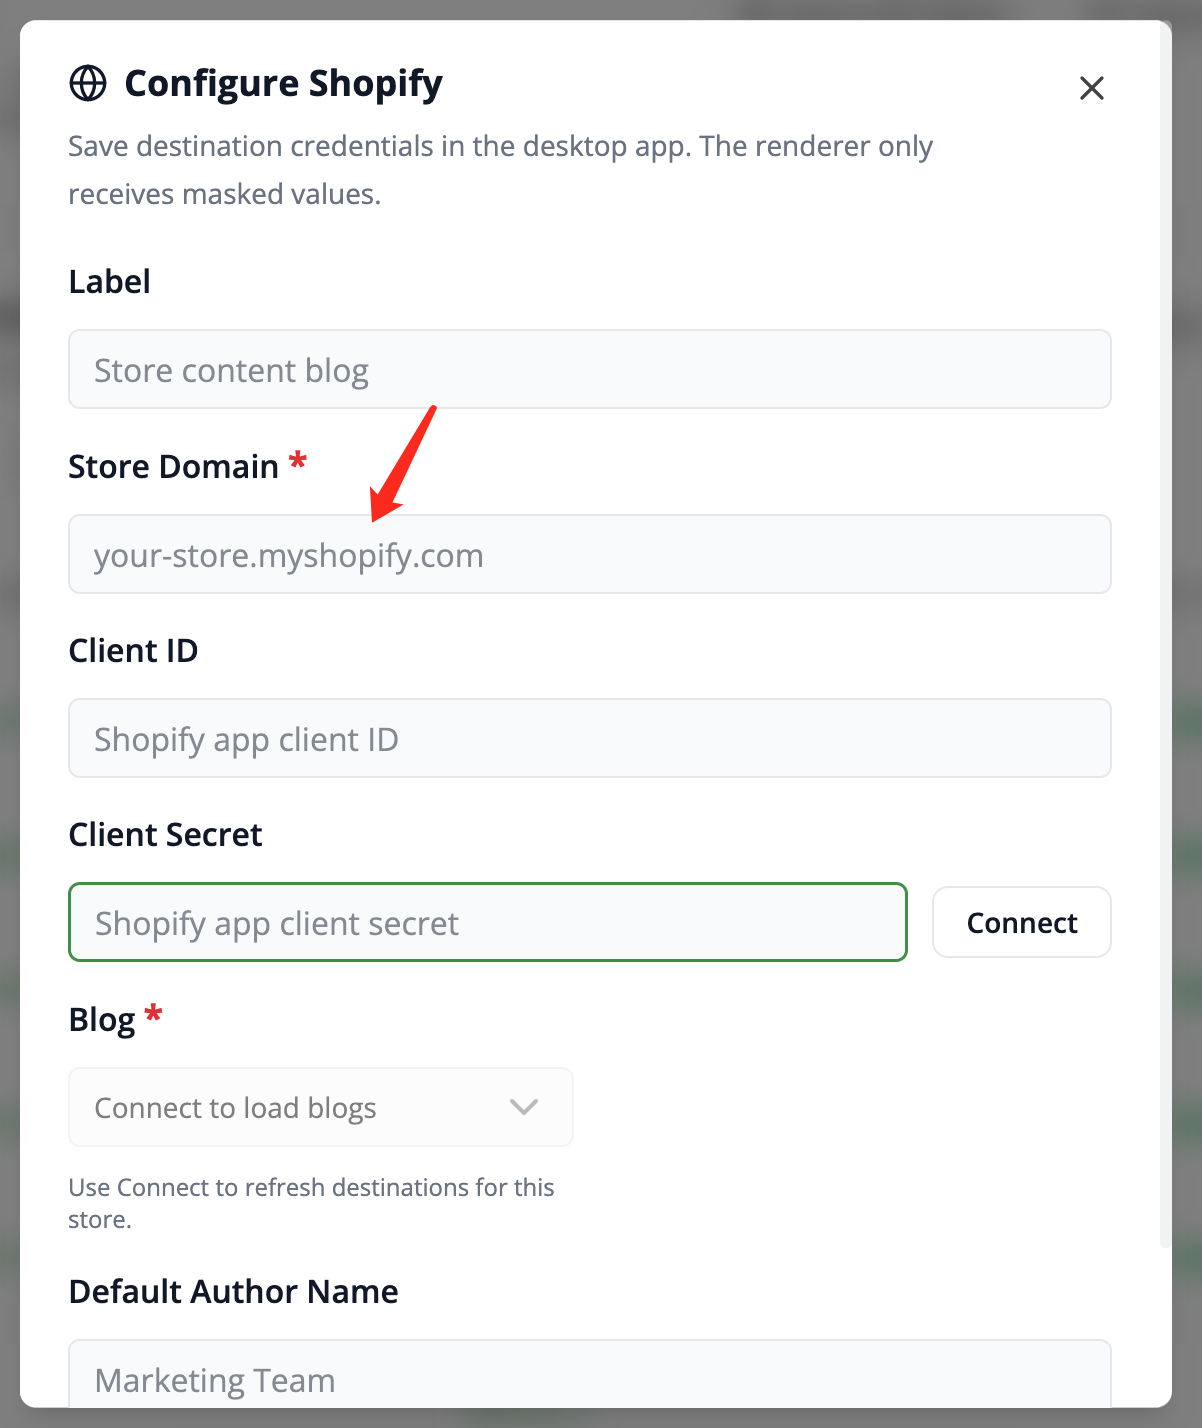
Enter each value in its corresponding field in Frevana.
Keep your Client Secret private. Treat it like a password and enter it only in the intended Frevana connection settings.
Step 4: Install the app on your store
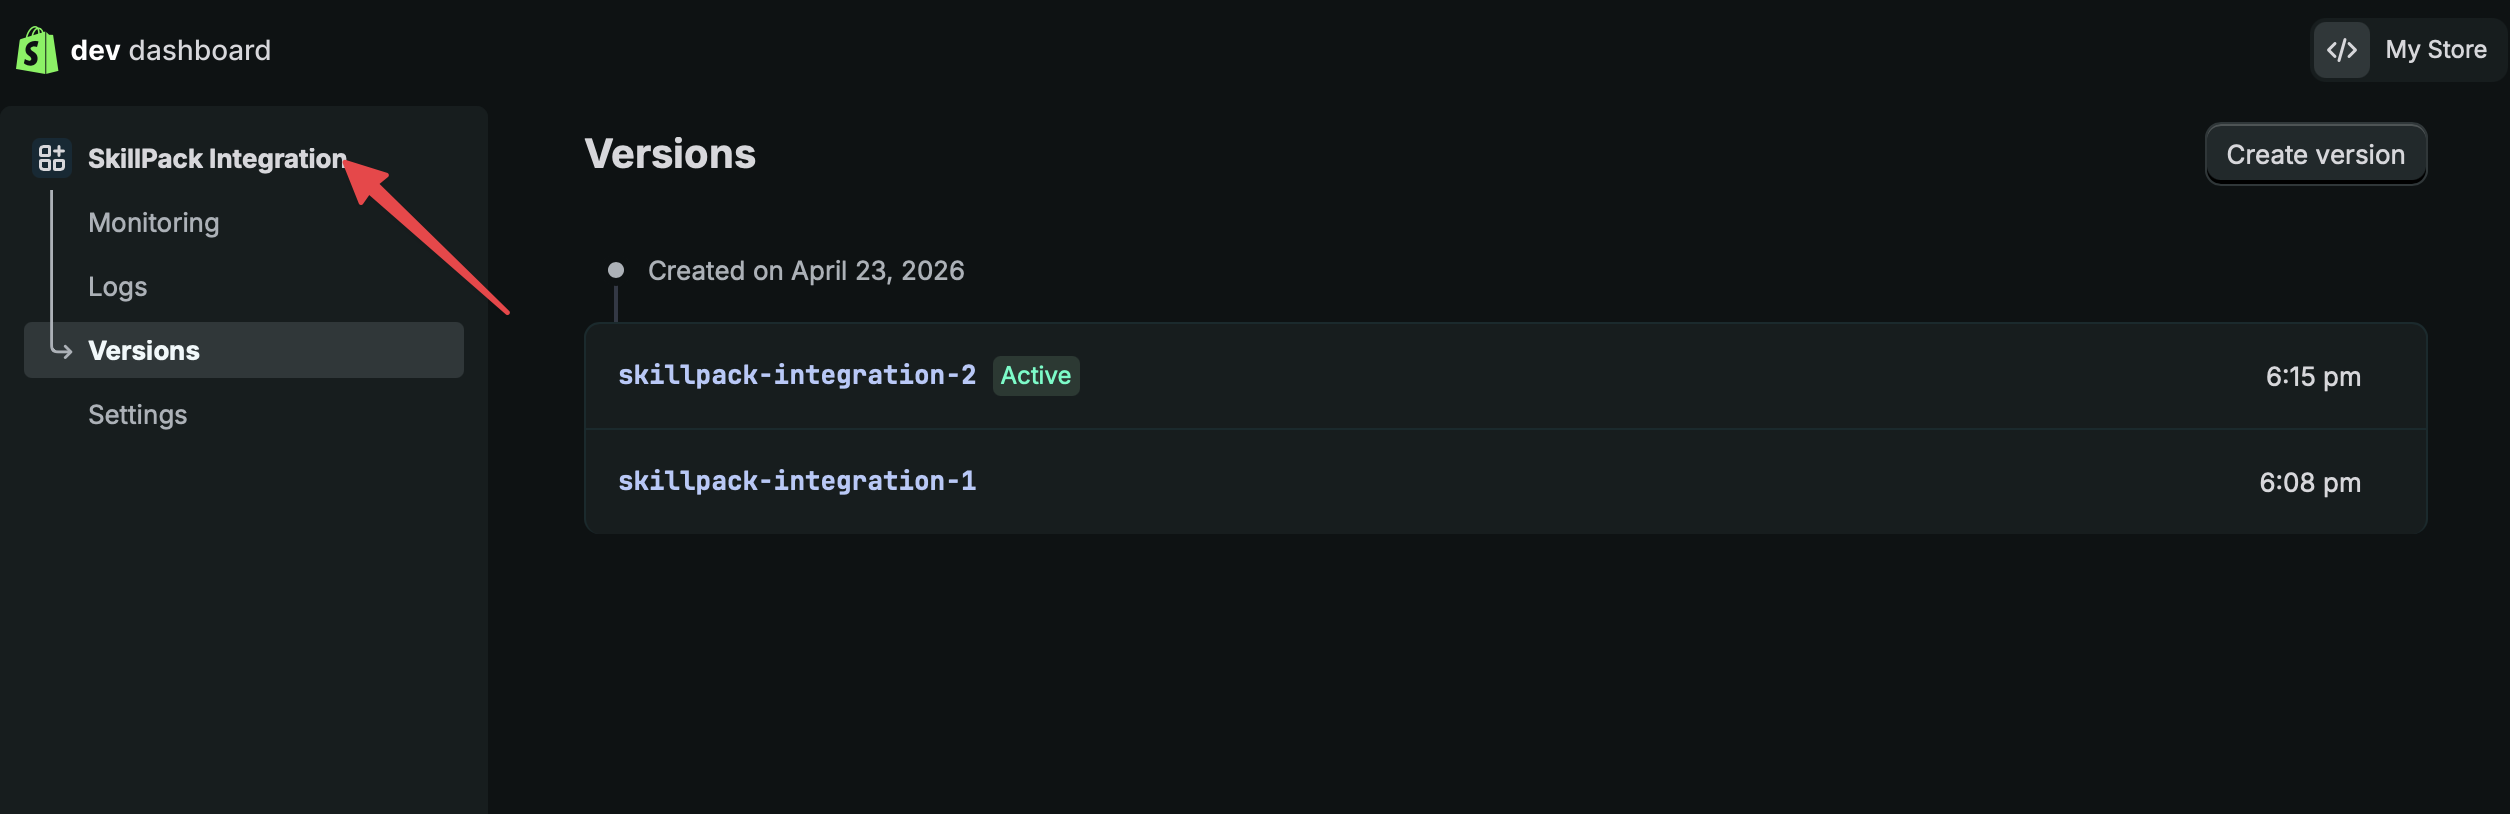
Select your app in the sidebar to return to its home page.
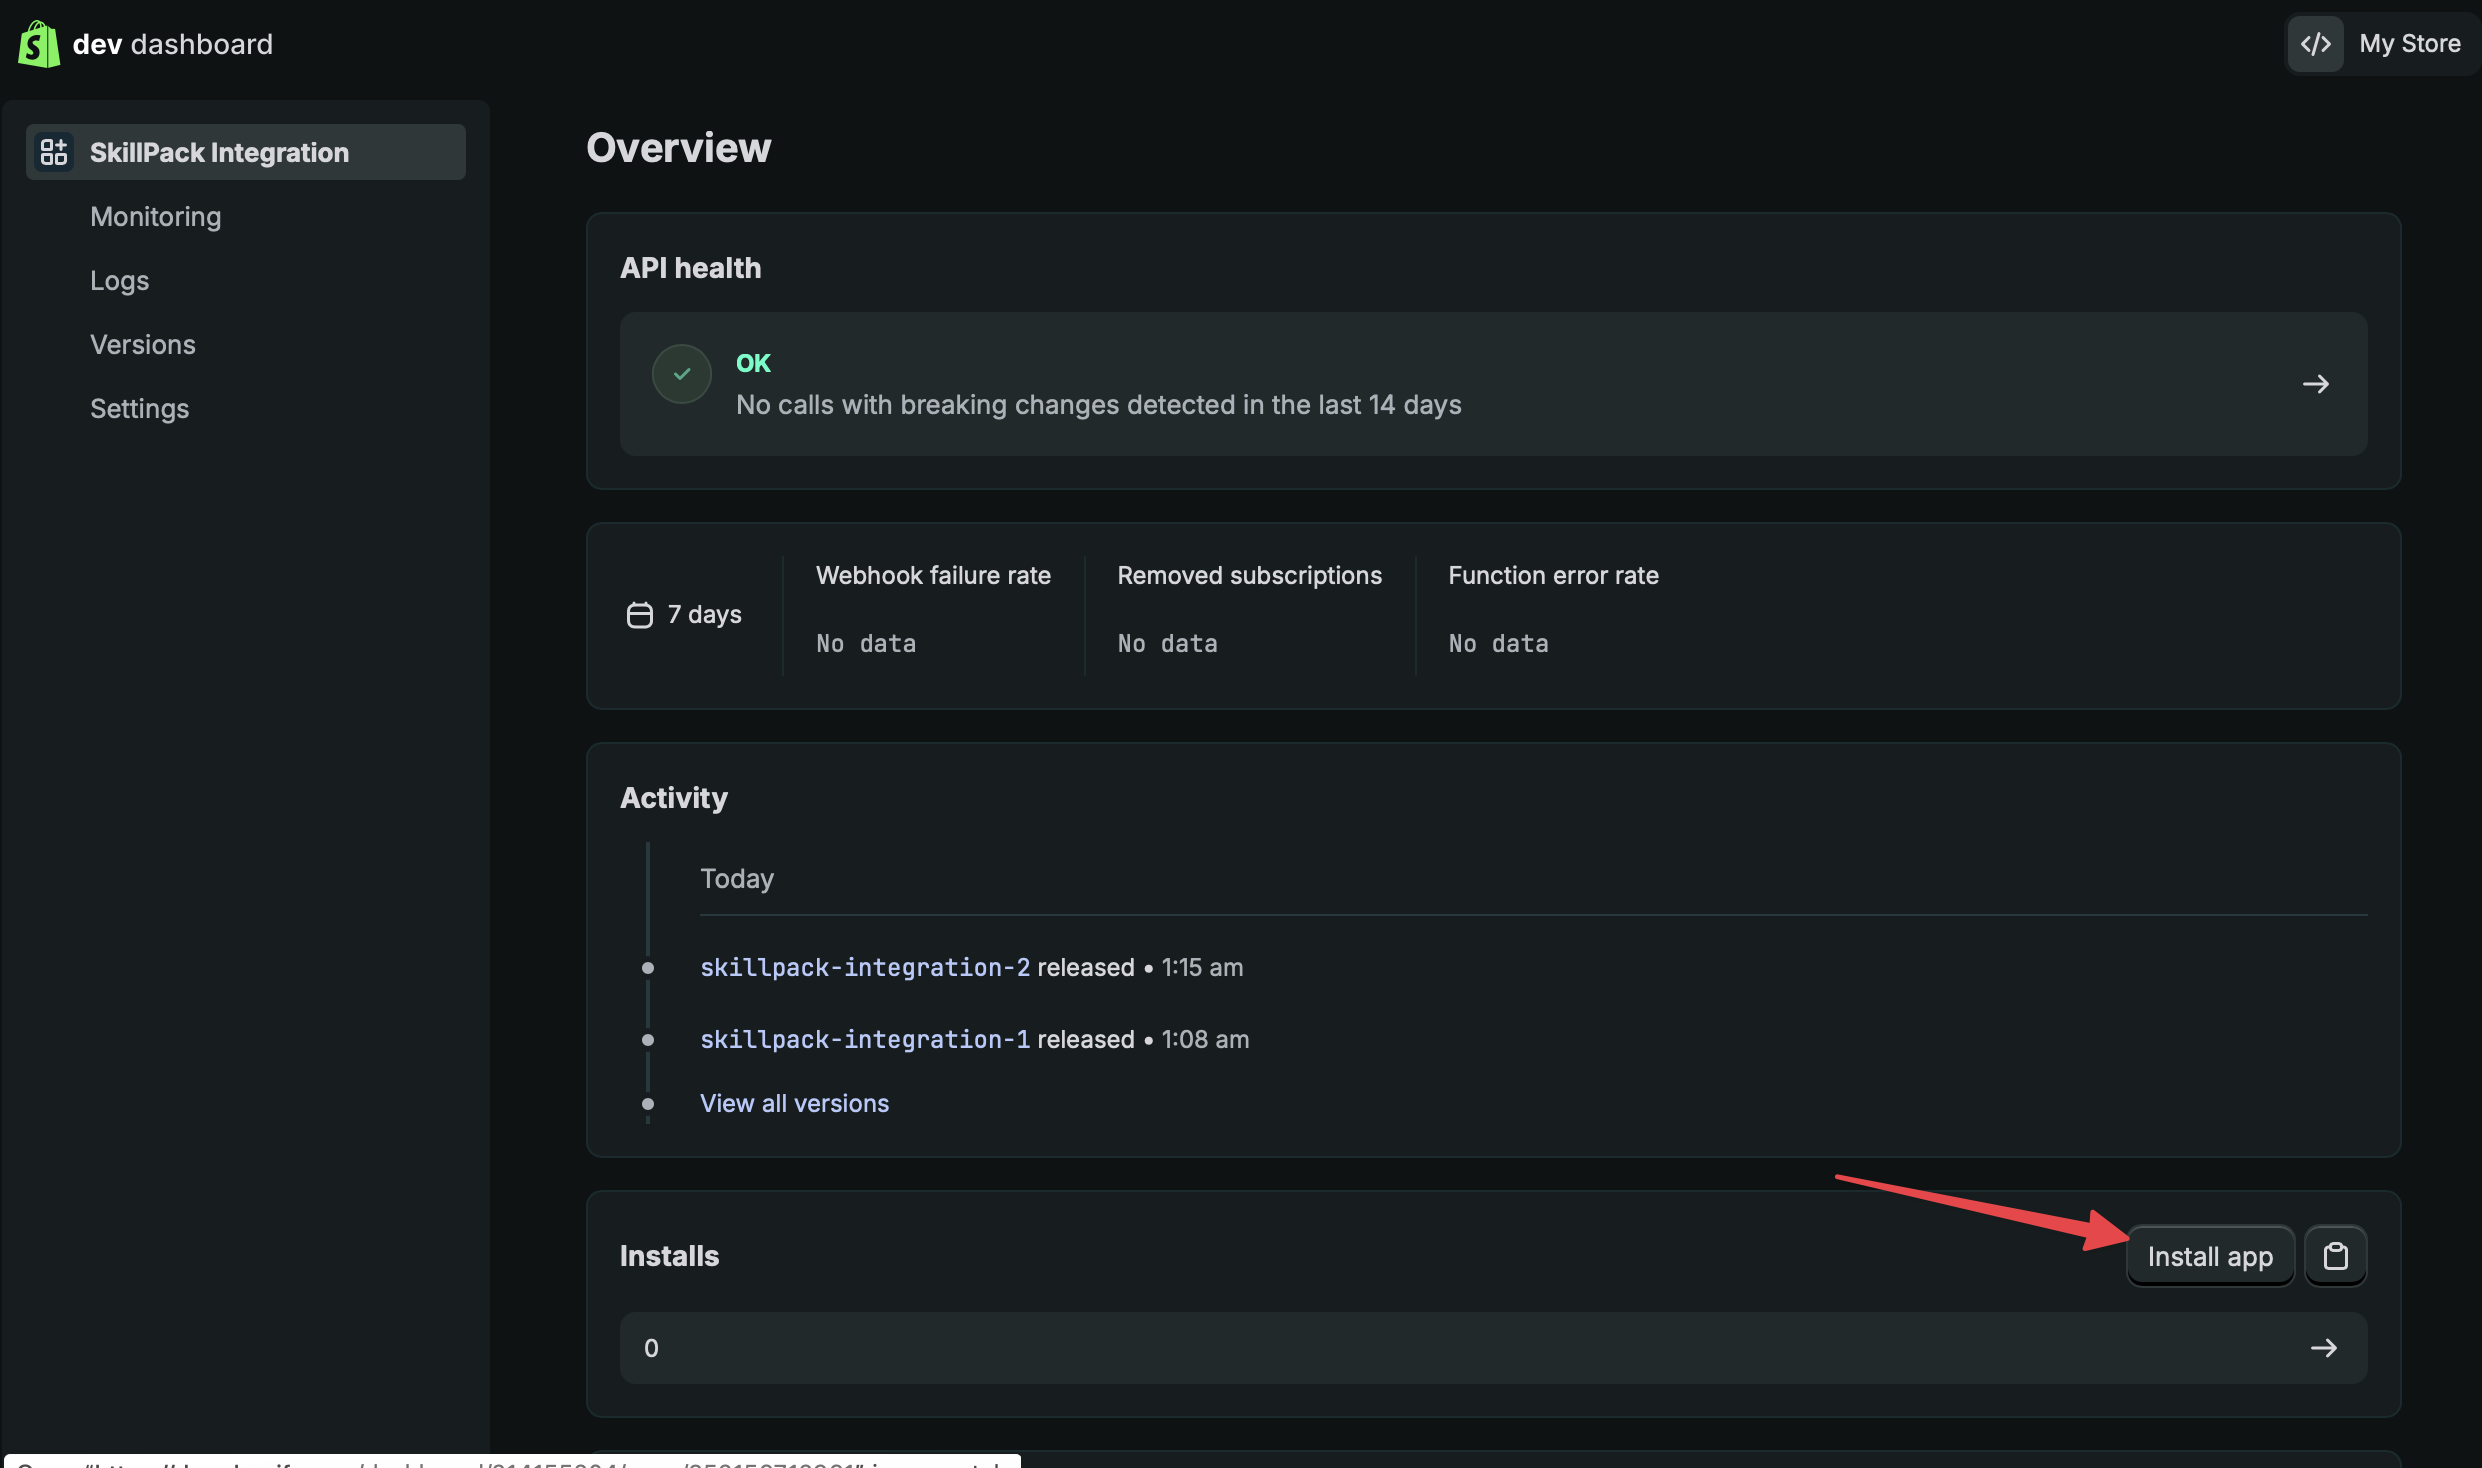
Select Install app in the lower-right corner.
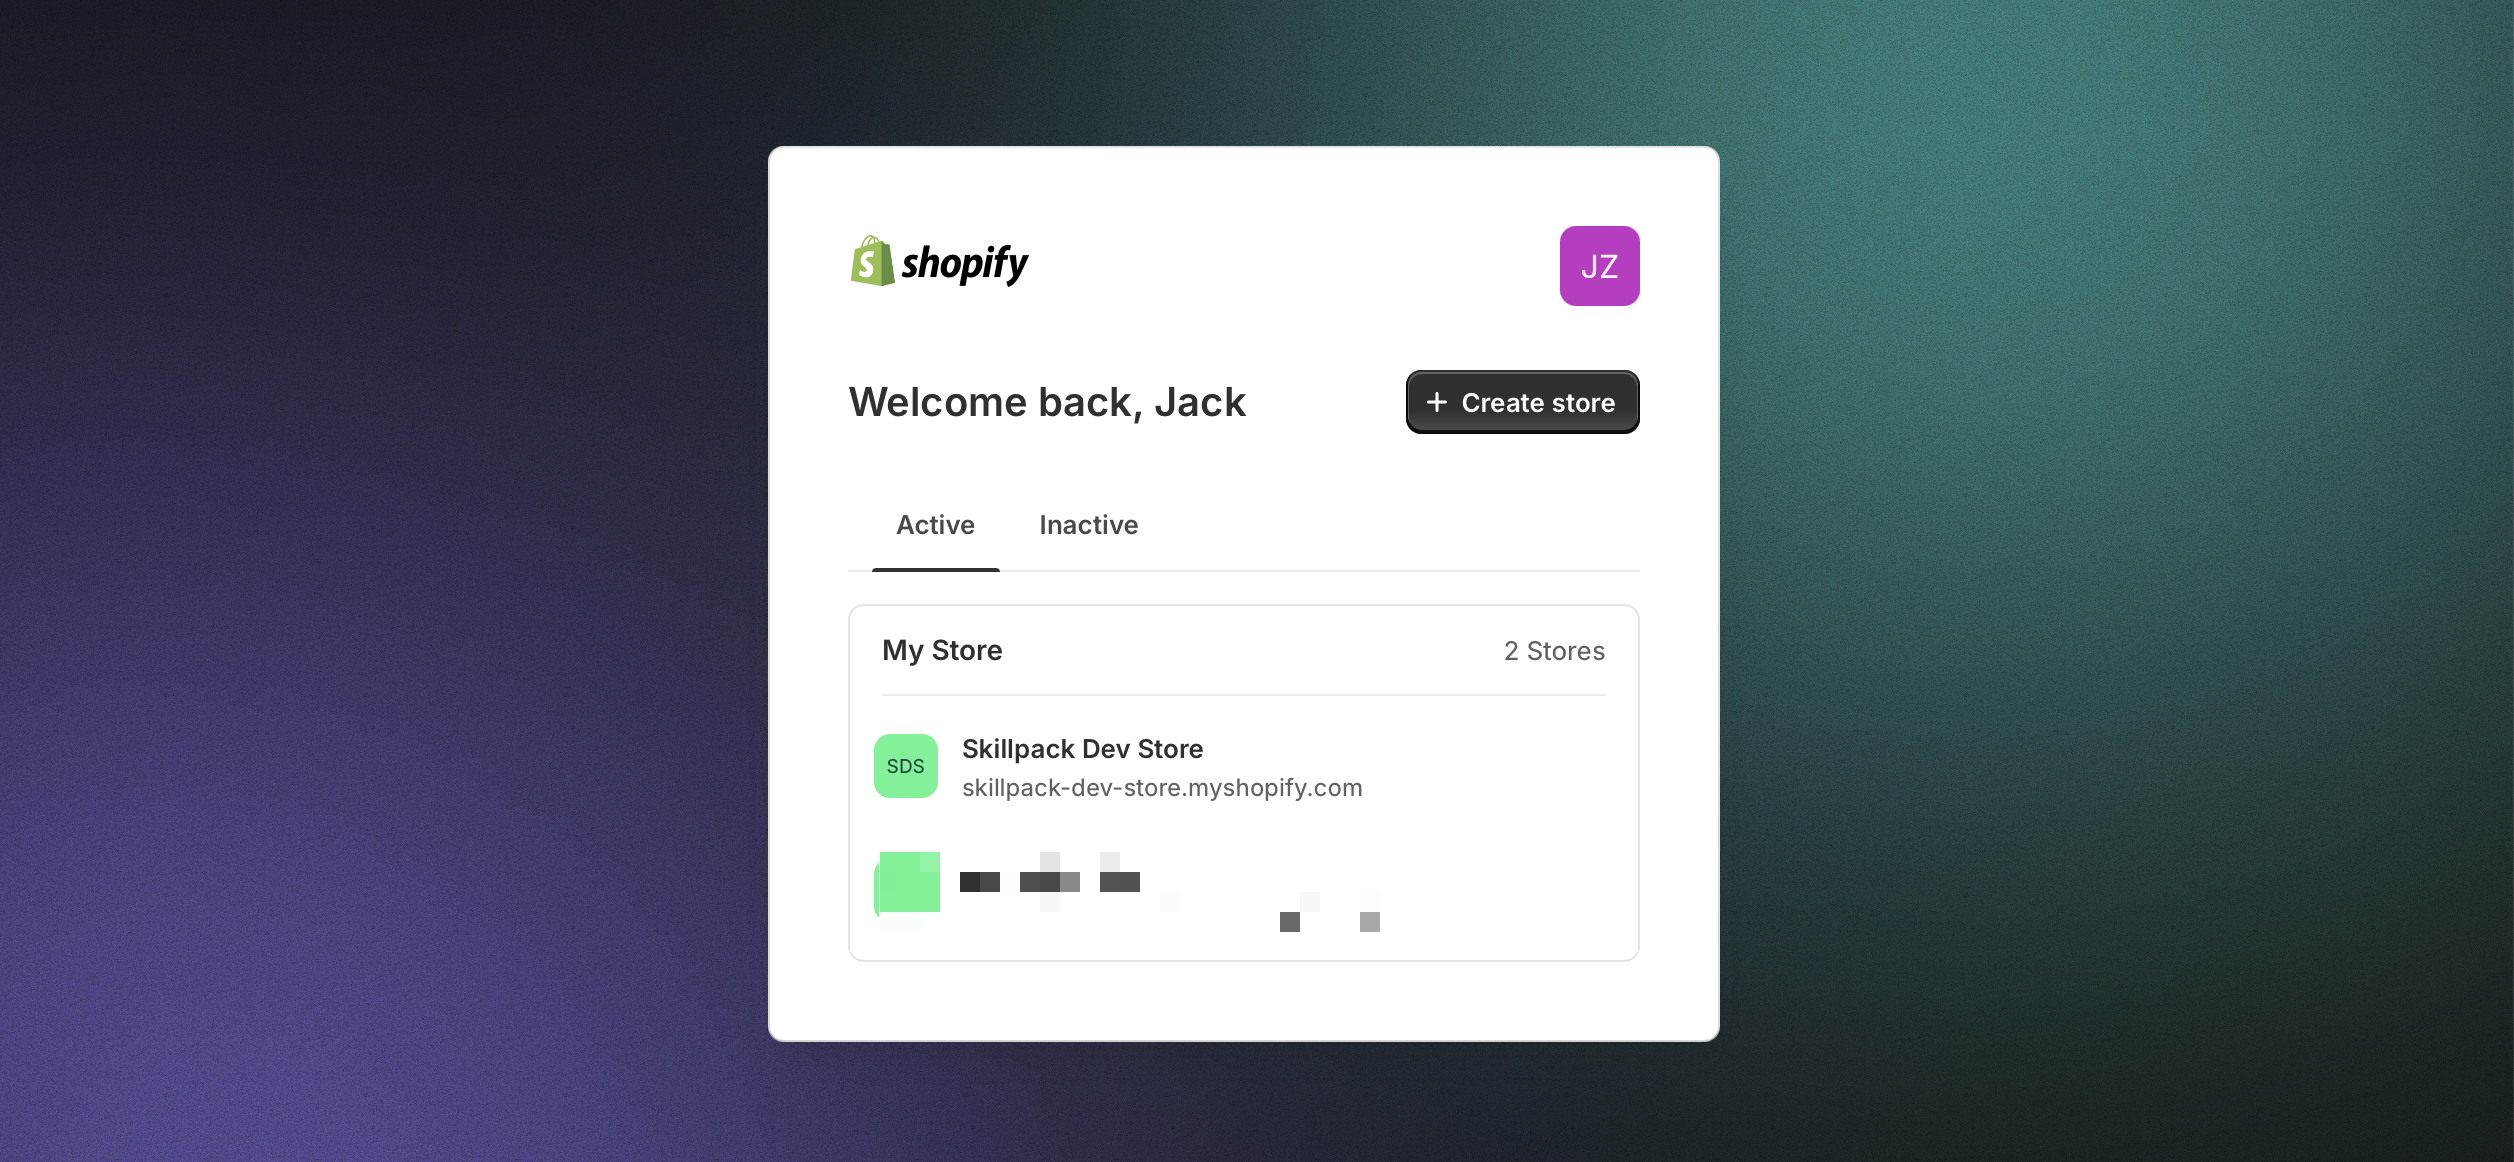
Choose the store you'd like to connect.
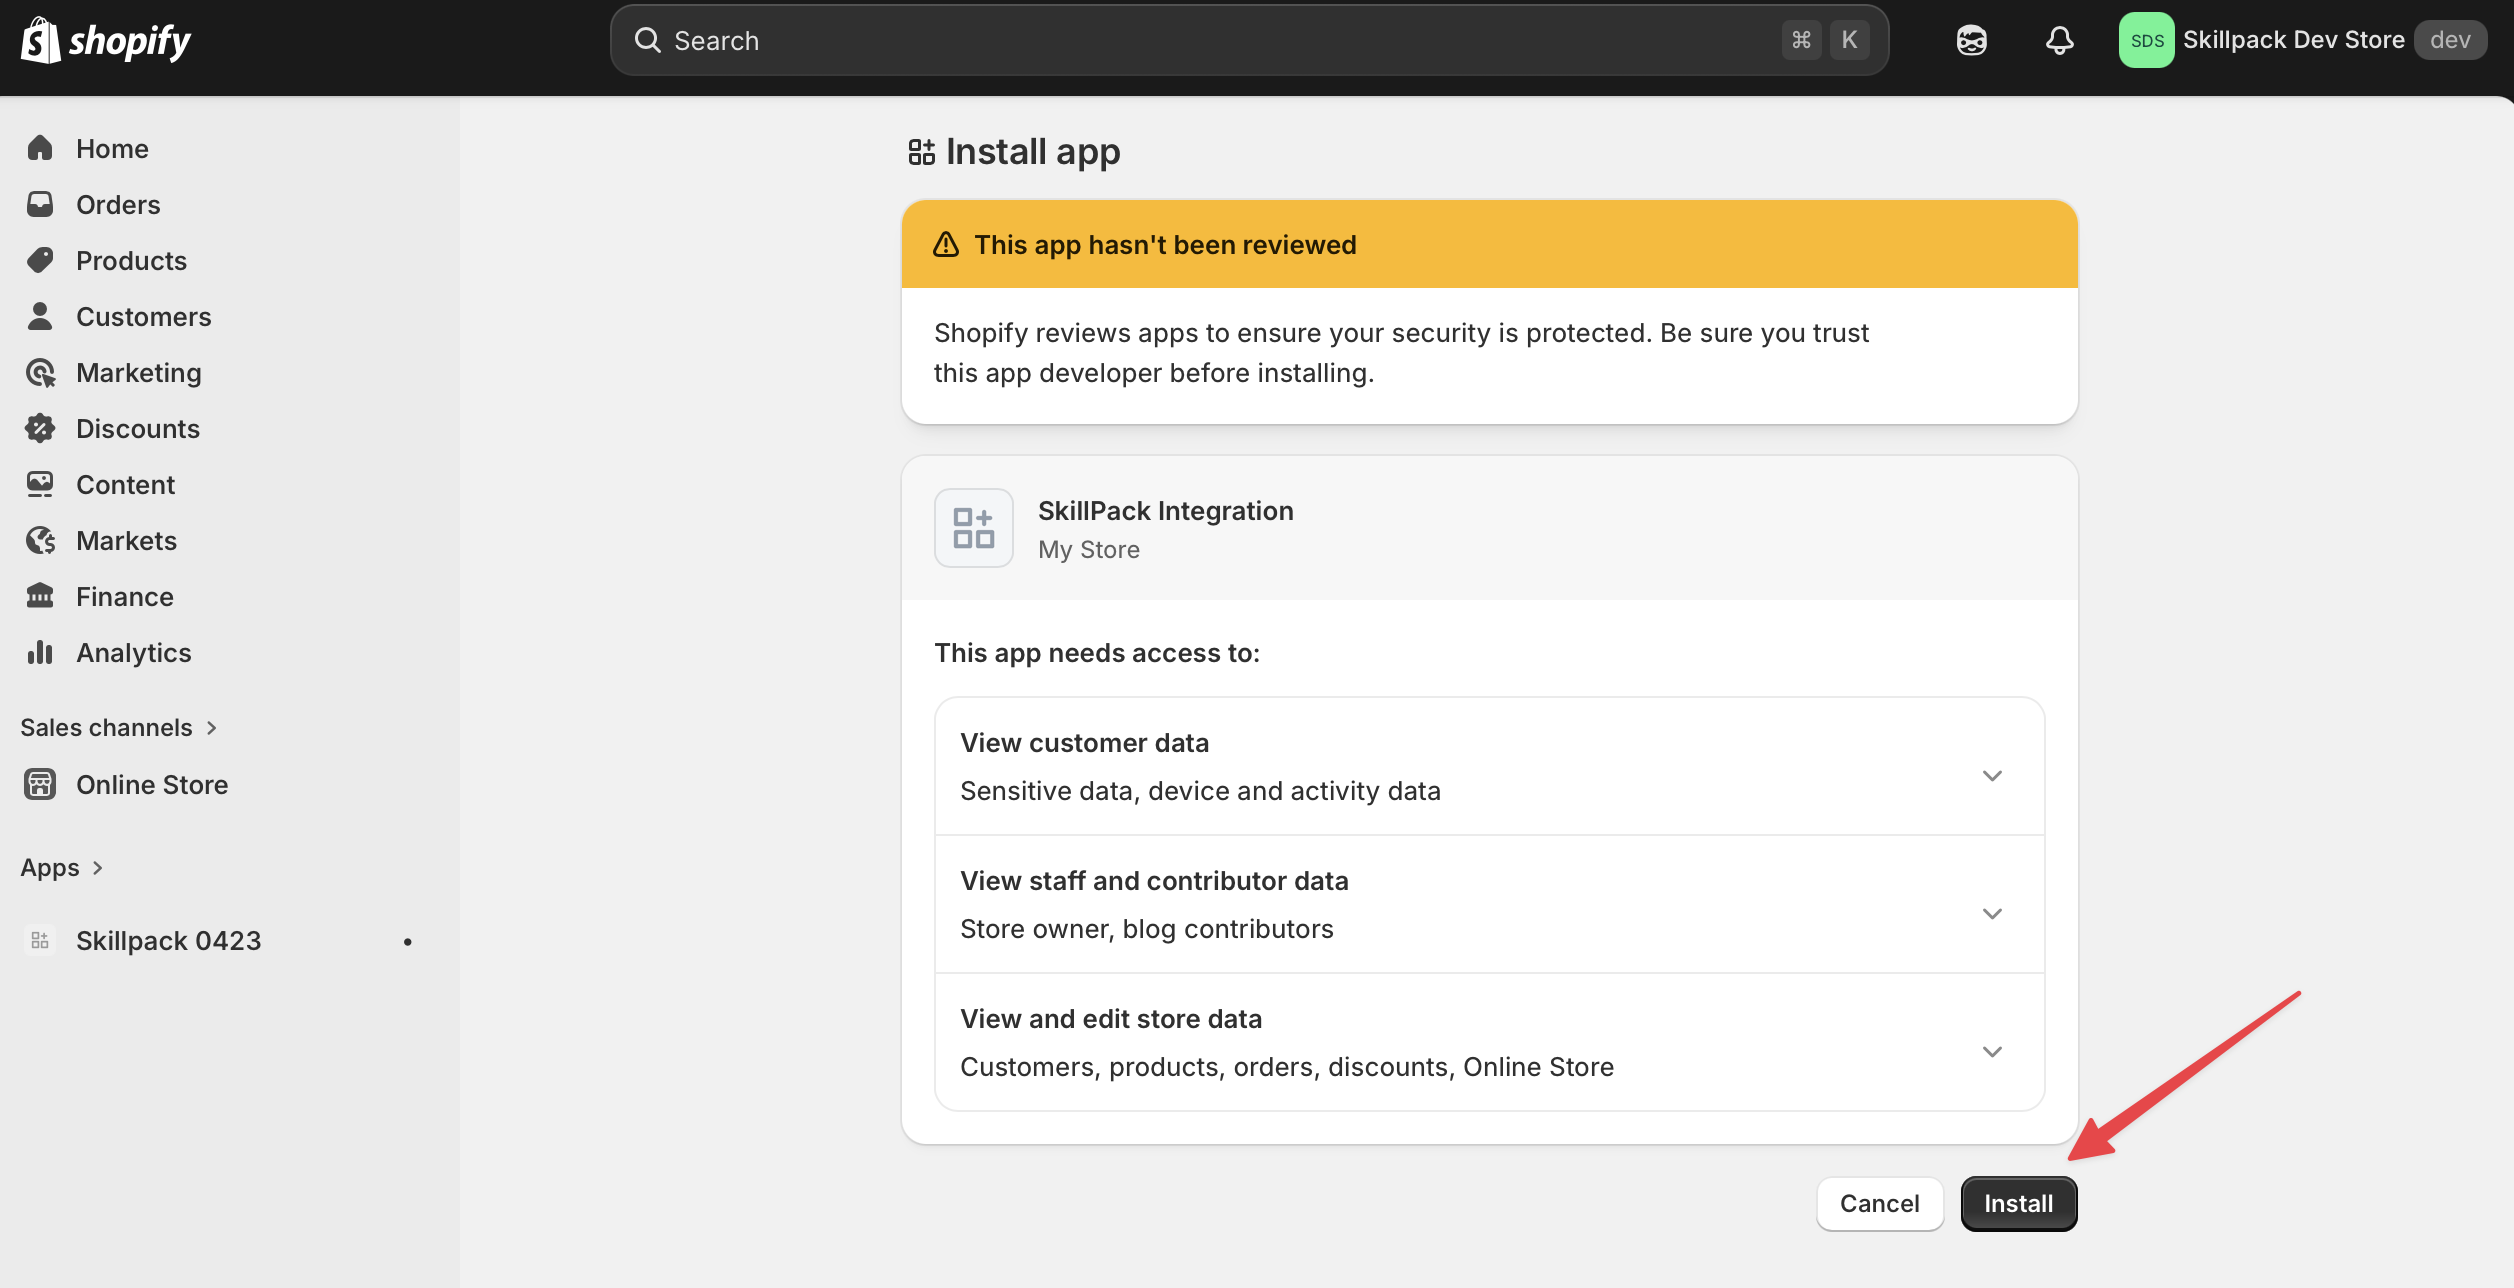
Select Install to confirm.
Step 5: Add your store domain
Open your store's home page and copy its domain. It should look like yourstore.myshopify.com.
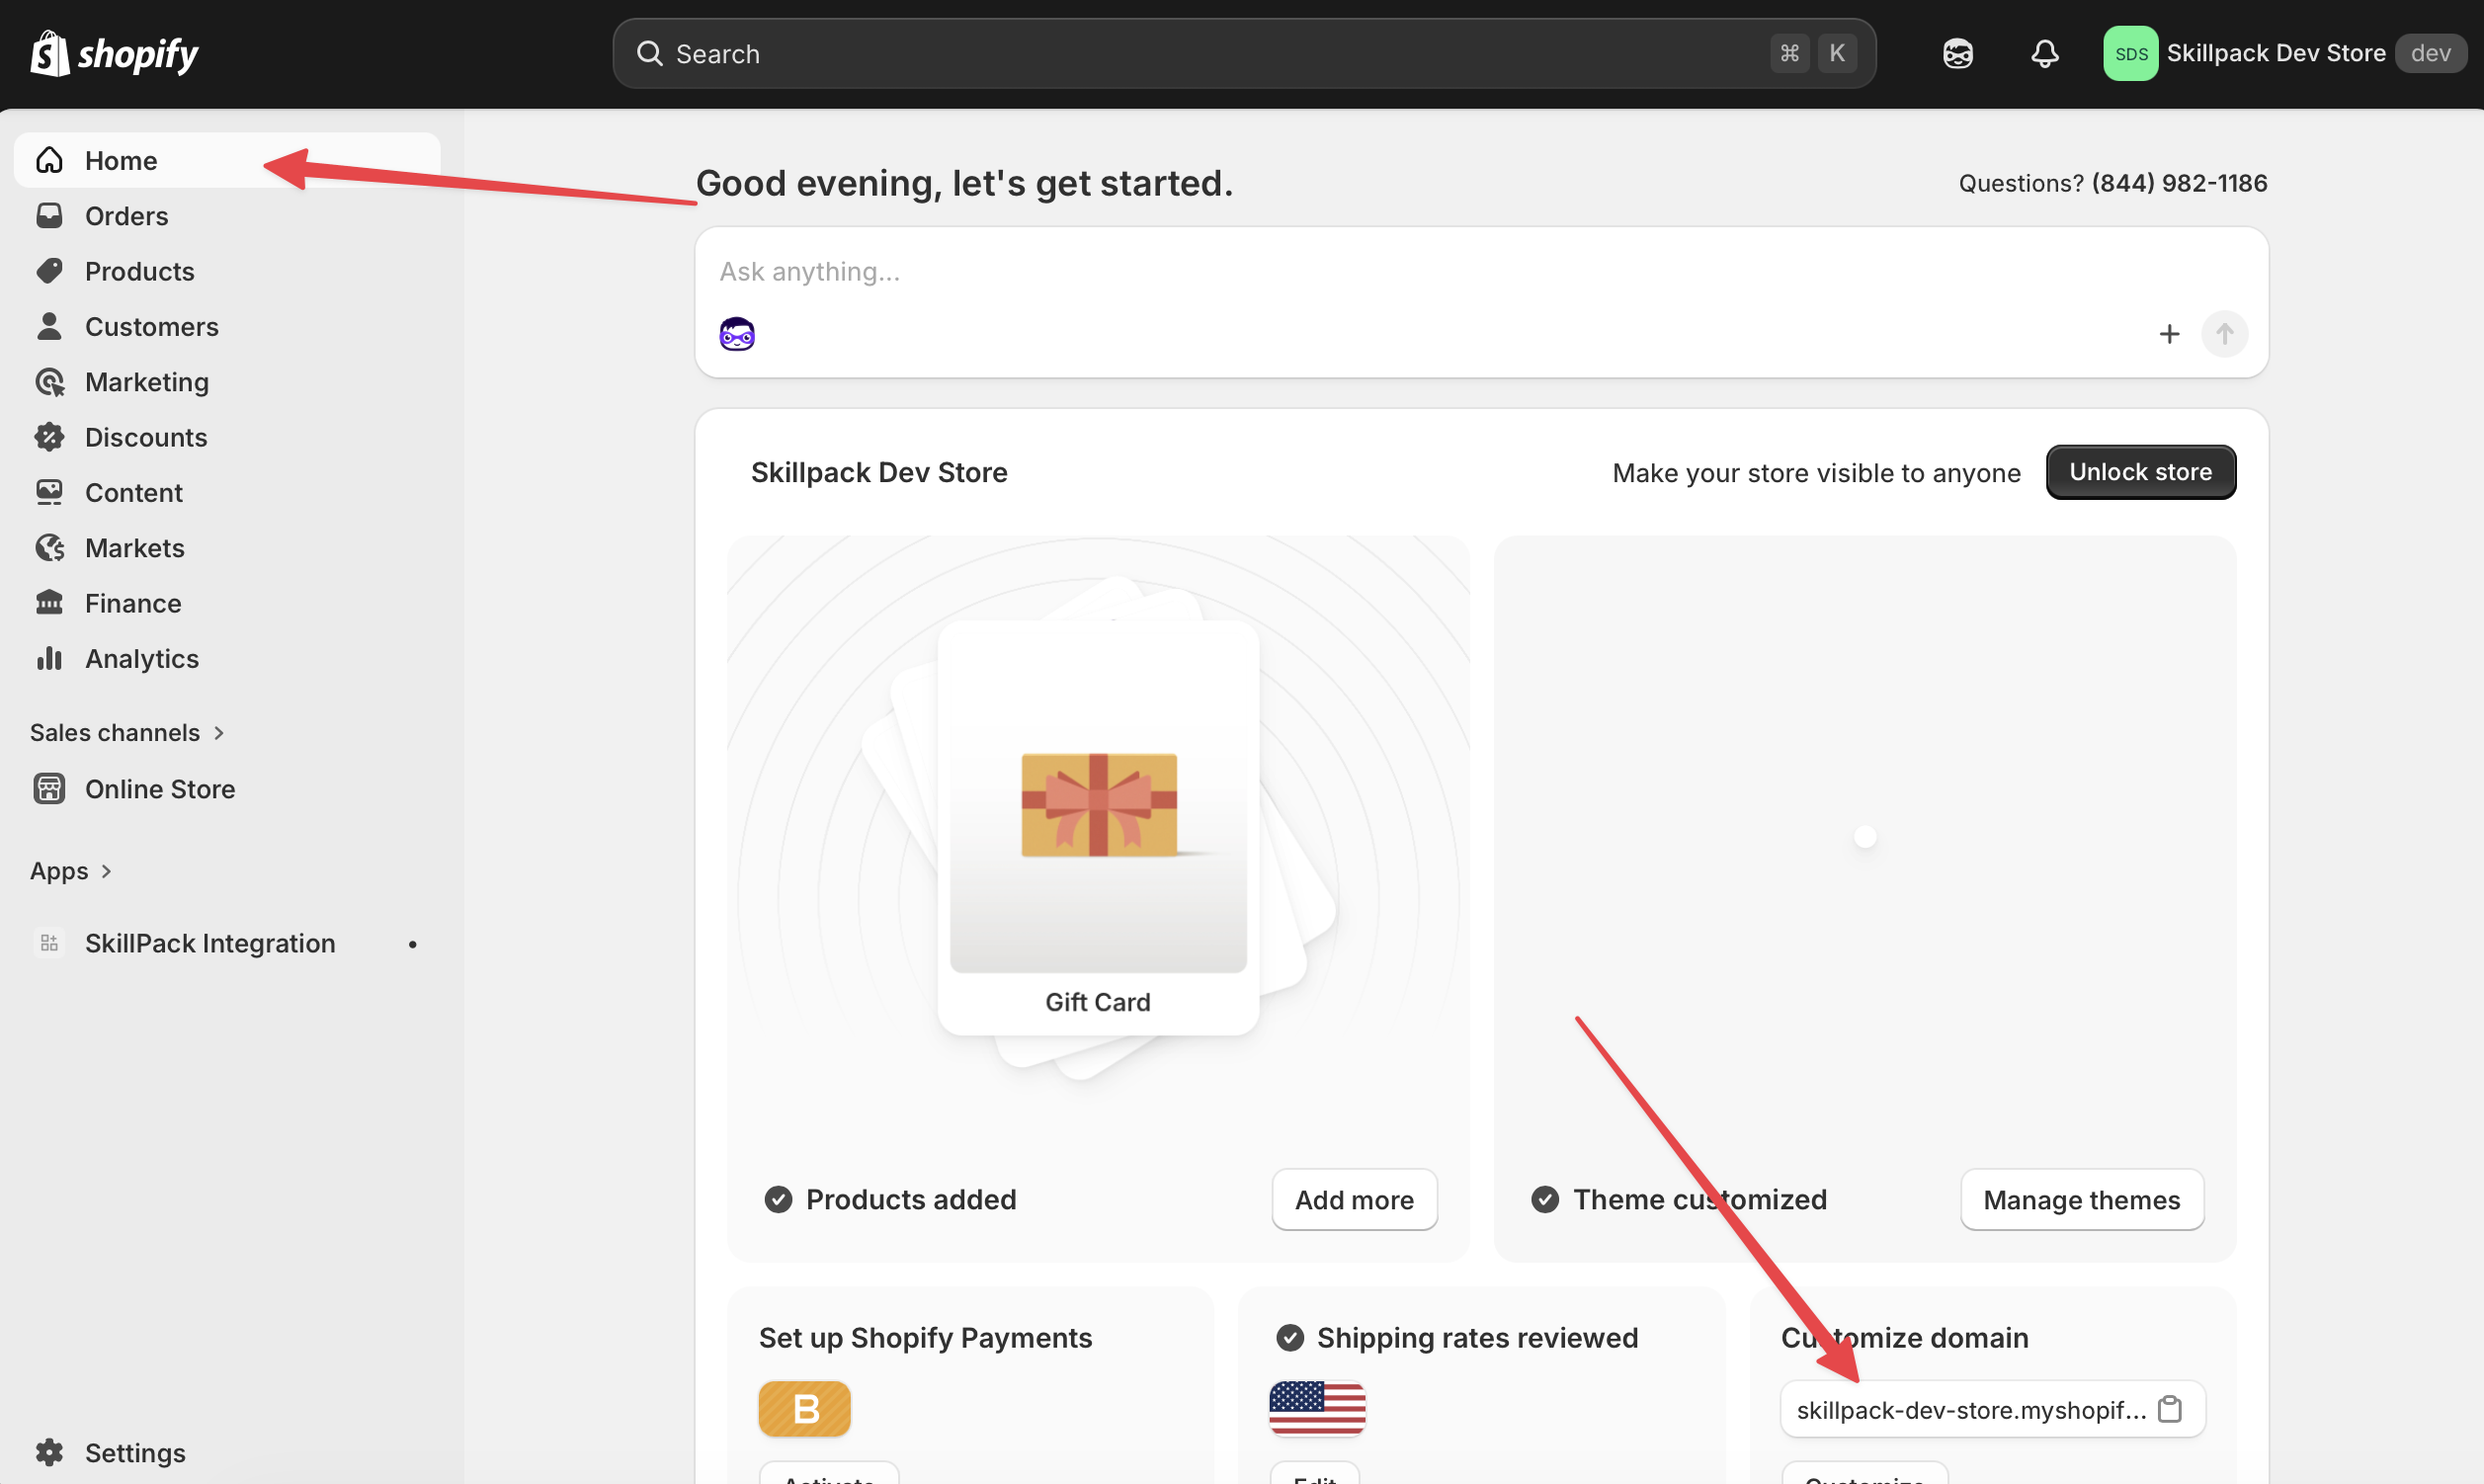
Enter the domain in the corresponding Frevana field.
Ready to connect
Once your store domain, Client ID, and Client Secret are in place, complete the connection in Frevana. You're ready to start working with your Shopify content.